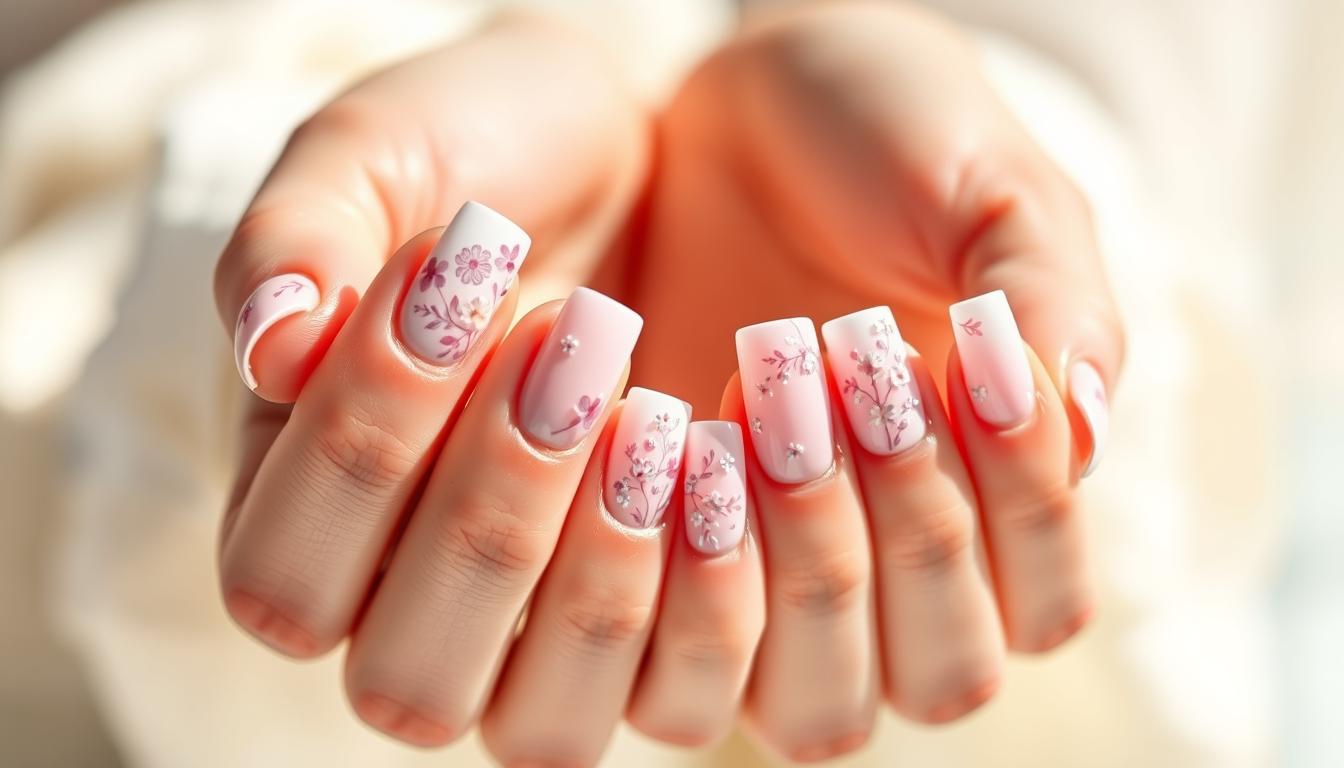
Looking for a nail style that’s both elegant and timeless? Classic nail designs are always in fashion. Acrylic pink and white nails are a favorite among many.
This style is very versatile. It lets you pick a design that fits your style perfectly. You can go for something simple or make a bold statement with nail art designs.
With trendy nail styles always changing, staying current is easy. Acrylic pink and white nails give you a clean, polished look. They’re great for any event.
Key Takeaways
- Timeless elegance with acrylic pink and white nails
- Versatile design possibilities to match your personal style
- Perfect for any occasion, from casual to formal events
- Easy to maintain and long-lasting
- Endless options for nail art designs and trendy nail styles
What Are Acrylic Pink and White Nails?
Acrylic nail enhancements in pink and white are popular for their durability and style. They are made from a mix of liquid monomer and powder. This mix is applied over your natural nails to add strength, length, and beauty.
Definition of Acrylic Nails
Acrylic nails are made by mixing liquid monomer with powder. This creates a hard, durable layer over your natural nail. Professional nail technicians perform this process, allowing for many creative options.
Getting acrylic nails done requires skill and precision. It’s best to see a professional nail technician for the best look. They can help pick the right shape, length, and color for you.
The Significance of Color Combinations
The pink and white acrylic nail combo is special because it looks natural and elegant. It mimics the look of a natural nail, with pink for the nail bed and white for the tip.
This color combo is not just pretty but also versatile. It’s great for simple looks or elaborate designs. The pink and white acrylic nail is a blank canvas for your creativity.
| Color Combination | Description | Style Suitability |
|---|---|---|
| Classic Pink and White | Natural look with pink nail bed and white tip | Formal, Casual |
| Ombre Pink and White | Gradual transition from pink to white | Trendy, Fashion-forward |
| Glitter Pink and White | Pink and white with added glitter for extra sparkle | Party, Special Occasions |
Knowing about acrylic nails and the pink and white combo is key for good nail care treatments. Whether you’re new to acrylic nails or a seasoned fan, there’s something for everyone.
Benefits of Acrylic Pink and White Nails
Acrylic pink and white nails are not just pretty; they’re also practical. They last long and can be customized to fit your style. This makes them a top pick for those who want durable manicure services.
Durability and Longevity
Acrylic nails are tough and don’t chip or break easily. This is great for people who are always on the go or have jobs that involve using their hands a lot.
With the right care, acrylic nails can stay looking good for weeks. This means you won’t need to go to a nail salon as often for touch-ups.
| Feature | Acrylic Nails | Natural Nails |
|---|---|---|
| Durability | High | Low to Medium |
| Longevity | Several weeks | A few days to a week |
| Customization | High | Limited |
Customization Options
Acrylic nails come in many colors and styles. You can pick the perfect pink shade and white tip to match your style. This lets you express yourself through your nails.
Plus, acrylic nail extensions can make your nails longer. Whether you want a natural look or something bold, acrylic nails can be customized to fit your dream.
“The versatility of acrylic nails allows for endless creativity in nail design, making them a favorite among nail enthusiasts.”
In summary, acrylic pink and white nails are great for their durability, lasting look, and customization. They’re a top choice for those looking for quality manicure services. Knowing these benefits can help you make better choices for your nails.
Choosing the Right Shade of Pink
There are many shades of pink to choose from. Finding the right one for your skin tone and style is important. It helps you rock acrylic pink and white nails with confidence.
Light vs. Dark Pink
Light pink shades are great for a subtle, elegant look. They look best on fair skin, adding sophistication without being too bold. Dark pink or bold shades, on the other hand, make a bold statement. They’re perfect for those who want their nails to stand out.
These deeper shades look amazing on medium to darker skin tones. They really make a statement.
Matching Your Skin Tone
Choosing a nail color that matches your skin tone is key. For cool skin tones (pale with pink undertones), look for pink shades with blue undertones. This will enhance your natural look.
If you have warm skin tones (olive or golden), choose pink shades with golden or peach undertones. This will complement your skin’s natural warmth.
Talking to professional nail technicians can help. They can give you personalized advice based on your skin tone, style, and the occasion. They can also suggest nail art designs and trendy nail styles that fit your chosen pink shade. This way, your acrylic pink and white nails will be both stylish and tailored to your taste.
Essential Nail Care Tips for Acrylics
To keep your acrylic nails looking great, follow some key nail care tips. Getting your nails ready before applying acrylics and taking care of them afterward is important. This helps them last longer and look better.
Pre-Application Preparation
Before getting acrylic nails, make sure your natural nails are clean and dry. Remove any old nail polish and gently push back your cuticles. Try to avoid harsh chemicals or detergents that can dry out your nails and skin.
Pre-application tips:
- Keep your natural nails moisturized.
- Avoid biting or picking at your nails.
- Tell your nail technician about any nail concerns or issues.
Post-Application Maintenance
After getting acrylic nails, take care of them to prevent damage. Keep your nails and cuticles moisturized. Also, avoid using your nails as tools. Regular visits to a nail salon for fill-ins can help keep your nails looking good.
| Tip | Description | Frequency |
|---|---|---|
| Moisturize | Keep your nails and cuticles hydrated. | Daily |
| Fill-ins | Visit a nail salon for acrylic nail fill-ins. | Every 2-3 weeks |
| Avoid harsh chemicals | Limit exposure to chemicals that can damage your nails. | As needed |
By following these essential nail care tips, you can enjoy beautiful, long-lasting acrylic pink and white nails. They will enhance your overall look.
Popular Nail Shapes for Acrylics
Acrylic nails come in many shapes, each fitting different tastes. The shape of your nails can change how you look, making it a big choice in nail care.
Two top shapes are almond and square. Each shape brings a unique look that can highlight your nail art.
Almond Shape
The almond shape is loved for its elegant and sophisticated vibe. It has a curved tip, like an almond. It looks great on medium to long nails, balancing your look.
Benefits of the Almond Shape:
- Slims the fingers
- Creates an elegant, sophisticated look
- Versatile for various nail art designs
Square Shape
The square shape is bold and edgy. It has a straight edge, perfect for a statement. It’s great for {{the}} nails, making them look longer.
Benefits of the Square Shape:
- Gives a bold, edgy appearance
- Can make short nails appear longer
- Ideal for those who want a statement nail
Nail care expert says, “The right nail shape can completely transform your look. Both almond and square shapes have unique benefits.”
“The shape of your nails can say a lot about your personal style, and acrylics provide the perfect opportunity to experiment with different shapes.”
Here’s a comparison to help you choose:
| Nail Shape | Description | Ideal For |
|---|---|---|
| Almond | Curved tip, elegant | Medium to long nail beds |
| Square | Straight edge, bold | Short nail beds or edgy look |
In conclusion, whether you choose almond or square, your acrylic nails will stand out. Try different shapes to find your perfect fit.
Tools Needed for Applying Acrylic Nails

To get salon-quality acrylic nails, you need the right tools and supplies. Whether you’re a nail technician or a DIY fan, having the right materials is key for success.
Basic Supplies
The quality of your basic supplies is the foundation of great acrylic nails. You’ll need:
- Acrylic powder and liquid monomer
- Nail tips or forms
- Nail glue
- Nail files and buffers
- Cleansing solution and lint-free wipes
Experts say, “Having the right basic supplies is essential for a flawless application.”
Decorative Accessories
After getting your basic supplies, you can add flair with decorative accessories. Some favorites include:
- Nail art brushes
- Glitters and rhinestones
- Nail stickers and stamps
- Colored acrylic powders for ombre effects
Experts in manicure services say, “Decorative accessories can make or break your nail look.” They help you create unique designs that show off your style.
By mixing basic supplies with creative accessories, you’re on your way to stunning acrylic nails. They’ll look just as good as those in top nail salons.
Step-by-Step Guide to Applying Acrylic Pink and White Nails
Applying acrylic pink and white nails requires several steps for a beautiful finish. It’s important to know how to prepare, mix, and apply the acrylic. This ensures your nails look professional and last long.
Preparing Your Natural Nails
First, prepare your natural nails. Remove old nail polish and gently push back your cuticles. Use a nail file to shape your nail, making sure it’s clean and dry. This step is key for a successful nail care treatment.
- Remove old nail polish
- Push back cuticles
- Shape your natural nail
Mixing Acrylic Ingredients
Mixing the acrylic ingredients right is important for a strong and good-looking finish. You’ll need acrylic powder and liquid monomer. The mix is usually 1 part liquid to 2 parts powder, but it can change based on the brand and desired texture. Mix in a well-ventilated area, following the instructions for the best acrylic nail extensions.
| Ingredient | Ratio | Purpose |
|---|---|---|
| Liquid Monomer | 1 part | Activates the acrylic powder |
| Acrylic Powder | 2 parts | Provides structure and durability |
Application Techniques
To apply the acrylic, use a brush to pick up the mix and shape it on your nail. Start at the center and work to the tips. Make sure the coat is even and avoid getting it on your cuticles or skin. You may need to repeat to get the right thickness and shape.
By following these steps and practicing, you can get beautiful, long-lasting acrylic pink and white nails. They will enhance your natural beauty.
Design Ideas for Pink and White Acrylic Nails
Take your nail game to the next level with stunning pink and white acrylic nails. These nails are perfect for showing off your creativity. You can try out many styles and techniques.
Ombre Effects
Ombre effects are a hit for pink and white nails. They create a beautiful color transition. Start with light pink at the cuticle and get darker towards the tip.
Tips for a seamless ombre effect:
- Use high-quality acrylic powders that blend easily.
- Practice makes perfect – experiment with different techniques until you achieve the desired effect.
- Finish with a top coat to seal the colors and add shine.
The French Twist
The French twist is a timeless choice. It features a white tip on a pink or nude base. It’s great for those who like a simple yet elegant look.
To give the French twist a modern spin:
- Experiment with different shades of pink or add a pop of color to the tip.
- Try a diagonal or curved French tip for a unique twist.
- Add some sparkle with glitter or rhinestones.
Whether you choose ombre or the French twist, your nails will stand out. With a bit of creativity and practice, you can get salon-quality nails at home.
How to Remove Acrylic Pink and White Nails Safely

Removing acrylic nails safely is a detailed process. It’s important to do it right to avoid harming your natural nails.
Tools for Safe Removal
You’ll need specific tools to remove your acrylic nails. These include a nail acetone solution, cotton balls, aluminum foil, a nail file, and a cuticle pusher. Professional nail technicians use these tools for safe and effective removal.
Start by filing your nails gently. This breaks the seal of the acrylic. It helps the acetone soak in better.
Steps for a Smooth Removal Process
Here’s what to do next:
- Soak a cotton ball in acetone and place it on your nail.
- Wrap the cotton ball with aluminum foil to secure it.
- Leave it on for about 15-20 minutes to allow the acetone to dissolve the acrylic.
- Gently remove the foil and cotton, and use a cuticle pusher to carefully pry off the acrylic.
If the acrylic is hard to remove, soak it again in acetone. Be patient and don’t force it to avoid damaging your natural nail.
After removing the acrylic, wash your hands well. Then, apply a moisturizer to keep your nails and cuticles hydrated. Regular help keep your natural nails healthy.
Going to a nail salon or getting advice from professional nail technicians can help. They can guide you for a safe and effective nail removal.
The Cost of Acrylic Pink and White Nails
Understanding the cost of acrylic pink and white nails is key. The price can change a lot based on a few things. These include the nail salon you choose, the technician’s skill, and the design’s complexity.
Factors Affecting Price
Several factors affect the cost of your acrylic nails. These include:
- The reputation and location of the nail salon
- The experience and qualifications of the nail technician
- The complexity and detail of the nail design
- The quality and brand of the acrylic nail enhancements used
Salon Choice: High-end salons with skilled technicians might cost more. It’s smart to compare prices to find a salon that fits your budget.
Technician Expertise: More experienced technicians might charge more. Their skill can make your nails last longer and look better, even if it costs a bit more.
Budgeting for Maintenance
Acrylic nails need regular care to stay in top shape. This includes fills and repairs, which can increase the cost. It’s important to budget for these services to keep your nails looking good.
| Service | Average Cost | Frequency |
|---|---|---|
| Initial Application | $30-$100 | Once |
| Fill | $20-$50 | Every 2-3 weeks |
| Repair | $5-$20 | As needed |
Knowing these costs helps you plan and enjoy your acrylic nails without surprises. Regular care keeps your nails looking great and protects your natural nails from damage.
Finding a Professional Nail Technician
To get perfect acrylic pink and white nails, finding a professional nail technician is key. They should know what you want and have the skills to make it happen.
Start by looking up nail salons in your area and their reputation. Check online reviews and ask friends or family for recommendations. They might have had a great experience.
What to Look for in a Salon
A good salon should feel clean and welcoming. Here are important things to look for:
- Sanitation and hygiene practices
- Qualifications and experience of the nail technicians
- Range of services offered, including manicure services
- Before and after photos of their work
Questions to Ask Your Nail Technician
After finding a few options, it’s time to ask questions. Here are some to consider:
- What experience do you have with acrylic nail applications?
- Can you show me examples of your previous work?
- What products do you use, and why?
- How do you ensure the health and integrity of my natural nails?
By researching and asking the right questions, you can find a professional nail technician. They will help you get the acrylic pink and white nails you want.
Trends in Pink and White Acrylic Nail Designs
Pink and white acrylic nails are big in the beauty world. They change with the seasons and are influenced by celebrities. This makes them a favorite among nail lovers for their style and elegance.
Seasonal Inspirations
Every season brings new ideas for nail art designs. In spring, soft pastels and flowers are in. Summer is all about bright colors. Autumn and winter bring deeper tones and festive designs.
For example, in winter, you can add glittering snowflakes or red and green stripes to your nails. This makes them a great match for your holiday outfits.
Celebrity Influences
Celebrities often lead the way in trendy nail styles. When they’re seen with a unique nail look, it quickly becomes popular. For instance, if a star chooses a certain pink shade or pattern, it becomes a must-try.
The impact of celebrities on acrylic nail extensions is clear. Their nail choices inspire fans to try new designs. This encourages creativity and keeps nail fashion exciting.
DIY Versus Professional Application
Choosing between DIY and professional acrylic nail application depends on your skills and what you prefer. Both options have their good and bad sides. It’s important to know these before deciding.
Pros and Cons of Each Approach
Doing it yourself can save money and let you work at your own speed. But, you need some skill and knowledge about acrylic nail enhancements to get a pro look. Going to a professional nail technician means a top-notch job and their nail care treatments expertise. Yet, it costs more and you need to book a time.
| Application Method | Pros | Cons |
|---|---|---|
| DIY Application | Cost-effective, flexible timing | Requires skill, possible errors |
| Professional Application | High-quality finish, expert advice | More expensive, needs an appointment |
Skills Required for DIY
To apply acrylic pink and white nails yourself, you need specific skills. You must know how to prep your nails, mix the acrylic right, and apply it smoothly. Having nail care experience and patience is also key, as the process is detailed.
In summary, whether you go DIY or professional for your acrylic nails, think about the pros and cons. Consider your skills, budget, and what you like. This way, you can choose what’s best for you.
Nail Health Considerations with Acrylics
Acrylic pink and white nails are stylish and durable. But, they can affect your natural nail health. It’s important to know the risks and how to keep your nails healthy under the acrylics.
Potential Risks
Acrylic nail enhancements look great but can harm your nails. The risks include:
- Lifting or loosening of the nail plate
- Fungal infections due to moisture trapped under the acrylic
- Nail damage or breakage during the removal process
Professional nail technicians warn about the dangers of damage during application or removal. “Improper application or removal can cause serious nail damage,” says a seasoned nail technician. “It’s vital to have a professional who knows about nail health.”
| Risk Factor | Prevention Method |
|---|---|
| Lifting or Loosening | Proper application and regular maintenance |
| Fungal Infections | Keeping nails dry and clean, avoiding excessive exposure to water |
| Nail Damage During Removal | Professional removal using appropriate techniques and solvents |
Maintaining Natural Nail Health
To keep your natural nails healthy under acrylics, follow these tips:
- Regularly moisturize your cuticles and nail beds
- Use a nail strengthening base coat under your acrylics
- Give your nails a break between applications to allow them to breathe
Regular maintenance is essential. Visiting a professional nail technician for fill-ins and checks can spot issues early. They can also suggest the best nail care treatments to keep your nails healthy and strong.
By knowing the risks and taking steps to protect your nail health, you can enjoy your acrylic nails. And keep your natural nails in good shape.
Conclusion: Embrace Your Acrylic Pink and White Nails
Now that you’ve explored acrylic pink and white nails, it’s time to get creative. Try out different nail art designs. Every season brings new trendy nail styles to try.
Nail Art Inspiration
Explore various acrylic pink and white nail designs. From classic French tips to bold ombre effects, there’s a lot to try. Get inspired by fashion trends, seasonal themes, or even celebrity styles to keep your nails chic.
Maintaining Your Nail Beauty
To keep your acrylic nails looking great, follow some nail care tips. Regular maintenance, like filling and repairing, is key. By following these tips and trying new designs, you’ll enjoy beautiful, long-lasting nails.