Getting new body art should feel exciting, not intimidating. But let’s face it—even the most passionate ink lovers sometimes worry about discomfort during longer sessions. That’s where topical anesthetics come in. These products temporarily reduce sensitivity, letting you focus on the creative process instead of the needle.
Imagine sitting comfortably while your artist brings intricate designs to life. Many studios, like Wild Heart in Brooklyn, encourage open conversations about pain management. Their artists often collaborate with clients who use skin-numbing solutions to make sessions smoother. It’s not about eliminating sensation completely—it’s about creating a manageable experience.
Before your appointment, chat with your chosen professional. Some prefer knowing you’ve applied a numbing product, as it affects how they approach shading or linework. With the right preparation, you can tackle detailed pieces or multi-hour sittings without tapping out early.
Key Takeaways
- Topical anesthetics help minimize discomfort during body art sessions
- Clear communication with your artist ensures optimal results
- Longer appointments become more manageable with proper preparation
- Reduced anxiety lets you fully embrace the creative journey
- Trusted studios often support clients using pain-reducing solutions
Understanding Tattoo Numbing Cream: What You Need to Know

Your skin’s nerve signals hold the key to a smoother tattooing experience. These products temporarily quiet specific pathways that communicate discomfort to your brain. Let’s break down the science behind this process without getting lost in medical jargon.
The Nerve Signal Interruption Process
Lidocaine acts like a temporary roadblock for pain messages. It targets sodium channels in nerve cells—the same pathways that shout “ouch!” to your brain. By blocking these channels for 1-3 hours, the ingredient lets you feel pressure without sharp sensations.
Active Components and Their Roles
Most formulas rely on trusted ingredients with proven track records. Here’s how common options compare:
| Ingredient | Concentration Range | Onset Time | Duration |
|---|---|---|---|
| Lidocaine | 4%-5% | 20-30 mins | 2-3 hours |
| Prilocaine | 2.5%-3% | 25-35 mins | 1.5-2 hours |
| Benzocaine | 5%-20% | 10-15 mins | 30-60 mins |
Combination formulas often pair lidocaine with prilocaine for extended relief. Remember: Higher concentrations don’t always mean better results—proper application matters more than maxing out percentages.
Exploring Different Types of Tattoo Numbing Creams

Choosing the right formula can transform your body art experience from stressful to manageable. Let’s explore how different solutions interact with your skin’s biology to create varying levels of comfort.
Nerve Blockers vs. Nerve Deadeners
Nerve blockers like tetracaine act like signal jammers. They prevent pain messages from reaching your brain without shutting down nerve function entirely. These formulas work well for mild discomfort but may struggle during detailed shading or prolonged sessions.
Nerve deadeners take a different approach. Ingredients like lidocaine temporarily pause nerve activity, creating deeper relief. This makes them ideal for sensitive areas like ribs or ankles where pressure feels more intense.
| Type | Key Ingredients | Effect Duration | Best For |
|---|---|---|---|
| Blockers | Benzocaine, Tetracaine | 30-60 mins | Small designs |
| Deadeners | Lidocaine, Prilocaine | 2-3 hours | Large pieces |
The Role of Vasoconstrictors in Enhancing Effects
Ever wonder why some formulas last longer? Vasoconstrictors like epinephrine tighten blood vessels. This slows your body’s ability to flush away numbing agents, extending their effectiveness by 30-50%.
These additives also minimize bleeding, giving artists cleaner visibility. Pro tip: Combination creams with vasoconstrictors often deliver the most balanced results. For a deeper dive into selecting options, check this comprehensive guide to numbing solutions.
Finding the Best Tattoo Numbing Cream for Your Needs

How do you choose between dozens of skin-numbing solutions? Top brands offer distinct formulas tailored to different needs—whether you’re tackling a full-back piece or a delicate wrist design. Let’s explore standout options that balance effectiveness with skin safety.
Leading Formulas Compared
Hush Anesthetic Gel stands out with FDA approval and a lidocaine blend that preserves ink clarity. Artists at studios like Ironclad Tattoo Co. recommend it for large-scale projects. One client shared: “I sat through six hours shading my sleeve without tapping out—game changer.”
| Brand | Key Features | Duration | Best For |
|---|---|---|---|
| Dr. Numb | 5% lidocaine, 30-min onset | 3-4 hours | Detailed work |
| Mad Rabbit | Natural additives, hypoallergenic | 2.5 hours | Sensitive skin |
| TKTX | High-strength formula | 5+ hours | Marathon sessions |
| Zensa | No parabens, water-based | 2 hours | Quick touch-ups |
Water-based options like Ebanel Numb 520 absorb faster than oil-based counterparts. Vitamin E-enriched formulas help maintain skin elasticity during long appointments. For natural enthusiasts, plant-based balms provide mild relief without synthetic additives.
Remember: Effectiveness depends on proper application timing. Most artists suggest applying lidocaine products 45 minutes before needlework begins. Always patch-test new solutions 24 hours prior to your appointment.
How Tattoo Numbing Cream Works During Your Session

Your body’s response to ink work involves more than just skin-deep reactions. When applied correctly, specialized formulas create a temporary shield against discomfort. This lets artists focus on precision while you stay relaxed.
The Science Behind Lidocaine and Other Actives
Lidocaine acts like a temporary mute button for nerve signals. It binds to sodium channels in your skin cells, stopping them from sending “pain” alerts to your brain. Most formulas need 25-35 minutes to reach full strength—think of it as your skin hitting the snooze button on sensitivity.
Why does timing matter? Apply too early, and the effect fades before shading starts. Apply too late, and you’ll feel the first needle pricks. One client shared: “I set a timer 30 minutes before my appointment—game changer for my rib piece.”
Your experience might differ based on:
- Skin thickness in areas like elbows vs. wrists
- Metabolism speed affecting how fast ingredients break down
- Formula strength (4% vs. 5% lidocaine blends)
While the numbness peaks around 90 minutes, some report relief lasting through 3-hour sessions. Pressure sensations remain—you’ll feel the artist’s movements without sharp stings. For sensitive areas like hands, this balance helps maintain comfort without losing positional awareness.
Step-by-Step Guide to Applying Tattoo Numbing Cream

Proper preparation transforms your skin into a receptive canvas. Whether you’re a first-timer or adding to your collection, mastering these steps ensures your chosen formula works as intended.
Pre-Application Skin Preparation
Start by washing the area with mild soap and warm water. Pat dry gently—no rubbing. If there’s hair, shave carefully to create a smooth surface. “Dead skin cells act like tiny barriers,” explains Brooklyn artist Mia Torres. “A quick wipe with rubbing alcohol removes oils and lets the solution penetrate properly.”
Proper Application Techniques and Timing
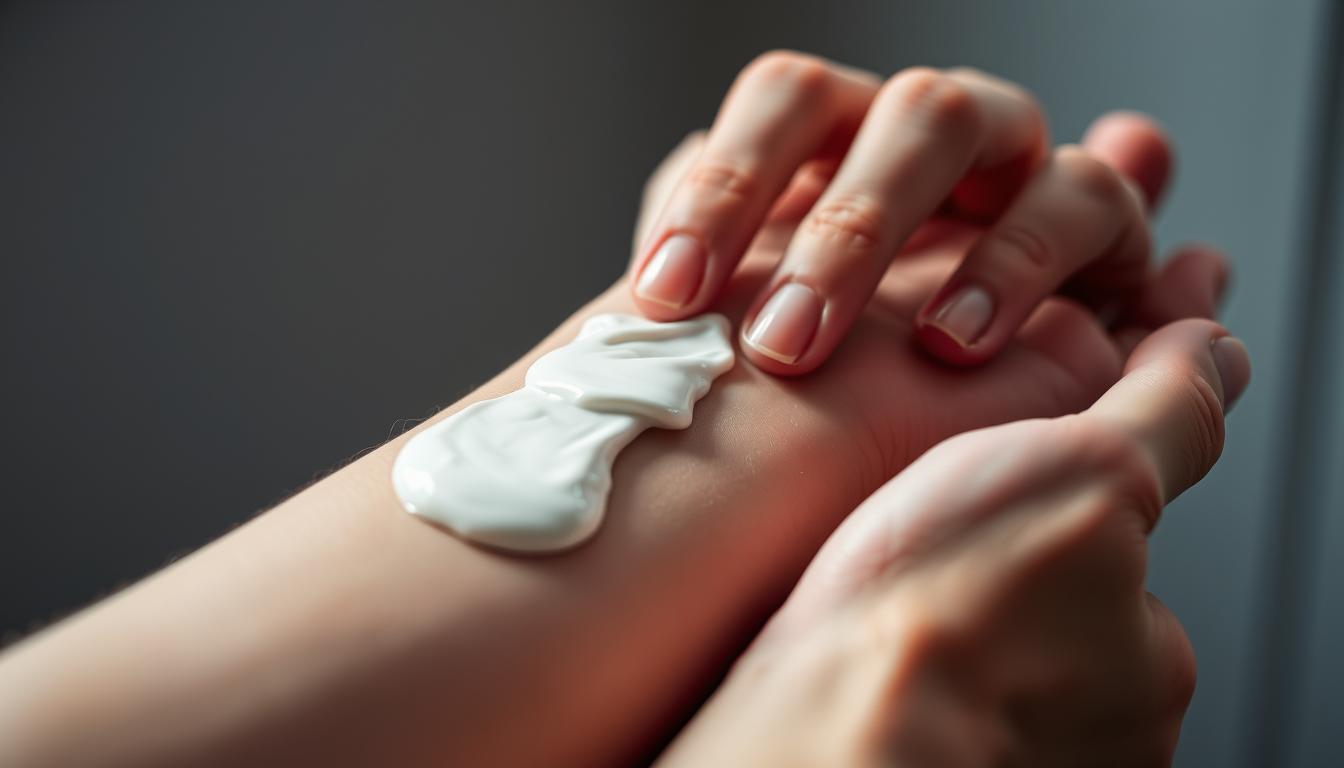
Apply a thick 2mm layer—about the width of two credit cards stacked. Massage gently in circular motions without pressing too hard. Cover tightly with plastic wrap to trap body heat, which boosts absorption. Set a timer for 50-60 minutes.
After removing the wrap, wait 10-15 minutes before your session starts. This breather period prevents residue from interfering with the ink process. Timing matters more than you think. One client shared: “I missed the window by 10 minutes during my sleeve work—felt every line.” Always follow package instructions, as formulas vary in strength and activation time.
Evaluating the Efficacy and Safety of Numbing Creams

Safety and effectiveness go hand in hand when using topical solutions for body art. While these products can make sessions more comfortable, understanding their limits helps avoid surprises. Let’s unpack what to expect from different formulas and how to spot potential issues.
Assessing Pain Relief and Duration
Most solutions reach peak effectiveness within 20-45 minutes. You’ll typically feel a cooling tingle followed by gradual pressure reduction. Lidocaine-based options often provide 2-3 hours of relief—enough for medium-sized designs. Check this comparison:
| Formula Type | Average Duration | Peak Effect |
|---|---|---|
| Low concentration (3-4%) | 1.5-2 hours | 45 mins |
| High concentration (5%) | 3-4 hours | 60 mins |
| Vasoconstrictor blends | 4+ hours | 75 mins |
“If you still feel sharp pricks after 30 minutes, tell your artist immediately,” advises Miami-based specialist Carlos Rivera. Reapplication mid-session isn’t recommended—it can disrupt ink application and increase irritation risks.
Potential Side Effects and Precautions
Mild reactions like temporary redness affect about 1 in 10 users. More concerning responses—swelling, dizziness, or nausea—occur in less than 2% of cases. Those with reactive dermis should:
- Test a pea-sized amount behind the ear 48 hours pre-appointment
- Avoid solutions with parabens or artificial fragrances
- Choose water-based over oil-based formulas
One client shared: “My patch test revealed a benzocaine allergy—saved me from a miserable session.” Always keep the area clean post-application, and hydrate skin with unscented moisturizers afterward.
Tips for a More Comfortable Tattoo Experience

Creating your ideal body art session involves more than just picking a design. Small adjustments to your preparation and communication can turn a nerve-wracking appointment into a smooth collaboration. Let’s explore practical ways to enhance comfort while maintaining artistic results.
Teamwork Makes the Dream Work
Start by discussing your plans during the consultation. Many professionals prefer knowing if you’ll use topical solutions, as these can slightly alter skin texture. “I keep medical-grade sprays on hand for clients who need extra support,” shares Chicago artist Lena Park. This openness helps artists adjust their technique for optimal ink retention.
Consider these discussion points:
- Your sensitivity levels in the chosen area (reference this pain chart for guidance)
- Previous experiences with long sessions
- Preferred break schedule for multi-hour work
Beyond the Cream: Holistic Comfort Tactics
Pair your chosen solution with these evidence-backed strategies:
| Technique | Benefit | Ideal Timing |
|---|---|---|
| Box Breathing | Lowers heart rate | During outline work |
| Hydration Boost | Prevents fatigue | 24 hours pre-session |
| Audio Distraction | Reduces focus on discomfort | Shading phases |
| Protein Snacks | Stabilizes blood sugar | Every 90 minutes |
Remember: Numbed areas might feel different to the touch. Artists often check skin response through light pressure tests before starting needlework. Stay flexible—if your chosen product makes the surface too rigid, they might suggest alternatives like cooling gels.
Where to Buy Tattoo Numbing Cream and Look for Discounts
Finding quality solutions doesn’t require detective work. Today’s shoppers have multiple reliable channels to source skin-comfort products while staying budget-savvy.
Digital Marketplaces and Brick-and-Mortar Stores
Amazon leads online options with fast shipping and verified reviews. Their “Tattoo Numbing Cream, 5% Lidocaine Cream” often appears in Subscribe & Save deals—perfect for multi-session projects. Mad Rabbit’s official site offers exclusive bundles that pair their popular formula with aftercare essentials.
Local tattoo studios frequently stock trusted brands. Artists at shops like Denver’s Crimson Canvas keep single-use packets behind the counter for last-minute needs. Chain pharmacies sometimes carry basic versions, though these may lack the strength required for lengthy work.
Pro tip: Follow your favorite brands on social media. Many run flash sales or offer first-time buyer codes. “I saved 25% on my last order through an Instagram promo,” shared a client prepping for a back piece. Always compare per-ounce prices—bulk purchases often cut long-term costs.