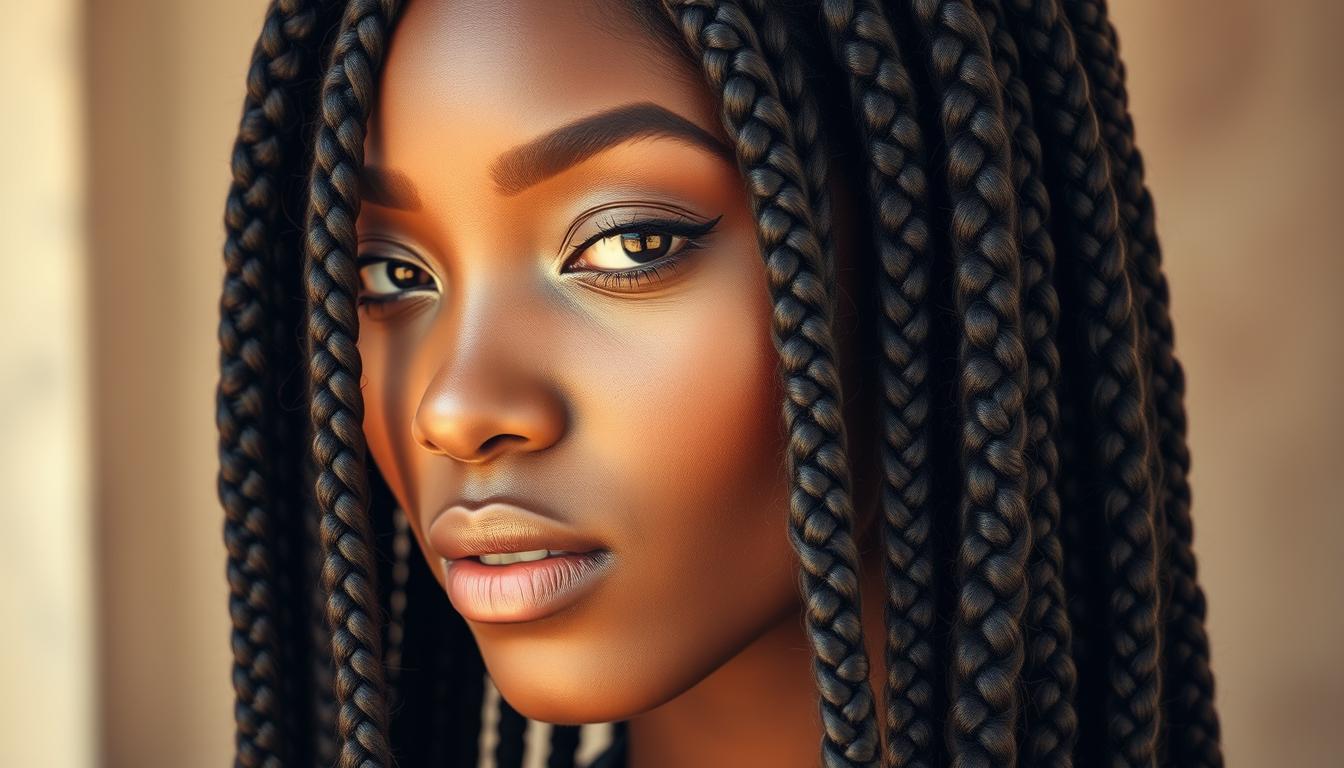
Ready to refresh your daily look? This guide shows how a single braid can sharpen an outfit, beat humidity, and stay neat from morning meetings to evening events.
Summer favorites like halo, Viking side details, fishtails, Dutch, and French plaits keep the head cooler and hold through heat and movement. Many classics work loose or slicked, and a light serum or hairspray tames frizz for all-day wear.
Think of this list as your inspiration hub. You’ll find easy how-tos, protective options for short to long lengths, and festival-ready ideas with accessories like cuffs and scarves. Color tricks such as ombré or two-tone add instant drama.
Practical tips include when to prep with smoothing crème, mousse, or heat protectant so your braid stays sleek without harming hair. Use these sections to mix and match quick-switch looks and care steps that extend wear time.
Key Takeaways
- Braids offer lasting style and help manage heat and humidity.
- Classic and modern options suit short, medium, and long hair.
- Anti-frizz products and prep keep each look neat all day.
- Accessories and color can turn a simple braid into a statement.
- The guide gives step-by-step tips for beginners and pros alike.
Why braids are trending now: style, protection, and all-day wear
A neat plait can cut morning prep time and keep you cool all day. This simple move gives a polished look with very little daily fuss. It tames frizz, holds through humidity, and shifts easily from workout to a night out.
Keep hair cool and frizz-controlled in summer
Plaits lift strands off the neck, reduce direct heat on the scalp, and limit the need for hot tools. Wear them slick for a sleek office finish or loose for a softer, beachy feel.
Low maintenance benefits for natural hair and beyond
Protective styles reduce daily manipulation and tangles when you moisturize and avoid over-wearing. Less detangling means fewer broken ends and more time saved.
- Time wins: skip blow-drying and flat ironing on busy mornings.
- Lasting finish: light-hold spray or touch-up crème controls flyaways and edges.
- Care tip: avoid scalp tension and sleep on satin to keep styles fresh.
| Benefit | Why it matters | Quick tip |
|---|---|---|
| Cooling | Lifts hair off neck; lowers heat on scalp | Choose higher parting or side accents |
| Protection | Less daily manipulation reduces breakage | Moisturize and limit wear time |
| Convenience | Saves prep time and reduces tool use | Finish with light-hold product for all-day neatness |
Classic braid favorites: French, Dutch, and fishtail
For a polished, long-wearing look, start with these three staples. Each offers a different finish and works on varied lengths, so you can pick the best style for your day.
French technique: grip, frizz control, and short-hair starts
Brush hair back into three even sections. Add hair from the sides as you go and apply a small amount of smoothing crème to boost grip.
Start the french braid higher toward the crown if your hair is short to gain working length. Finish with a light serum and a quick hairspray mist for humidity control.
Reverse plait: bold lift with a Dutch method
Cross strands under instead of over to make the braid sit on top of the hair and pop visually. That reverse move gives strong definition and holds up well on shorter starts.
Try two dutch braids or a side-swept version for added structure and a fresh twist.
Fishtail basics: ponytail prep and neat finishing tricks
Secure a low ponytail first, then split into two sections and take tiny outer pieces across. Once woven, snip the elastic after the tail is stable.
Smooth flyaways with touch-up crème or a baby toothbrush misted with hairspray for crisp edges.
- Keep tension consistent: even pressure = clean lines.
- Mix textures: sleek roots + soft pancake pulls add fullness.
- Quick switch: two Dutch or a side French refreshes the same base braid.
Waterfall braid for breezy half-up movement

A cascading waterfall braid balances structure at the crown with loose, flowing lengths. This graceful half-up braided hairstyle lets tendrils fall free for soft movement around the head.
Prep at the crown with a volumizing blow-dry spray to lift and help the braid hold through a long day. For very fine hair, apply a heat protectant and set the lengths with hot rollers to build body before you braid.
- Start a French-style section across the head and drop outer strands as you go to create the waterfall effect.
- Mist a light-hold spray on your fingertips before smoothing each pass to keep the pattern tidy.
- Anchor the end behind the ear with discreet pins for extra longevity without visible hardware.
Pro tip: Loose waves on the remaining lengths add a romantic contrast to the crown structure. Highlights or ombré really pop with this pattern, giving a multi-dimensional look in sunlight.
Finish with a few micro cuffs near the waterfall entries for subtle accents. A gentle detangle before bed preserves the shape for an easy next-day refresh.
Pull-through braid for big impact without complex weaving
Want a full, dimensional braid without intricate plaiting? Try the pull-through method — a series of stacked ponytails that builds volume and sculpted shape without traditional weaving.
Start by smoothing glossy, conditioned hair with a straightening spray to tame frizz and boost shine. Create the first ponytail at the top for maximum lift or place it mid-head for a softer daily look.
Make stacked ponytails down the length. Split the top ponytail, pass the next ponytail up through that split, and repeat until you reach the ends. Gently pancake each section outward to widen the effect and add drama.
- Grip tip: second-day hair helps sections hold and stay defined.
- Polish: wrap a small strand around each elastic to hide bands for an editorial finish.
- Tools: use micro elastics that match hair color and finish with a serum on your palms to smooth halo frizz.
- Active option: secure the final ponytail tightly for workouts to cut bounce while preserving volume.
Result: a bold, textured look that reads big on camera and holds through a busy day — all with a simple, repeatable technique.
Side braids and lemonade vibes
Traveling cornrows that finish on one side offer a modern, low-maintenance look with high visual impact.
Lemonade-inspired side braids are small, sleek plaits that wrap the crown and cascade to the side for instant edge. Stylists can go minimalist with clean lines or create geometric cornrows for a statement.
For balance, start your part deeper on the side you want the ends to fall toward and keep the opposite side smooth. Use lightweight gel at the hairline and a soft-bristle brush for a polished finish.
- Add metallic cuffs or charms to amp the style for concerts or nights out.
- Try a looser, airy side take for casual daytime outfits that still read modern.
- Combine a few tight cornrows with one larger side braid for contrast and texture.
“Wrap your hair at night with a silk scarf to keep parts crisp and preserve the shape.”
Quick restyle: flip the ends into a low side bun for instant polish without redoing the whole set.
Mermaid braid for beach-proof texture and volume

This rib-cage braid turns long hair into a textured, ocean-ready statement that still feels lightweight.
Why try it: the style gives romantic width and depth across the full length while standing up to wind and surf.
- Create a top ponytail and secure it.
- Make a simple plait down from that ponytail.
- Twist small front pieces and tuck each twist into the main braid as you work down.
- Finish with a clear elastic so the eye stays on the woven detail.
Product tip: apply a volumizing mousse for body that stays soft, not crunchy. Gently loosen outer sections to build that signature mermaid silhouette.
Leave a few face-framing tendrils for a windswept look. On day two, scrunch sea-salt spray into lower lengths to revive the textured effect.
“Wrap a small strand around the base of the top ponytail to hide the band for a polished finish.”
| Feature | Why it helps | Quick result |
|---|---|---|
| Volumizing mousse | Adds body without stiffness | Full, touchable texture |
| Interlaced twists | Create depth through the length | Dimensional, flowing effect |
| Clear elastic + wrap | Keeps focus on the weave | Sleek base, pro finish |
Box braids: the versatile protective staple
Square partings and added length make box braids a go-to when you want long-lasting, ready-to-style hair. These styles are built from small, square “box” sections, with synthetic extensions braided in for density and length.
With proper prep and care, box braids can last up to six weeks while keeping daily maintenance minimal. A deep-conditioning treatment before your appointment strengthens natural hair and improves slip for a smoother install.
Parting into “boxes” and adding extensions
Part size matters. Ask your stylist about small, medium, or jumbo boxes to match weight and look. Two-toned or ombré additions let you add depth without coloring your own strands.
Style it your way: buns, ponytails, and cuffs
Wear them loose, flip into a high bun, or sweep into a low ponytail. Add gold cuffs or beads for instant glam. Box braids cut down on heat-styling and resist frizz in summer.
- Care tips: use microfiber towels and scalp mists between washes.
- Night routine: lightly oil the scalp and wrap with a silk scarf.
- Comfort: avoid excessive tension at the hairline and tell your stylist if it feels tight.
Knotless braids for a lighter, tension-reducing option
Knotless braids begin by working with your natural strands, then smoothly feeding in added hair for a soft, flatter root.
The method starts with your own hair and gradually adds extension pieces. This creates a flatter, lighter feel at the scalp and helps protect hair from base tension.
Compared to a classic box braid, knotless finishes look very similar but often feel more flexible and scalp-friendly. That makes them a smart pick for sensitive scalps or first-timers worried about tightness.
- Better for ponytails and updos right after install.
- Neat, seamless transitions photograph well for casual and formal events.
- Ask about part size to control density and weight.
Care mirrors regular braided maintenance: moisturize the scalp, wrap at night, and watch edges. If any area feels stressed, ask your stylist to loosen tension.
| Feature | Benefit | Quick tip |
|---|---|---|
| Gradual feed-in | Flatter roots, less pull | Comfortable first 48 hours |
| Custom part size | Controls weight and density | Choose small or medium for long wear |
| Scalp-friendly finish | Helps protect hair and edges | Good for sensitive scalps |
Plan extra time: knotless techniques are meticulous, but the soft base and polished look make the appointment worth it.
Cornrows, Ghana, and Fulani: sculpted designs along the scalp
Sculpted scalp designs turn simple parting into eye-catching art. Cornrows, Ghana styles, and Fulani looks give a range from graphic lines to cultural accents. Each method sits close to the head and can be adapted for any occasion.
Cornrows are close-to-the-scalp plaits that run thin or wide. Thin cornrows take more time and often cost more, but they produce detailed, custom patterns across the head. Jumbo rows speed the install and make a bold statement.
Cornrows: thin-to-thick customization and design
Choose pattern placement for balance when mixing slim and jumbo rows. Discuss where rows land on each side so the final shape flatters your face and outfit.
Ghana braids: feed-over technique and ringed effect
Ghana or feed-over braids add hair over the top to build a ringed, raised finish. Fishbone or spiral patterns create strong movement and depth across the head.
Fulani braids: center braid, temple pieces, and beads
Fulani styles pair a central braid with forward temple braids and bead highlights. Add rings and beads to personalize the look and catch the light.
- Maintenance: cleanse the scalp gently between rows and keep skin moisturized to cut itching.
- Pick braiding hair texture and color to control sheen and structure.
- Wrap with a silk scarf at night to preserve crisp lines and reduce fuzz.
| Style | Characteristic | Quick tip |
|---|---|---|
| Cornrows | Close-to-scalp; thin to thick rows | Fine rows = more detail; plan cost and time |
| Ghana | Feed-over build; ringed, raised look | Try fishbone or spiral for texture |
| Fulani | Center braid + temple pieces + beads | Add beads/rings for cultural accents |
Micro braids: delicate plaits with weeks of styling freedom
Micro plaits give the illusion of loose, flowing hair while staying neatly contained for weeks. These ultra-fine plaits move freely and let you wear many looks without bulk.
Expect a longer install time; the payoff is lightweight, low-fuss wear for weeks. Many people stop braiding halfway to leave straighter ends for easier ponytails and buns.
Everyday switches are fast: go from a sleek ponytail to a low bun or half-up in seconds. Micro braids mimic the flow of loose hair while cutting down tangles and daily styling.
- Care: cleanse the scalp gently and moisturize strands to keep sheen and softness.
- Handle with care: avoid tension at the root, especially near the hairline.
- Extras: delicate cuffs or small beads add dimension without overwhelming the fine scale.
Trim frayed ends when needed and plan a realistic appointment window—bring snacks and entertainment. With gentle upkeep, this style stays polished and versatile for weeks.
braided hairstyles inspiration board: from halo to messy-chic
Create a mini mood board that spans soft romance to modern edge. Pick one look to try, then blend elements to make it your own.
Halo braid: crown effect that works on most lengths
Halo braid is a Dutch wrap that circles the head like a crown. It keeps hair away from the face for a clean, regal profile.
Finish with a glossy mist to boost shine. The mist photographs beautifully and helps the style last for days.
Messy braid: boho texture with soft pull-outs
Start lower and pull out gentle pieces to build a relaxed, boho feel. Deep conditioning first adds luster and healthy texture.
Tip: use light pulls to pancake the braid for volume without undoing the structure.
Viking-inspired side details for edgy-cool
Side details range from tight micro rows to looser plaits that frame the face. Add cuffs or rings for instant attitude without bulk.
Mix a halo on top with a messy, textured tail to get an editorial, custom result.
- Experiment with part lines and braid width to shift mood from soft to sharp.
- Slightly undone finishes suit casual outfits; sleeker versions match workwear or formal events.
- Always preview styles from all angles to ensure balance around the head and side profile.
| Look | Key feature | Quick finish |
|---|---|---|
| Halo | Wraps around the head; crown effect | Glossy mist for shine |
| Messy | Lower start; soft pull-outs | Deep condition for healthy texture |
| Viking side | Tight rows or loose side plaits | Add cuffs or rings for edge |
“Mix elements—halo plus a textured tail—so your look reads unique and editorial.”
Final note: try one reference at a time, then swap parting and width until the perfect look matches your day and outfits.
Half-up and ponytail braid ideas for every day

A simple top section or low throw-over ponytail can upgrade your daily routine in minutes.
Half-up, half-down on box, micro, or cornrows: Section a small crown area on box braids or micro braids for a quick top knot. On cornrows, lift one center row to show the pattern while leaving lengths free. Small claw clips secure the section fast without dents.
Low braided ponytail with throw-over length
Gather hair low at the nape and plait a neat ponytail you can toss over one shoulder. This keeps weight balanced and stays practical for errands or evening plans.
Bubble braid: chic pony with spaced elastics
Create a high ponytail, add elastics every 2–3 inches, then gently loosen each segment for rounded “bubbles.” Use color-matched elastics and wrap a small strand of hair around the base for a pro finish.
- Smoothing tip: a touch of lightweight gel and a boar-bristle brush tames flyaways at the crown.
- Mix textures—sleek base with a gently pulled braid hair finish—to build dimension with minimal effort.
- Distribute weight evenly to avoid tension on fresh installs.
| Style | Best for | Quick hack |
|---|---|---|
| Half-up top knot | Box braids, micro sets | Claw clip for no-dent hold |
| Low throw-over ponytail | Long braids or extensions | Toss over shoulder for instant polish |
| Bubble braid | Daily wear to date night | Color-matched elastics + pancaking |
Braided updos and buns for work to weddings
A polished updo can shift from desk to dance floor with only a few pins and the right finish. This section gives easy, formal, and modern options that suit daytime meetings and evening events.
High bun and beehive crown shapes
Create a high bun by wrapping long braided sets or locs into a stacked crown. Tease beneath the wrap to add volume and secure with discreet pins.
When placed slightly forward on the head, the result reads vintage and elegant. Use a workable hairspray so you can reshape without crunch.
Low messy bun with fishtail combo
A low messy bun paired with a side fishtail braid gives romantic texture and deliberate imperfection. Start the fishtail at the temple and tuck its tail into a loose nape knot.
Tease lightly where you want lift, then pin and mist to hold soft pieces in place for day-long wear.
Updo roses and formal polish
“Rose” updos coil shorter braids into petal shapes and require a detail-oriented stylist for symmetry and lasting hold. Tuck-and-pin methods hide ends for a seamless finish.
Add pearl pins or metallic accents for weddings or galas to catch light without overpowering the look. Clean parting and smooth edges elevate the whole style.
- Try different placements: forward for vintage, centered for classic balance.
- Test volume points before pinning and use pins that match hair color.
- Bring photo references so your stylist can match scale and density.
“A tidy part and strategic teasing make a formal updo read polished from every angle.”
Creative twists: faux hawk, undercut braids, and pompadour bun
Swap a full undercut for mini cornrows to fake shaved sides while keeping lots of top length to play with. This faux hawk approach uses tight side rows to create contrast and leaves the crown free to braid, wave, or slick back.
Undercut braids highlight the longer section above the ear and add punch when you feed in colored extensions. The result is dramatic without losing versatility.
The pompadour bun pulls braided sections into a large, retro-forward bun that sits toward the forehead for instant drama. Test weight distribution so the bun feels secure and won’t strain your crown.
- Play with part lines along the head to control symmetry and top height.
- Pair intricate side work with a smooth top for an editorial, clean finish.
- Use lightweight edge control for crisp, camera-ready hairlines.
- Lock thick sections with bobby pins in an X pattern to prevent slipping.
Pro tip: a soft sheen spray makes texture pop under indoor lights. Add subtle color threads or small rings to emphasize the braid without cluttering the look.
“Balance bold side detail with a polished top so the whole look reads modern and wearable.”
Accessories, color, and extensions that elevate any braid

A quick accessory swap can turn a simple plait into a head-turning statement in seconds.
Headbands and headscarves are the fastest way to change your braids look while keeping hair off the face. Tie a scarf at the top for instant polish or fold a patterned band across the forehead for a relaxed vibe.
Hair cuffs, rings, beads, and charms
Small metal pieces add big impact. Cluster rings near the head for subtle sparkle or space them down lengths for a bold, festival-ready finish. Smooth metal edges to avoid snagging and remove delicate charms before sleep.
Colored yarn and extensions
Woven yarn or added extensions can introduce bright color without dyeing. Use braiding hair or yarn for texture and pop. Keep strands moisturized to help some yarn blends last longer and stay soft.
Two-toned box braids and ombré effects
Two-toned box braids give depth without commitment. Try a dark root that fades to a bright tip, or mix contrasting strands in each box for extra dimension. Accessories then highlight the pattern you want the eye to follow.
| Accessory | Best placement | Quick tip |
|---|---|---|
| Headscarf | Top knot or crown | Tie once for secure, polished finish |
| Metal cuffs & rings | Near the head or scattered | Smooth edges; remove to sleep |
| Colored yarn/extensions | Weave with braiding hair | Moisturize to extend wear |
Feed-in braids and crochet techniques to change length and volume
Want added length or volume without a bulky root? Feed-in and crochet methods solve that by blending added hair smoothly into natural sections. These options give a sleeker base and let you choose dramatic length or quick texture swaps.
Feed-in method: seamless length and less bulk at the base
Feed-in braids gradually introduce added hair as the braid is formed. This keeps the scalp area slim and comfortable.
It builds length without the knotty bulk that can sit at each start point. The result feels lighter and often reduces tension at the roots when done by a pro.
Crochet technique: cornrows plus latch-hook versatility
Start with neat cornrows as a secure base. Then use a latch hook to loop in pre-styled pieces for fast changes.
Crochet installs support many textures—waves, twists, and tight curls—so you can swap looks with fewer install hours. They also offer a budget-friendly time option for busy schedules.
- Pick extensions that match your desired sheen and feel for the most natural finish.
- Both methods can cut root tension compared with bulky attachment points when installed correctly.
- Keep a scalp-friendly cleansing routine between cornrows to keep the base fresh and healthy.
- Discuss detangling patterns, refresh cycles, and removal windows with your stylist before you start.
Tip: schedule reinstall or removal on a sensible timeline to protect the scalp and keep your look crisp.
Double the fun: space buns, braided buns, and pigtails
Turn simple parts into statement looks with double buns or looped pigtails. These twin styles are playful, quick, and easy to tweak for work, the weekend, or a festival.
Space buns up top or at the nape
Place two buns high on the top for a bold, festival-ready vibe. Keep them tight for activity or soft and messy for a relaxed feel.
For a retro silhouette, lower the pair to the nape. Low buns cut tension and make headphones or hats more comfortable.
Classic braided pigtails, knotted or bunned
Braided pigtails are a quick classic. Leave them sleek, knot the ends, or twist each into a mini bun for polished ease.
Center your part so both sides mirror each other from the front and side. Use clear elastics and discreet pins to keep everything secure.
Braided pigtails with color pop
Add color only to the pigtails by feeding in colored extensions. This gives a fresh pop without dyeing your own hair.
Finish with a slim headband or scarf to keep the crown tidy. Match small cuffs on both plaits for a coordinated look.
| Style | Placement | Quick tip |
|---|---|---|
| Double space buns | High top / low nape | High = festival; low = retro & comfy |
| Knotted pigtails | Side symmetric parts | Center part for balance; use clear elastics |
| Color-popped pigtails | Pigtail lengths only | Braid in extensions; remove gently to protect ends |
| Mini braided buns | Top or nape | Secure with discreet pins for all-day hold |
“Smooth edges with a touch of gel and a soft brush to sharpen the finish in seconds.”
Quick-switch looks when you’re short on time

A few simple moves — and just one elastic — can turn yesterday’s set into a polished today-ready look. These quick changes keep things neat and let you keep hair off the face without redoing the whole install.
Low bun or ponytail with existing braids
Gather lengths at the nape and smooth the hairline for a sleek finish. Secure into a low bun for a meeting-ready vibe or a low ponytail for gym-to-grocery ease.
Half-up top knot on long box braids
Pull the crown section into a small top knot to free the face while leaving length loose at the back. This option adds instant polish and keeps bangs tidy.
- Tools: two elastics and strong pins are all you need.
- Pack a tiny kit: elastics, mini edge brush, and travel hairspray.
- Revive with a lightweight shine spray and smooth the nape under a cap or scarf.
- Alternate parting and placement to protect the scalp from repeated tension.
Result: fast swaps that save time and lift the same base braids into a new look for work, travel, or evening plans.
Care checklist: keep braids neat, moisturized, and long-lasting
Small, daily habits make a big difference in how long your set stays neat and healthy.
Pre-install prep: clarify, deep condition, and detangle to prime natural hair and make the base strong for any braiding session.
- Keep the scalp and lengths lightly moisturized with weightless oils or a hydrating mist to prevent dryness.
- Balance wear time—braids give convenience, but wearing them too long can cause matting and root tension.
- At night, sleep with a silk scarf or bonnet and use a loose scrunchie if you gather lengths.
- Cleanse the scalp gently using diluted shampoo or a scalp tonic to remove buildup without frizzing the set.
- Use edge control sparingly and rotate bun or ponytail placement to avoid repeated strain.
- Dry fully after washing or swimming to prevent mildew and keep the weave intact.
- Schedule small refreshes—touch up front rows or edges—to extend the life of the look.
- Avoid heavy, residue-prone products; pick lightweight, non-flaking formulas to protect hair.
- Plan removal and rest periods so the scalp and strands recover before the next install.
| Step | Why it matters | Quick action |
|---|---|---|
| Pre-install care | Builds a healthy foundation | Clarify + deep condition |
| Moisture routine | Prevents breakage and itching | Light oils/mist at scalp and lengths |
| Gentle cleansing | Removes buildup without frizz | Diluted shampoo or scalp tonic |
| Night protection | Reduces friction and frizz | Silk scarf/bonnet + loose scrunchie |
“Protect the scalp with gentle care and scheduled breaks so your next appointment helps, not harms.”
Work with a stylist: custom designs and pro finishes
A one-on-one consult with a pro turns a Pinterest board into a plan that fits your life. Booking a stylist helps translate your inspiration into realistic, wearable looks and clear care steps.
Tell the stylist about scalp sensitivity, how long you want to keep the set, and any weight limits. Bring multiple photos so they can match scale, parting, and density to your face and routine.
Pros guide choice of braid sizes, the right braiding hair for texture and sheen, and whether feed-in, knotless, or crochet is the best option. Complex techniques like fishbone Ghana patterns or rose updos benefit from professional precision for comfort and longevity.
- Discuss accessories early so beads, cuffs, or yarn enhance the design rather than clutter it.
- Ask for quick-refresh tips and product recs to keep the look salon-fresh between visits.
- Clarify aftercare and removal steps to protect your scalp and natural strands.
| Benefit | Why it helps | Quick tip |
|---|---|---|
| Custom sizing | Balances comfort and longevity | Request trial tension at the front |
| Material choice | Matches sheen and texture | Compare samples before install |
| Aftercare plan | Prevents damage at removal | Get a written care checklist |
Partnering with a pro opens more style options for seasonal updates and special events. A good stylist not only builds the look—you leave with a clear plan for care, comfort, and how to refresh it at home.
“A short consult saves time and keeps your set looking great longer.”
Conclusion
To finish, think of braids as a toolkit—mix methods to match mood and movement.
From sleek box braids to a soft waterfall or a crisp dutch braid, there is a look for every day and event. Pick micro braids for flow, knotless braids for comfort, or cornrows when you want sculpted lines.
Try a quick ponytail, braided pigtails, or a braided bun to switch the vibe fast. Feed-in braids and crochet expand length and texture without heavy installs. Add two-toned color, rings, or beads to make hair pop without permanent dye.
Care wins: moisturize natural hair, protect edges, and plan removals so styles stay beautiful and the scalp stays healthy. With a few techniques and a stylist on call, you can braid hair into looks that feel fresh every season.