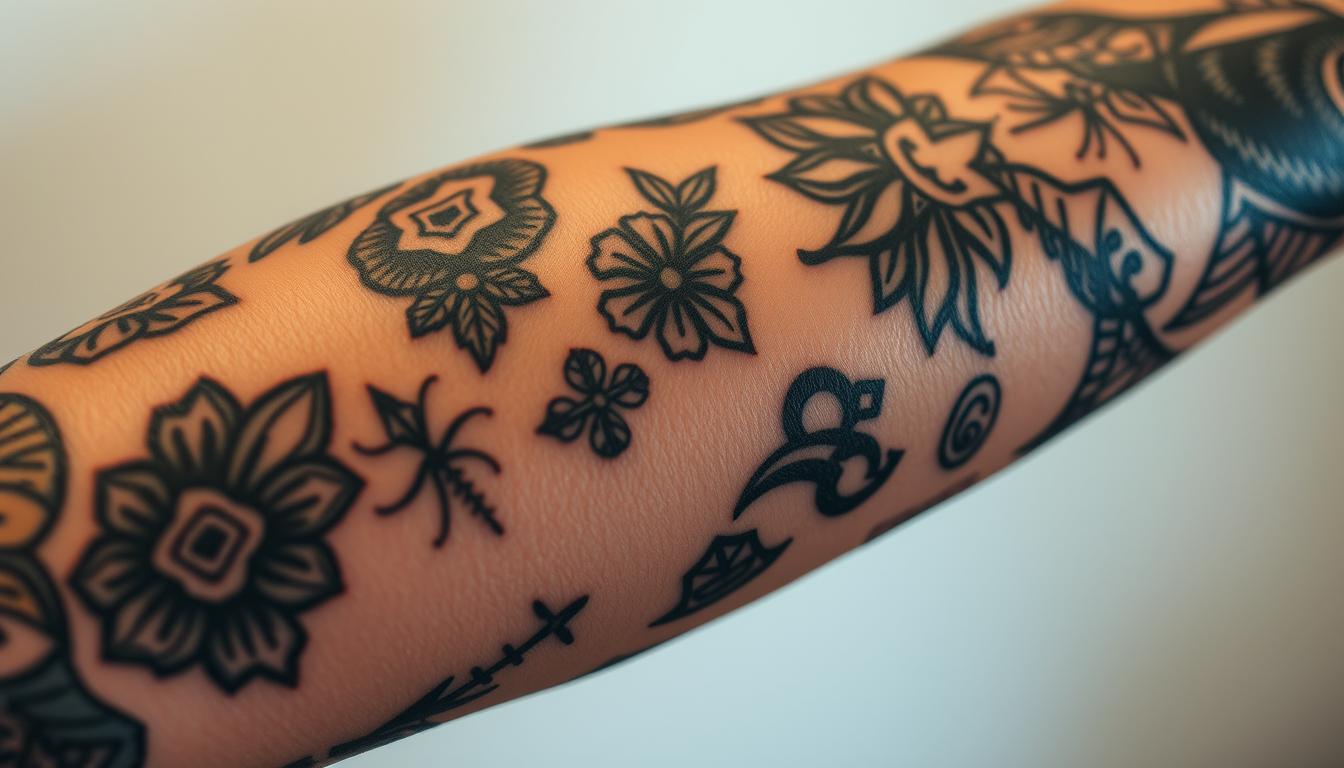
Have you ever wondered how a messy old piece can become something you’ll wear with pride?
We want practical steps that stop band-aid fixes and start smart design. This guide walks us from picking the right artist to sizing, color logic, and realistic timelines.
We outline three main approaches—complete coverage, creative reinvention, and blast overs—so we match method to the existing ink and our aesthetic. We also explain when laser lightening helps, and why most projects need multiple sessions for durable results.
Expect notes on budget, healing windows, and common challenges like raised scars or dense pigment. Our aim is a clear, friendly playbook so we enter consultations confident and ready to get a new tattoo that looks intentional.
Key Takeaways
- Find an experienced artist who specializes in repairs and has a style we love.
- Know the three main methods so we can match design to old ink.
- Laser lightening can increase color and design options but adds time.
- Most projects need 2–3 sittings and may require touch-ups later.
- Blues, browns, and blacks cover best; bright hues may need pre-lightening.
Why We Choose Cover Ups: Setting Expectations Before You Begin
Before we book a session, it helps to set honest goals so the result matches our expectations. A smart disguise often beats full removal when the old ink is in a spot we can expand or when partial lightening makes color options possible.
We prefer hiding work when it saves time and money. Partial laser can lighten dense black or raised lines and broaden design choices. Many artists advise a couple of lightening sessions before getting a new piece.
When covering beats removing
- Faster overall timeline and often fewer total sessions than full removal plus new work.
- Better for designs that can expand in size or change direction to mask letters or heavy lines.
- Names and dense scripts may need larger, darker, or textured subjects to disguise properly.
What a realistic “pro” result looks like
Professional results focus on flow and camouflage, not perfect opacity. Expect 2–3 sessions, touch-ups later, and possible textural hints from scars or dense linework. Our artist’s experience helps decide size, shading depth, and color to balance disguise with natural movement.
“Disguise is an art; sometimes the goal is convincing integration, not total invisibility.”
For readers weighing options, see our note on removal methods in this guide: how to remove a tattoo.
Understanding Search Intent: What most of us really want from cover up tattoos
What readers really want is a result that reads like a deliberate piece of art, not a repair job. Our primary goal is regaining confidence by disguising a mistake or a painful reminder. That drives most searches and shapes realistic outcomes.
People ask whether to aim for camouflage or full removal. Many choose camouflage because the process is faster and often needs fewer sessions than removal plus a new piece. We should expect consultations, design compromises, multiple sittings, and healing cycles.
Design limits come from the old ink: lines, shapes, color density, and placement guide our new plan. Larger, textured subjects with high contrast work best to mask existing elements.
Partial laser lightening can widen our palette and subject choices. It lets us use brighter hues or finer detail that would otherwise fail over dense pigment.
- We want to hide an unwanted tattoo so it reads as intentional art, not a patch.
- Good disguises use shadows, directional light, and layered texture to integrate old elements.
- Getting rid unwanted feelings often happens faster with a smart disguise; removal stays an option later.
“A convincing result focuses on flow and cohesion — others should see a finished piece, not a job to be fixed.”
For practical examples and design ideas we like, see our roundup of best tummy tuck cover-up ideas.
Choosing an Artist: The most important decision we’ll make
Choosing the right professional is the decision that most affects how our new piece reads. Specialists in disguise work need more planning and a different skill set than general practitioners. We should seek artists who publish healed before/after sets and explain limits honestly.
How to vet portfolios for successful disguises (not obvious cover-ups)
Look for work where the old ink is undetectable, not just darker. Healed photos and multiple angles prove long-term quality.
Check for: clear before/after pairs, notes on sessions, and subjects that hide lines rather than mask them with heavy ink.
Experience with cover ups vs. general tattooing
Experience matters. Artists who focus on repairs understand texture, contrast, and when to suggest partial removal.
Many pros, like Jacob Wiman, Jo Harrison, and Jen Tonic, request creative control because it improves the outcome.
Creative freedom and why it matters for results
Creative freedom lets the artist choose scale, lighting, and color to make the work read as intentional art. If we micromanage every detail, the result can look forced.
- Ask about laser or removal if brighter colors are needed.
- Confirm how many sessions and touch-ups they expect.
- Choose an artist whose style matches what we love to wear every day.
“The right artist is transparent about what will and won’t work on our skin and our existing ink.”
Consultation 101: Bringing the right info and asking the right questions
The consultation is where our plan takes shape. We arrive armed with clear photos and a few honest goals so the artist can map a realistic process.
Photos, lighting, and angles that help your artist plan
We bring sharp, well-lit photos from multiple angles and distances. Close shots show line work and saturation; wider shots show how the old ink follows body lines.
Good images let the tattoo artist judge scars, density, and movement. That helps them say whether partial removal will widen our options.
Discussing style, size, sessions, and budget up front
We talk style but stay flexible—design must work with the existing piece. Expect suggestions to increase size so the new subject redirects the eye.
Ask about the number of sessions, typical healing windows, and hourly rates or deposits (many shops charge around $250 per hour). Clarify touch-up fees and ask for a get free estimate range.
- Confirm whether removal is recommended to broaden color or detail choices.
- Request a run-through of the process: stencil tests, freehand work, and photo check-ins between sessions.
- Agree on aftercare and when final touch-ups will be scheduled.
“Good prep makes the build clearer — fewer surprises, better results.”
Laser Tattoo Removal or Not: Deciding if lightening helps your new piece
A few smart laser passes can change what designs and colors are even possible for our new piece. We weigh benefits, timelines, and risks before booking any work.
When a few removal sessions widen design and color options
Partial lightening can reduce dense pigment and soften raised lines. That lets an artist use brighter tones and finer detail instead of forcing a dark, heavy fix.
Healing timelines after laser
After laser removal, we must let the skin fully heal. Most pros advise waiting 6–12 months before a new tattoo. That pause protects our skin and the longevity of the new work.
Partial lightening vs. full removal: how we choose
We often pick targeted removal over full erasure for cost and time. A few removal sessions can be enough to unlock florals, painterly blends, or underwater gradients that would otherwise fail.
- Ask about settings, spacing, and how your skin responds.
- Document changes with photos so artist and client decide readiness.
- Avoid over-treating — impatience can harm results.
“Partial lightening often expands possibilities more than complete removal.”
Design Strategy: Subjects that camouflage old ink best

We pick motifs that work with existing shapes rather than fight them. The goal is a new piece that reads as intentional art, not a patch job.
Textures and shadows that hide lines
Florals, Japanese waves, skulls, and organic bio-mech use busy surfaces and deep contrast to break straight lines. Busy textures scatter attention, so old marks stop reading as anchors.
Underwater scenes, coral, and painterly gradients layer blues and dark bases to absorb stubborn ink. Illustrative realism and neo-traditional styles pack shading that masks edges well.
Using lighting effects to steer the eye
Rim light, cast shadows, and directional gradients control focus. We use bright accents only where the darker anchors already hide old pigment.
- High-contrast shadows disrupt dense patches and linear script.
- Rim light outlines shape while keeping center areas darker to mask ink.
- Expanding the size slightly lets flow and geometry redirect seams.
“Creative freedom lets the artist match new shapes to old lines for convincing integration.”
| Subject | Why it works | Best uses |
|---|---|---|
| Japanese waves & koi | Natural motion and layered contrast hide lines | Arms, backs, and shoulders where flow can expand |
| Florals (chrysanthemum, peony) | Petal clusters and shadows break dark patches | Medium pieces that can grow in size |
| Underwater scenes | Deep blues and coral textures layer over dense ink | Color-forward pieces after partial laser or without |
| Bio-mech & skulls | Heavy texture and panels absorb awkward edges | Bold, darker palettes for stubborn ink |
Plan color and size before any laser work. Dark anchors give room for luminous accents and more believable depth. Often, a small increase in size unlocks better geometry and lets lighting and texture do most of the disguise.
Color Choices That Work: Why bold color beats black and gray for cover ups
A smart palette balances deep anchors and bright accents so the design reads as one piece.
We rely on deep blues, warm browns, and strong blacks because they layer over dense ink and keep the new piece coherent. Dark, cool pigments absorb old lines and give artists room to sculpt shadows and form.
How pigments layer and why darker hues win
The physics of layering: darker pigments and cool hues generally overpower old lines better than light, warm tones. Blues and browns create rich midtones and shadow without muddying the design.
Black-and-gray can work, but gray washes often lack opacity over heavy ink unless we do partial laser tattoo removal first.
Avoiding weak overlays
Thin reds, yellows, and oranges tend to fail over dark ink. They can shift, desaturate, or read as stains instead of new art.
We reserve those brights for isolated highlights only after enough dark layering or laser lightening makes them viable.
“Artists often insist on full color for covers to ensure depth and opacity; lightening first widens what we can use.”
| Palette | Strength | Best use |
|---|---|---|
| Deep blue + brown | High opacity, natural shadows | Large floral, marine, and landscape pieces |
| Black + saturated cools | Maximum concealment | Bold, graphic subjects and bio-mech |
| Muted darks + bright accents | Balanced depth with focal highlights | When partial laser allows brighter hues |
We plan color anchors—dense dark zones where the old lines are strongest—and keep softer passages around them. That way the eye reads structure, not leftover marks.
Size Matters: Planning dimensions for effective coverage
Scaling a piece deliberately gives artists the room to reroute lines and hide stubborn edges.
Many specialists advise increasing the footprint to roughly three times the original size. A larger size lets the new design redirect attention and mask the structure of an old tattoo.
Why more space helps: added area lets artists use leading lines, overlapping forms, and dense shading to defeat straight, dark marks. That is the common trade-off for stronger concealment.
Practical planning tips
- Shift placement slightly to avoid boxed-in shapes and follow body flow.
- Negotiate dimensions with artists so the canvas is not too tight for real coverage.
- Consider a moderate size bump plus partial laser tattoo removal when we want color without going huge.
| Choice | Benefit | When to use |
|---|---|---|
| 3x enlargement | Maximizes concealment and flow | Heavy lines or dense dark ink |
| Moderate increase + laser tattoo | Allows brighter color and finer detail | When removal is limited but needed |
| Minimal size change | Less time and cost, higher risk of show-through | Small fixes or willing to accept texture hints |
“Stencil and freehand mapping test whether the planned dimensions will truly hide the old work.”
Techniques Compared: Complete coverage, creative reinvention, and blast overs
Each approach offers trade-offs: total concealment, creative transformation, or bold graphic overlays. We choose based on how much old ink shows, our timeline, and the final look we want.
Complete coverage: maximizing opacity and flow
Complete coverage aims for high opacity and often a larger footprint so the new piece reads as one cohesive work. This is the best route when we need to truly hide old tattoo lines.
Most artists stage shading, dark anchors, and layered color across multiple sessions to tighten opacity.
Reinvention: adding and transforming the old tattoo
Reinvention uses the existing mark as a design element. Think of Jessica Baker’s viral Pikachu example—old shapes become part of a new story.
This method keeps character and can need fewer sittings, but it asks for creative freedom from the artist.
Blast over: bold linework over faded color for a stained-glass effect
Blast-overs place heavy black lines and graphic forms over faded pigment to create a stained-glass read. It’s bold and accepts some show-through as a stylistic choice.
- Portraits are realistic only after enough lightening; textured subjects hide ink more reliably.
- Size and composition must adapt so flow reroutes around old edges.
- Artists evaluate ink density and may recommend a laser tattoo pass to widen color options.
| Technique | Best use | Trade-off |
|---|---|---|
| Complete coverage | Max disguise, large pieces | Darker result, more sessions |
| Reinvention | Keep character, creative | Less opacity, needs design buy-in |
| Blast-over | Graphic, stained-glass look | Bold lines, possible show-through |
“Pick the method that matches our goals, skin, and schedule — then trust the artist to stage the work across sessions.”
The Process and Timeline: From booking to final pass
We map the full timeline so each appointment has a clear purpose, from the first line to the final polish. A defined process helps us and our artist track progress, budget, and healing time.
Multiple sittings and layering color for durability
Most projects need 2–3 sessions to add layers of color and tighten opacity. Artists often begin with lining, then stage shading and color packing across visits.
If partial laser removal happened, we wait until the skin is fully healed—typically 6–12 months—before tattoo new work. That spacing prevents complications and boosts the piece’s longevity.
Touch-ups are common and usually billed at standard hourly rates. As an example, many shops charge about $250 per hour for re-layering or final passes.
What to expect between sessions
Healing between sessions can show frosting, haze, or raised texture. These are normal signals that pigment is settling. We message photos to the artist if we see prolonged swelling or unusual discharge.
- Space sessions to improve saturation and reduce blowouts.
- Expect some areas to be revisited to prevent sessions fade later.
- Pause if skin is overworked, too swollen, or shows signs of infection.
Simple tracking helps: take dated photos, follow the artist’s aftercare, use sunscreen, and note when areas feel firm or raised. For healing timelines and care tips, see how long does a tattoo take to.
“Pacing protects the skin and gives the new work the best chance to last well.”
Healing and Aftercare: Protecting our new tattoo and the disguise
Healing is where the plan proves itself—good aftercare keeps the design crisp and believable.
Raised or scarred areas need gentle attention. Textural scars can stay noticeable while the surface settles, so we avoid aggressive scrubbing and tight clothing that rubs the site.
Managing raised or scarred areas during healing
Daily routine: clean gently with mild soap, pat dry, and apply a thin film of recommended ointment or lotion. Too much moisturizer traps heat and slows recovery.
Expect flaking, mild itching, and a silver sheen as pigment nests. Do not pick or peel; that can lift ink, especially where old ink sits underneath. If texture stays raised after months, a touch-up session often evens tone. Touch-ups are billed at standard hourly rates.
Sun, skincare, and long-term vibrancy
Sun is the enemy of saturation and illusion. We use broad-spectrum SPF once the skin has fully healed and cover the area when possible during the first year.
For long-term color, follow gentle cleansing, regular hydration (not heavy creams), and avoid harsh exfoliants over the site. Minor color boosts years later are common for pieces layered over dense old ink or after partial removal.
- When to check in: photo at 2 weeks, 8 weeks, and 6 months to judge settling.
- Signs you need re-layering: faint lines showing, irregular saturation, or persistent raised texture.
- Simple support: sleep position, loose clothing, hydration, and avoiding heavy exercise that makes the area sweat excessively during early healing.
| Issue | What to expect | Suggested action |
|---|---|---|
| Raised scar tissue | Texture remains visible while healing | Gentle care, avoid pressure; plan touch-up after 3–6 months |
| Flaking and silvering | Thin white film, itchiness | Do not pick; keep area clean and lightly moisturized |
| Sun exposure | Fades color and breaks illusion | Use SPF after healing; cover or avoid direct sun early |
| Color loss over years | Slow desaturation, especially over old ink | Schedule minor boost sessions as needed |
“Patience and consistent care give the new work the best chance to read as a single, lasting piece.”
Peekers and Touch-Ups: Managing what shows through
Sometimes the old lines peek through even when the new design looks solid at first glance. We call those faint survivors “peekers.” They are usually thin black lines that resist color and become more visible as color fades with time.
Why some linework can resurface
Black ink holds better than bright pigments. As sessions fade over years, darker original lines can outlast surrounding color. Scars and skin texture also make peekers more likely.
Scheduling re-layering and touch-up sessions
Document healed results with dated photos and send them to your artist. That helps plan where re-layering will have the most impact.
- Decide if a small laser pass is smarter than more ink—sometimes tattoo removal sessions fade stubborn lines first.
- Book short touch-up sessions for targeted darkening; avoid overworking fragile skin.
- Expect touch-ups to be billed at standard hourly rates; budget for occasional maintenance.
“A successful disguise reads right in everyday light — total erasure is rare.”
We recommend sunscreen, periodic check-ins, and saving reference photos so we can track change and decide when intervention is needed.
For care questions and hand-specific pain, see our note on how hand work feels.
Budgeting the Project: Rates, sessions, and long-term maintenance
Let’s break down real costs so budgeting doesn’t blindside us mid-project.
Typical rates: many studios charge about $250 per hour for cover work. Expect most projects to need 2–3 sessions and later touch-ups billed at the same hourly rate.
What drives cost: hourly rates, number of sessions, increased size, and complexity of concealment strategy. Blast-over or full-color plans often need extra passes to tighten saturation, and that raises the total bill.
- Ask the shop for a get free estimate range with best and worst case scenarios.
- Factor in optional removal or laser work—lightening adds cost and time but can reduce future rework.
- Plan for touch-ups over the years; old lines can subtly reappear as color softens.
Also budget deposits, possible travel to a specialist, and time off for healing between sessions. A seasoned tattoo artist usually achieves better first-pass coverage, which can lower long-term expense.
“Get a clear estimate, consolidate passes where possible, and keep photo updates so costs stay predictable.”
| Approach | Typical cost drivers | When it saves or spends |
|---|---|---|
| Complete coverage | More hours, larger size, multiple sessions | Higher upfront cost, fewer surprise touch-ups later |
| Reinvention | Creative time, less dark layering | Often cheaper, needs artist freedom |
| Blast-over | Strong linework, possible extra passes | Lower initial time but may require tightening |
Skin, Scars, and Old Ink: What affects cover up difficulty
Our planning begins with a clear read of skin, scar tissue, and how saturated the existing ink is.
Highly raised scars and pigment-packed old tattoo fields make the job harder. Thick linework, saturated black zones, blowouts, and textured scar tissue all limit how much new pigment will hide beneath.
Dense pigment, raised scars, and placement challenges
Placement matters. Areas near joints, hands, and sun-exposed skin age faster and may need different strategies. Thin skin or lots of stretch forces the artist to place shadows where movement won’t reveal old ink later.
When to consider laser tattoo or removal: targeted laser passes can lower density in key zones and reduce scar prominence before we add new work. That measured lightening often widens color and design options.
- Variables that raise difficulty: thick lines, saturated blacks, blowouts, and scar tissue.
- Placement effects: joints, high-sun zones, and mobile skin change how ink settles and wears.
- Targeted laser can reduce pigment density and improve final results when used sparingly.
Most pros prefer full color for a believable finish; color anchors outperform black-and-gray over heavy old ink. Incremental plans—lighten, then layer—help avoid overworking sensitive skin.
“Expect some textured scars to remain palpable even when visually hidden; clear expectations make for better outcomes.”
| Factor | Impact | Artist response |
|---|---|---|
| Thick, saturated black fields | High risk of show-through | Partial laser + darker color anchors or larger scale |
| Raised scar tissue | Texture may stay palpable | Gentle layering, delayed touch-up, careful needle groupings |
| Placement (joints, sun-exposed) | Faster wear, migration, or fading | Adjust composition, use durable pigments, plan larger footprint |
| Blowouts and spread | Soft edges are hard to mask | Use busy textures and deeper contrast to scatter attention |
Why an experienced artist matters: a skilled pro adapts machine setup, needle groupings, and saturation to our skin. They evaluate stretch and movement to place shadows where they will hide lines, and they recommend incremental laser or layering so the skin is never over-traumatized.
Names, Portraits, and Lettering: Special considerations
Scripts and single words are often the hardest elements to hide without enlarging the new design. Straight, high-contrast strokes read clearly through layers and force us to rethink scale and texture.
For a stubborn name, we usually suggest heavier, textured subjects—florals, Japanese motifs, or bio-mech—that break letterforms with layered shadow and motion. Tilted composition and overlap help reroute lines so the old skeleton stops dictating the new piece.
Portraits demand caution. A realistic portrait over dense ink risks muddiness unless we do partial laser tattoo removal first. Many pros recommend lightening key zones so lighter skin tones and fine detail read correctly.
- When to pivot: if the base is too dense, we move from photorealism to a stylized portrait that embraces bolder lines and contrast.
- Test during consult: overlays and stencil trials show how new shapes align with stubborn script lines.
- Expect size increases and likely touch-ups to keep a name fully subdued over time.
| Issue | Best tactic | Why it works |
|---|---|---|
| Name or thick script | Larger, textured motif (floral/Japanese) | Shadows and layers break straight strokes |
| Dense base under portrait | Partial laser + stylized portrait | Lightening prevents muddy flesh tones |
| Limited space | Tilt/overlap + bold anchors | Redirects eye and hides letter skeleton |
“When we plan for scale and test overlays, hard lettering becomes manageable — but patience and staged work matter.”
Cover Up Tattoos: Our step-by-step playbook for getting it right
We begin with a practical scan: photos, a feel for scars, and a note of pigment density. That first check tells us whether a partial laser pass will help or if a larger new piece is the smarter choice.
Assess > Consult > (Optional) Laser > Design > Sessions > Touch-ups
- Assess: Gather images, mark problem zones, and judge skin texture and placement.
- Consult: Book time with a specialist, share goals, and stay flexible so the new design can disguise old lines.
- (Optional) Laser: Decide on tattoo removal sessions if brighter pigments or fine detail are needed.
- Design: Choose textured subjects and full color that anchor over trouble areas for lasting opacity.
- Sessions: Plan 2–3 sittings for layering so sessions fade is minimized and saturation holds.
- Touch-ups: Track healed photos, schedule paid re-layering where heavy linework shows, and budget for maintenance.
“Layering wins. Patient staging protects skin and gives the new piece the best chance to read as one work.”
Getting cover is a process, not a single visit. We follow aftercare, use sun protection, and treat occasional refreshers as normal to keep the new design vivid.
Conclusion
strong, Turning regret into art begins with a careful strategy. We get the best outcome when an experienced artist plans for a realistic disguise rather than perfect opacity. Partial laser work and staged sessions widen our options and protect the skin.
We know covers are a process: multiple sittings, layered color, and normal touch-ups keep the illusion strong. Honest portfolios and healed photos help us pick the right pro and set clear expectations.
Want examples? See useful chest tattoo ideas at chest tattoo ideas to spark design talks with your artist. If we want to rid an unwanted tattoo faster, targeted laser tattoo removal or measured tattoo removal can open more color choices.
Ask questions, compare techniques, and start the consult— patience and a smart plan let us trade an unwanted tattoo for something we truly wear with pride.
