Ever wondered why some people wince at the thought of ink on their fingers while others breeze through the process? The truth is, pain isn’t one-size-fits-all—especially when it comes to body art in high-sensitivity zones. Is that bold ink design worth the sting? Let’s unpack what really happens when the needle meets your skin.
Areas with dense nerve endings and thin tissue layers—like your fingers or knuckles—tend to amplify sensations. Bone proximity plays a role too. When vibrations from the machine echo against carpal bones, the intensity spikes. But here’s the twist: while discomfort is real, it’s often fleeting. Smaller designs wrap up faster, making the experience more manageable than you might expect.
Your pain tolerance and the artist’s technique also shape the journey. Skilled professionals use precise methods to minimize trauma, and strategic preparation can help you stay calm. From numbing creams to mental focus hacks, there are ways to take control. Ready to dive deeper?
Key Takeaways
- High nerve density and thin skin amplify sensations in certain areas.
- Pain varies by location—knuckles and fingertips rank higher than the back of the hand.
- Proper hydration and rest before your session can improve comfort.
- Aftercare is critical for vibrant results due to frequent hand use.
- Choosing an experienced artist reduces unnecessary trauma to delicate skin.
Understanding Hand Tattoo Anatomy & Pain Factors

Your hands are sensory powerhouses—and that plays a big role in how you experience ink. Let’s explore why these areas react differently to needles compared to fleshier body parts.
Nerve Endings and Thin Skin
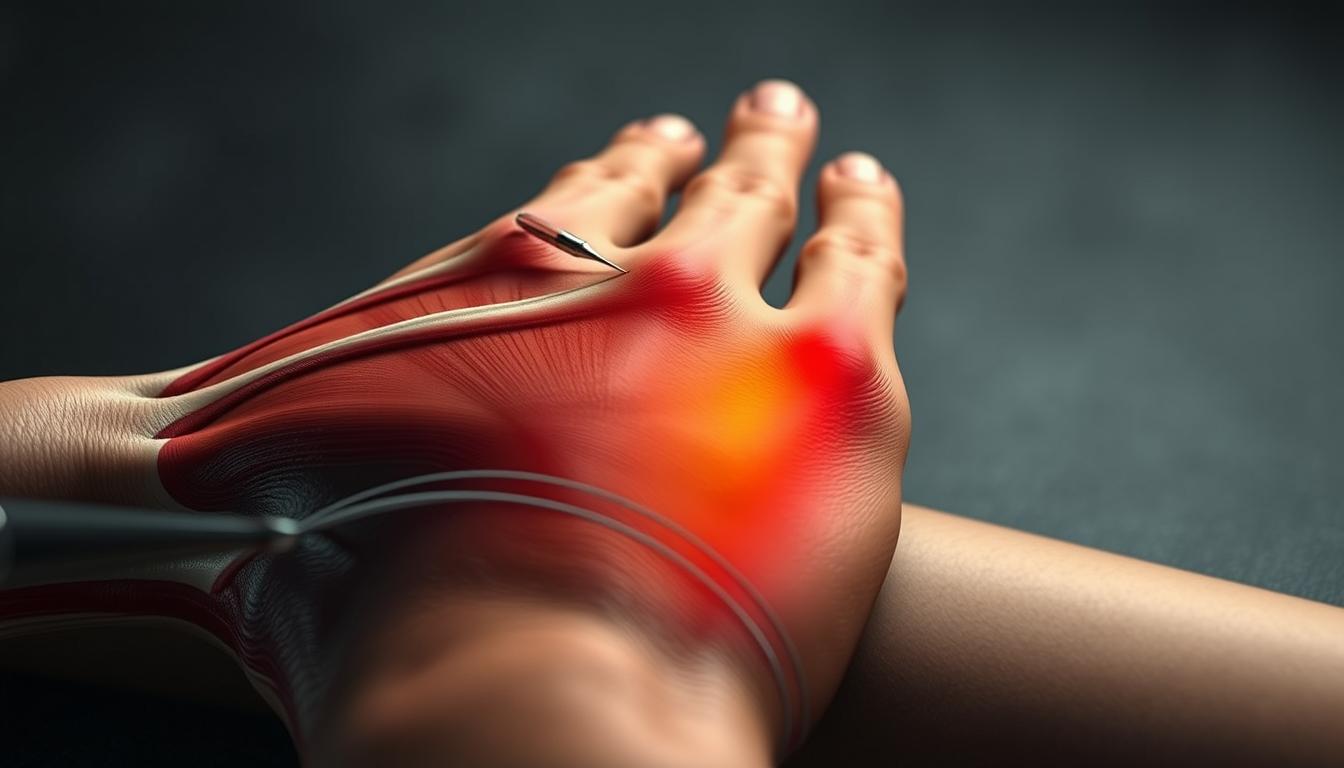
The skin here is up to four times thinner than your thighs. With barely any fat to cushion the needle, every vibration travels straight to dense nerve endings. Imagine tapping a microphone against a drum—that’s how amplified sensations get near bony ridges.
Fingers and knuckles have even fewer protective layers. This explains why shading over tendons can feel sharper than lines on your forearm. Your body’s natural alarm system kicks into high gear here.
Movement and Bone Proximity
Notice how your knuckles pop when you make a fist? Those tiny bones sit just beneath the surface. When the needle hits zones like finger joints, vibrations echo through the carpal structure. It’s like getting a dental drill sensation—minus the Novocain.
Constant hand use also matters. Muscles and tendons stay active daily, so they’re primed to react strongly to foreign stimuli. Artists often adjust their technique here to avoid overworking the skin.
Do Hand Tattoos Hurt? Breaking Down the Pain Level

Mapping out your hand’s landscape reveals why some zones feel like a quick pinch while others test your resolve. Sensitivity spikes where skin hugs bone or nerve clusters buzz beneath the surface. Let’s navigate these spots so you know what to expect.
Intensity Variations by Location
The back of your hand often lands at a pain level of 2/5. Thin skin and visible tendons create a steady hum, but it’s bearable for most. Move toward your knuckles, and that number jumps. These bony ridges score 3/5—needle vibrations echo through joints with every pass.
Edges of your fingers pack a punch too. Nerve highways along the sides make shading here feel like tracing a live wire. Yet the real challenge? Your palm. With sensitivity four times higher than average, this area hits a 5/5. “It’s like someone’s carving initials into a sunburn,” one artist describes.
Why do people still choose brutal spots? Symbolic designs sometimes outweigh the struggle. Just know ink fades faster on palms—thick skin and constant motion push pigment out quicker.
Your body’s condition matters. Hydration and rest soften the experience, while stress amplifies it. Seasoned artists use lighter pressures here, balancing precision with care for delicate tissue. Remember: discomfort fades, but that art? It’s yours to keep.
Preparing for Your Hand Tattoo Session

What’s the secret to transforming a nerve-wracking session into a smooth experience? It starts long before the needle touches your skin. Proper prep work helps you stay calm and gives your artist the best canvas to work with.
Skin Readiness Matters
Clean, hair-free skin isn’t just polite—it’s practical. Shave the area 24 hours before your appointment using a fresh razor. “Razor burns create unnecessary drama,” says Brooklyn artist Liza Monroe. Gentle exfoliation removes dead cells, while avoiding lotions prevents clogged pores.
Numbing Creams: Your Silent Partner
Topical anesthetics like lidocaine creams block pain signals temporarily. Apply them 45 minutes before your session—just follow the instructions. Pro tip: Test a small patch first to avoid allergic reactions. These creams won’t erase all sensation, but they’ll take the edge off.
Hydration and nutrition play bigger roles than you’d think. Drink water for two days prior—plump skin accepts ink better. Eat a protein-rich meal an hour before to stabilize blood sugar. Skip the triple espresso; caffeine heightens sensitivity.
“Clients who prep well always have smoother sessions. It’s like giving your body armor against discomfort.”
Lastly, rest up. A well-slept body handles stress better. Bring headphones or a stress ball if it helps. Remember: This is teamwork between you and your artist.
What to Expect During a Hand Tattoo Session

Stepping into the studio for your appointment? Let’s demystify the process. Your tattoo artist will position your hand securely, often using adjustable rests to limit movement. This isn’t just about comfort—it ensures crisp lines despite natural nerve reactions.
Pain Sensations and Artist Guidance
Expect a mix of sharp pricks and persistent vibrations as the needle interacts with sensitive zones. Many describe the initial minutes as the toughest—like scratching a sunburned area. “Your body adapts,” explains artist Marco Vega. “After 10 minutes, endorphins often dull the edge.”
Twitches are normal here. Artists anticipate this and may adjust their grip or speed. Some use single-needle techniques for precision, reducing skin trauma. Breaks are encouraged during longer sessions—don’t hesitate to ask.
| Design Type | Time Estimate | Pain Management Tips |
|---|---|---|
| Finger symbols | 30-45 minutes | Numbing cream + finger stabilizer |
| Back-of-hand art | 1-2 hours | Breathing exercises + short breaks |
| Full hand design | Up to 3 hours | Split into multiple sessions |
Tips for Staying Comfortable
Chat with your artist about splitting complex designs across visits. Hydrate well beforehand—plump skin handles needles better. Wear headphones if machine hums spike anxiety.
Position matters. Lean back in the chair to relax arm muscles. One client swears by counting ceiling tiles during shading: “Distraction tricks your brain into ignoring alarms.”
“The best clients communicate openly. A quick pause beats a shaky line any day.”
Remember: Quality work takes time. Trust the process, and you’ll walk out with art that turns heads for years.
Popular Hand Tattoo Styles and Their Longevity

Choosing art for your hands isn’t just about aesthetics—it’s a battle against friction, sunlight, and daily wear. Some styles fade into blurry shadows within years, while others stand defiant against the clock. Let’s explore which designs age like fine wine and which turn into regrettable smudges.
Design Ideas and Placement Tips
Traditional American tattoos with bold black outlines dominate hand real estate for good reason. Thick lines resist spreading better than delicate details. A rose with 3mm outlines? Timeless. Watercolor petals? Likely to dissolve into a bruise-like stain.
Geometric patterns thrive here too. Triangles or mandalas placed along the back of the hand maintain sharp angles if aligned with natural creases. One client’s hexagon sleeve still looks laser-cut after five years—thanks to strategic spacing between shapes.
| Style | Best For | Longevity | Pro Tip |
|---|---|---|---|
| Traditional | Knuckles, wrists | 8-12 years | Use 9RL needles for crisp edges |
| Fine Line | Finger sides | 3-5 years | Go 20% thicker than usual |
| Script | Metacarpal area | 5-8 years | Avoid fonts under 8mm height |
| Geometric | Back of hand | 6-10 years | Follow natural palm lines |
Celestial designs like crescent moons or star clusters work magic on fingers—if kept simple. A local artist notes: “Clients who want micro-constellations end up with connect-the-dots blobs. Scale up by 30% for lasting impact.”
Skip areas that stretch during fist-making. Your lovebird ink might turn into a pterodactyl when skin shifts. Instead, anchor symbols near stable zones like the thumb webbing or wrist bones.
Hand Tattoo Aftercare: Healing and Maintenance

Your fresh ink’s true test starts the moment you leave the studio—hands never get vacations. Unlike other body parts, you can’t pause daily tasks while your healing process unfolds. Let’s tackle how to protect your art without putting life on hold.
Essential Aftercare Steps
Waterproof gloves become your new best friends. Slip them on before washing dishes, cleaning, or any activity involving moisture. “Even brief water exposure can lift ink from finger tattoos,” warns Miami artist Carlos Rivera. Pat-dry your hands gently after washing—no rubbing.
Sunlight is public enemy #1 for new ink. Wear UV-protective fingerless gloves outdoors for 2-3 weeks. Apply fragrance-free moisturizer sparingly—thick layers cause blurred lines. A pea-sized amount thrice daily keeps skin supple without ink bleed.
Managing Touch-ups and Fading
Don’t panic if your knuckle rose loses petals post-healing. High-friction areas like fingertips often need 1-2 touch-ups. Schedule these 4-6 weeks after initial peeling stops. Pro tip: Artists recommend bolder designs for longevity—delicate details fade faster here.
Expect the healing process to take 3-4 weeks instead of the usual 14 days. Constant movement slows skin repair. Keep antibacterial soap handy—clean gently after gym sessions or gardening. One client swears by cotton gloves during sleep: “They prevent accidental scratching without trapping sweat.”
“Hand tattoos age like leather boots—they develop character. Regular touch-ups keep that character from becoming a horror story.”
Managing Pain with Topical Anesthetics & Techniques
Smart strategies turn challenging sessions into manageable experiences. Numbing creams containing lidocaine or benzocaine block pain signals when applied 30-45 minutes beforehand. These formulas work best on bony areas where skin hugs joints tightly.
Breathing techniques help too. Inhale deeply as the needle touches skin, then exhale slowly. This rhythm keeps muscles relaxed and oxygen flowing. Some artists use vibrating tools near the work area—the buzzing sensation distracts nerves from sharper feelings.
Hydration plays a role you might not expect. Well-moisturized skin accepts pigment more smoothly, reducing friction-related irritation. Discuss your artist’s approach beforehand—experienced pros adjust needle depth and speed for sensitive zones.
Open communication matters. A quick pause or position change can reset your comfort level. While sensations vary, modern methods make body art more accessible than ever.