
The Edgar is a bold, modern look that balances a blunt fringe with tight sides. It needs clean lines, symmetry, and regular upkeep to stay sharp. Expect clear guidance on tools, terminology, and whether to style at home or book a barber.
This intro previews who suits the style, how much length you need, and the maintenance rhythm that keeps the look camera-ready. We’ll cover popular variations—from textured tops to tapered and drop fades—so you can pick one that fits your routine.
Key decision points include fringe height, top length, and sides length, all of which affect daily styling time and overall polish. Learn pro tips for explaining the look in the chair and how to fix common mistakes like uneven fringes or harsh blends without losing length.
Key Takeaways
- The look pairs a blunt front line with a structured silhouette for a sharp, wearable style.
- Precision and symmetry around the fringe and temple matter most.
- Decide fringe height and sides length based on your lifestyle and styling time.
- Regular upkeep and clean lines keep the hairstyle camera-ready.
- Bring clear references and simple instructions to your barber for best results.
- Choose a finish—sleek or textured—before your appointment to avoid surprises.
What Is an Edgar Haircut? Key Features, Fit, and Why It’s Trending
A signature blunt fringe, fuller top, and tight sides/back create a structured, camera-ready silhouette. This style looks simple but needs precision to read well on a forehead and along the temple line.
Core blueprint: a clean horizontal fringe, balanced weight on the top, and a controlled fade or taper that hugs the head without bulk. The result is bold yet wearable.
Fit depends on face shape and texture. Broader foreheads can handle a softer fringe; narrow faces often benefit from slightly more height on top for balance. Straight strands make the geometry sharp. Wavy or curly types should keep a bit more length up top to keep movement.
- Lifestyle tip: low-fuss wearers can pick a longer top to air-dry. Daily stylers can choose tighter sides and crisper lines.
- Tool note: sharp scissors and steady scissor work at the fringe are vital to avoid unevenness that shows against the forehead.
- Why it’s hot now: the punchy outline, easy photo references, and room for variations—fades, undercuts, or disconnects—make it a go-to look.
Signature Shape and Who It Suits
The blueprint centers on a blunt front line and longer top with a subtle fade on the sides and back to keep the profile clean. Regional nicknames exist, so bring photos to your barber to lock in the exact variation you want.
Origins and Culture: From Jumano “cap” looks to social media fame

The shape’s origin mixes playful sports references with much older regional styles. One story nods to a Puerto Rican player who made the name catchy. Another points to Jumano-era “cap-like” styles recorded by Jack D. Forbes centuries ago.
Rasquachismo helps explain why the style stuck: it celebrates DIY pride and resists respectability rules. For many people, choosing this look is a small act of cultural inversion and humor.
Social media and meme culture amplified the silhouette fast. Accounts like Foos Gone Wild and other pages turned a regional shape into a recognizable trend among young Latinos across U.S. cities.
Controversy also played a role. School pushback in places like El Paso sparked debate and, ironically, more attention.
- The name and older traditions can coexist—one is a nickname, the other a longer history.
- Its simplicity invites tweaks: varied sides lengths, temple graphics, or softer tops.
- Community pride and algorithmic sharing drove the style from streets to wider scenes.
“A modern nickname sits on top of a deeper regional story—both matter to the people who wear it.”
Understanding Variations: Classic, Fluffy, Taper, Fade, and More
Designs in this family range from the original blunt line to bold modern takes. Each variation changes how aggressive or soft the look reads. Small tweaks at the top or temples make a big visual difference.
Classic vs. Modern: disconnects and undercuts
Classic: a blunt fringe, weight through the top, and minimal blending to preserve a strong outline.
Modern: sharper disconnects or undercuts and more aggressive fade placement to slim the profile.
Fluffy options and volume on top
The fluffy edgar and fluffy edgar haircut favor lift and softer edges. These versions add movement while keeping the defining front line.
Taper and fade spectrum
Low skims the ears, mid balances structure, and high maximizes contrast. Choose based on comfort and styling time.
“Precision at the perimeter keeps symmetry and makes each variation read cleanly.”
| Style | Sides | Effect |
|---|---|---|
| Low taper | Skims ears | Subtle, easy to maintain |
| Mid taper | Balanced fade | Classic shape, modern edge |
| High taper | High fade | Sharp contrast, elongates face |
- Try an edgar buzz cut for ultra-low maintenance while keeping the front line.
- Curly hair benefits from a slightly longer top to control puffing and celebrate texture.
- Bookmark reference photos and note exact top and sides lengths before you sit in the chair.
Tools and Products You’ll Need for a Clean, Precise Finish
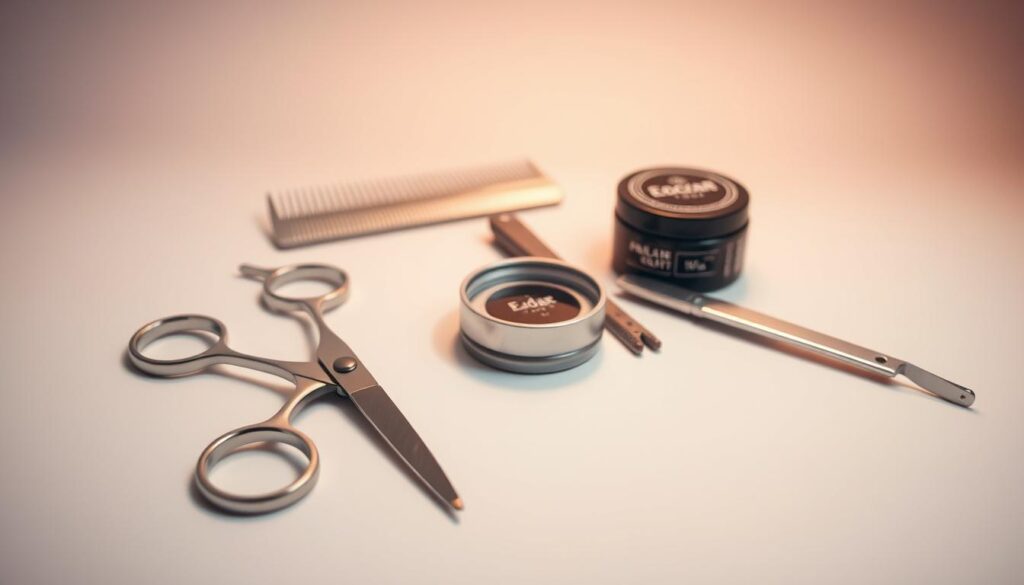
A tidy kit of tools saves time and helps keep every perimeter sharp and symmetrical. Start with the basics and add quality items as you learn what matters most for the style.
Clippers, guards, scissors, trimmers, and styling aids
Essentials: an adjustable set of clippers with sharp blades and a full guard set is key for consistent sides work and clean back detailing.
- Scissors for precise fringe work and subtle top shaping that keeps the line crisp without chunking.
- A lightweight trimmer and detail shaver to define lines around the forehead and temples.
- Styling aids: matte paste for texture, mousse for fluffy lift, light hairspray for hold, and a small round brush to shape the top.
- Water spray, sectioning clips, and a comb set (wide and fine) to guide both scissors and clippers along the sides and back.
- Good lighting and a hand mirror to check symmetry where the back meets the neckline.
For men with dense hair, choose stronger-hold products; finer hair needs lighter formulas to preserve lift at the top. Keep tools sanitized and sharp, and practice steady hand movements so each pass improves the lines and reduces the need to rework the cut.
“Patience, precision, and symmetry make every pass count.”
Consultation Prep: How to Ask Your Barber for the Style You Want
Walk in with clarity—photos, guard numbers, and a short plan—to get a consistent result. A brief roadmap helps your barber hit symmetry and avoid guesswork.
Bring clear references and name the variation
Bring at least three photos showing the exact edge you like. Point out the fringe line and any temple detail you want stronger or softer.
Specify lengths for top, sides, and back
Give guard numbers for the sides and explain how high the blend should travel up the back. Say if you want more weight on top or a lighter feel for daily styling.
Talk part, routine, and maintenance
Mention whether you plan a subtle part and how much time you spend on styling. Ask how often to return to keep the line sharp if you prefer very tight sides.
- Use clear phrases: “keep more weight on top” or “cleaner line at the temples.”
- Request a mirror check halfway through to confirm balance.
- If unsure, start conservative and adjust the fringe line in small steps.
“Summarize the plan aloud so you and your barber leave the chair on the same page.”
Step-by-Step: How to Cut an Edgar at Home (If You Choose DIY)

Take your time and work in short steps—this style rewards small, steady passes more than bold moves. Start with clean, dry hair and a clear plan. Mark a conservative baseline just above the eyebrows and secure the rest of the top away from the fringe.
Sectioning and baseline
Comb the fringe straight down and use sharp scissors to trim small, horizontal sections. Check the line against the forehead from several angles.
Clippers on the sides and back
Switch to clippers for the sides back. Pick a fade height that suits your face, work guard-by-guard, and keep the machine parallel to the skull for even lines.
Top techniques
Use point-cutting to remove bulk while keeping the strong outline on the top. Light texturizing creates movement without weakening the front line.
Refining the line-up
Detail the temples and fringe with short, gentle passes. Step back with a hand mirror to confirm symmetry, tidy the neckline, and remove stray hairs for a camera-ready finish.
- Final styling: matte paste for grit or mousse for lift on the top.
- Maintenance: trim the line every 3–5 weeks to keep edges sharp.
edgar hair cut
This phrase serves as an umbrella for the blunt-fringe family—a straight front line with tailored sides, a shaped back, and a top length that defines the final vibe.
Choose top length first. More length gives styling flexibility for a fluffy edgar or a textured finish. A shorter top locks in a sleeker, low-maintenance look.
For the profile, pair the fringe with a subtle blend on the sides if you want a smoother silhouette. Or push contrast with a tighter base to make the fringe pop.
- Product match: pick light paste or mousse for lift, matte paste for grit, and a smoothing cream for a sleek finish.
- Keep a small lift at the top to balance density and avoid a heavy forehead line.
- Do a quick weekly cleanup around the ears and neckline to extend time between barber visits.
Save a clear front and side photo to show your barber exactly where the line should sit and how far back to trim. Make small seasonal trims if you prefer cooler lengths in summer.
“A little weekly upkeep and the right product keep the look consistent and recognizable.”
| Decision | Option | Result |
|---|---|---|
| Top length | Long / Medium / Short | Fluffy lift / Balanced styling / Sleek finish |
| Sides | Subtle blend / Tight base | Smoother profile / Strong contrast |
| Maintenance | Weekly tidy / 3–5 week trims | Fresh neckline / Sharp fringe line |
Fluffy Edgar Cut Playbook: Build Height and Texture on Top
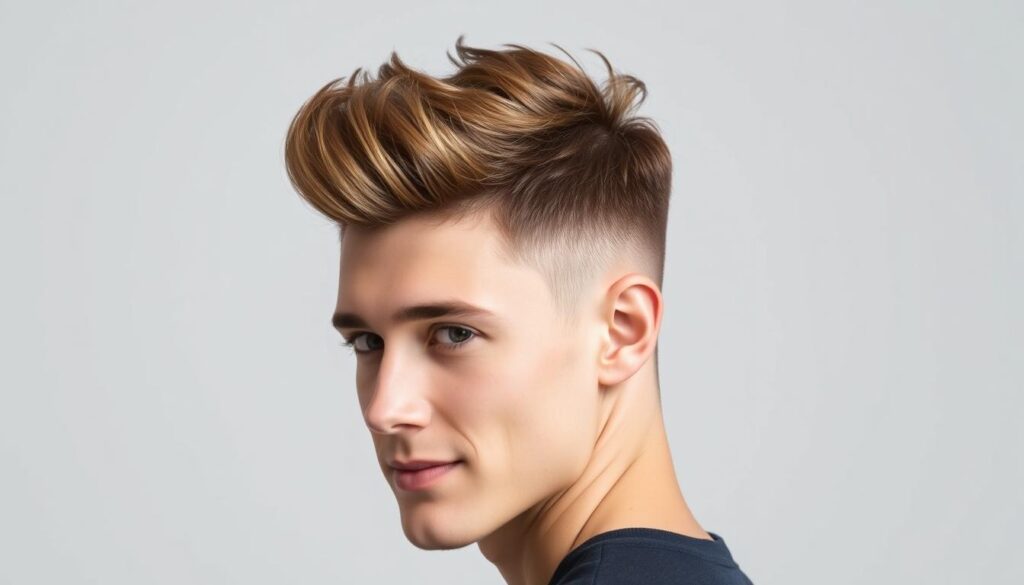
Start by planning volume at the crown so the top reads airy rather than heavy. The fluffy edgar approach keeps a defined front line while adding lift and movement on the hair top.
Layering and tools
Scissors-over-comb removes bulk without collapsing volume. Work short, angled layers to raise the top while keeping the fringe sharp.
Use mousse at the roots and a pea-sized matte paste on the surface. That combo sets texture and preserves natural movement.
Shaping and routine
A low taper anchors the sides and back so the longer hair on top stays the focus. For slight curls, diffuse on low heat to boost lift and avoid frizz.
- Try a soft, invisible part to guide direction while keeping the front line bold.
- Finger-style and air-dry for a laid-back look that refreshes fast.
- Refresh day two with a mist, re-activate mousse, and pinch sections for instant lift.
“Less product is more — overload will weigh down the top and blur the silhouette.”
Schedule: trim every 3–5 weeks to remove weight at the crown. For textured variations and a reference on curls, see the curly wolf cut for men.
Taper and Fade Options: Low, Mid, High, and Drop Fade
Choosing the right taper placement changes the whole silhouette and upkeep. This section explains common taper fade choices and how they shape the sides and back while keeping the front line intact.
Low taper is subtle and grows out well. It gives a conservative profile that still looks clean. Ideal if you want minimal visits and a soft transition to the sides.
Mid taper balances contrast and maintenance. It lifts the eye upward and pairs well with most top lengths. Ask for a mid taper for everyday wear that still reads intentional.
High taper creates bold contrast and sharp edges. Choose a higher taper to emphasize cheekbones and slim the side view without touching the top. This reads dramatic and often needs more frequent touch-ups.
Drop fade and practical tips
The Drop Fade Edgar cut traces the skull curve to contour the head. It slims the profile and makes the outline cleaner around the back head.
- Match taper height to hair density—thicker sides benefit from higher taper.
- Use consistent guard progressions to avoid uneven blends on both sides back.
- Barber cue: say “mid taper, soft drop, preserve temple line” to lock the finish.
| Option | Effect | Maintenance |
|---|---|---|
| Low taper | Subtle contrast | Easy grow-out |
| Mid taper | Balanced silhouette | Moderate trims |
| High taper / Drop fade | Sharp contour | Frequent visits |
“Pick the taper to match your density and the top sides transition — disconnected reads bold, blended reads sleek.”
Curly and Wavy Hair: Techniques for Definition Without Frizz

Texture changes everything—coils and waves need a different plan than straight strands. Work with natural pattern, not against it, to keep the front line clear and the top defined.
Curly care: diffusing and length balance
Keep the top slightly longer so coils can form without ballooning. Trim conservatively near the fringe so the line stays readable when dry.
Use a curl cream on damp areas and diffuse on low heat while scrunching. Avoid heavy gels that create cast at the front.
Wavy and straight variations: sleek or messy
For waves, add sea-salt spray for bend and finish with a tiny touch of matte paste to hold shape.
If you want a sleek finish for straight types, blow-dry the fringe downward and apply a light balm to seal flyaways. A gentle taper fade on the sides reduces bulk and highlights definition up top.
- Keep the part optional; many curly takes benefit from a subtle directional set.
- Schedule small, frequent trims to keep the outline tidy without over-shortening curls.
- Choose hydrating but light products to preserve movement and a defined edge.
“A crisp front line can coexist with texture if you trim in small increments and check the shape dry.”
Lines and Designs: Forehead Line, Temple Details, and Creative Art
The front line is the anchor for any design—treat it like the headline of the style. Decide first if you want the forehead line pure or if small temple touches will add personality.
Keep it precise. Use a trimmer with light pressure and steady hands so the line stays crisp without digging into the scalp.
Choose design work for special events, branding, or when tight sides amplify contrast. Simple geometric slashes, micro-curves, or a playful Spongebob Edgar cut add flair but must balance the overall look.
Mark guide points across the head before carving to check symmetry. Resist overworking the part area so lines complement the shape rather than compete with it.
Maintenance note: designs need touch-ups every 2–3 weeks. Avoid heavy creams directly on the line so the edge looks sharp longer.
“Precise line work can make a basic haircut feel custom without changing the shape.”
| Design | Best Pairing | Upkeep |
|---|---|---|
| Single temple slash | Low to mid fade | 2–3 weeks |
| Geometric cluster | High fade or tight sides | 2 weeks |
| Micro-curves / themed art | Subtle fade, balanced top | 2–3 weeks |
For fade placement options and care, see fade types. Small, restrained lines often read best and keep the defining forehead line clear.
Mullet Hybrids and Takuache Influence: Bold Takes on the Look
A bold hybrid keeps the blunt front but adds deliberate length at the nape for a modern throwback vibe. This approach shapes the back head to add attitude while keeping the defining front line intact.
Edgar with mullet and Mexican mullet
The edgar-with-mullet variation pairs a straight fringe up front with a pronounced tail in back. Expect tighter sides and a longer rear that frames movement when you turn.
Mexican mullet cues push the contrast: cleaner front and sides, with a fuller, party-ready tail. It reads bold and intentional, not accidental.
Takuache cuh styling cues and texture
Takuache culture often mixes boots, trucks, and swagger into the aesthetic. Texture matters—add volume at the crown and flow through the back for that signature motion.
Use a moderate fade to bridge the top and tail so the transition looks planned. Add fluffy edgar elements up top to balance the longer rear.
- Maintenance: trim the back length to avoid ragged ends while keeping the rebellious vibe.
- Products: light paste for the front line and flexible spray for movement through the back.
- Try subtle color or sheen to highlight flow without overwhelming the overall style.
“This hybrid is also known by several regional names—bring photos to lock in proportions.”
Styling the Top Daily: From Sleek to Tousled “Media-Ready” Looks
Your morning routine sets whether the top reads sleek under lights or airy on camera. Pick one route and keep steps short so the finish is consistent day after day.
Products for shine, hold, and fluffy lift
Sleek option: blow-dry the top downward with tension, then apply a light pomade or balm for smooth shine without greasiness. A tiny amount goes a long way.
Tousled route: rough-dry the hair top against growth, add mousse at the roots, and finish with a pinch of matte paste towards top for airy volume. This creates the fluffy edgar vibe that photographs well.
- Start with a pea-sized product and build slowly to avoid stiffness.
- Finish both routes with a light hairspray to lock the front while keeping the sides tidy.
- Seasonal tweak: use anti-frizz balm in humidity; a light cream in dry months for flexibility.
- Adjust taper upkeep so styling focus stays towards top, not the sides.
“Consistent blow-dry direction trains the top, so tomorrow’s routine is faster and more predictable.”
For a textured edgar cut reference and more top-focused options, see a quick guide to the french top.
Maintenance Schedule: Trims, Fades, and Upkeep Between Visits
A steady routine is the secret to keeping the front line and fades looking fresh.
Basic rhythm: plan a full barber visit every 4–6 weeks to preserve the fringe and overall shape. For very tight sides and high taper work, expect 2–3 week cleanups to keep the fade sharp.
Do a quick at-home tidy around the neckline and ears every 10–14 days. Use small scissors or an electric trimmer and check for stray strands along the sides and back.
Check the top head for bulk every few weeks. Remove minimal weight so proportions stay right without shortening the defining line.
- Men who prefer a high taper need more frequent visits than low taper wearers.
- Wash less often, use dry shampoo when needed, and re-activate product with a light mist to refresh the shape.
- Use a soft brush each morning to reset the front line and protect the silhouette under hats.
- Keep photos of your best look and reconfirm guard numbers and taper placement at each appointment.
- Track how popular among peers tighter versions are, but pick the variation that fits your upkeep tolerance.
| Service | Timing | Why |
|---|---|---|
| Clean-up (sides/back) | 2–3 weeks | Maintains sharp fade lines |
| Full haircut | 4–6 weeks | Refreshes fringe and balances top |
| At-home tidy | 10–14 days | Extends time between barber visits |
| Top head check | Every few weeks | Remove weight, keep proportion |
“Plan trims around busy years and seasons so the outline never softens.”
Common Mistakes and How to Fix Them
When lines lose symmetry, the whole look reads off. Precision matters; small, steady moves recover a defining line without overworking the head.
Jagged front line: Re-wet the fringe, comb straight down, and make micro-cuts. Keep the head still and trim in tiny, even passes.
Uneven fade or taper: Revisit the blend with half-guard steps from the sides back up. Use a mirror to compare the back sides at equal heights.
Harsh transition at the top sides: Point-cut lightly at the ridge. Smooth enough to blend, but don’t erase the definition that frames the top sides.
| Problem | Symptom | Quick Fix |
|---|---|---|
| Over-thinned top | Won’t hold shape | Stop texturizing; grow two weeks, then rebuild with blunt sections |
| Asymmetric temples | Uneven lines | Outline with guide dots and a trimmer; realign carefully |
| Product buildup | Dull definition | Clarify weekly, switch to lighter stylers |
Grow-out woes: Pick a lower taper and softer lines so in-between weeks stay wearable. For DIY repairs and styling tips, see the wolf cut DIY guide.
“Small, measured passes beat bold fixes—patience keeps the silhouette true.”
Conclusion
What makes the edgar haircut work is its bold front line, clean structure, and the high-contrast silhouette that reads modern in any setting.
The name carries a layered backstory—from a player-linked nickname to older regional cap styles—and its rise via social media helped it spread among young people as a cultural and visual statement.
Pick the version that fits your routine. Decide the front line, choose taper height, and keep weight balanced towards the top head. Small shifts to the part, slightly longer hair up front, or a higher taper refresh the look without starting over.
Last tips: save photos of your best day, schedule steady trims, and experiment with confident, measured tweaks. Whether you keep it classic or try creative edgar cuts, the result rewards precision and personality.
