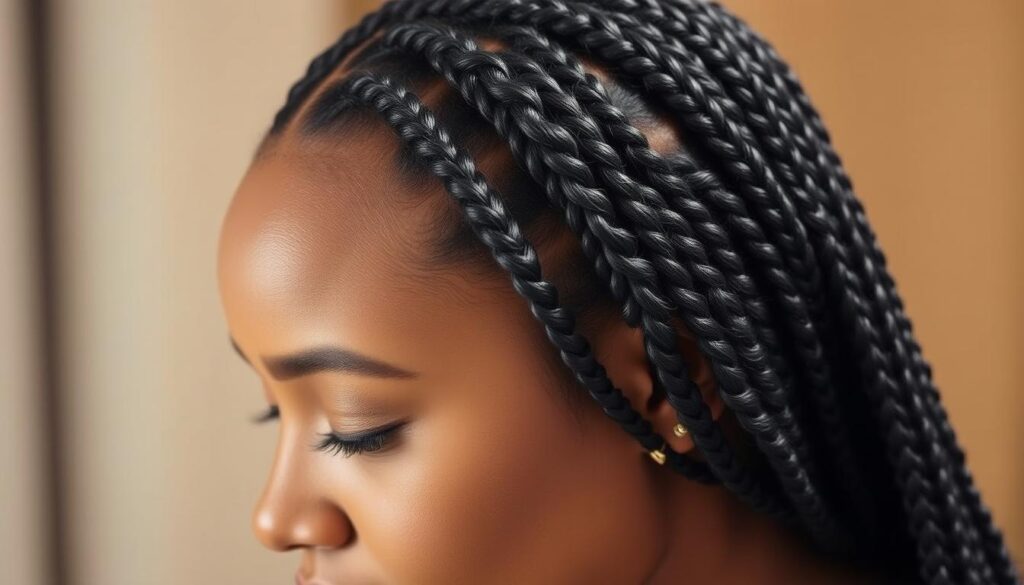
This intro explains two takes on goddess braids so you know which method the tutorial covers. Historically, the term can mean large inverted cornrows. Today, it often refers to a knotless box version with curly strands left out for a relaxed, feminine bob look.
The modern bob option mixes knotless feed-in technique with X-Pression braiding hair and 2–3 curly add-ins per braid. Installers usually use regular X-Pression (not pre-stretched) so length is custom-cut.
Why this style is everywhere: it is lightweight, low-maintenance, and easy to wear on a busy day. Typical installs take 4–7 hours, and simple night care—two plaits plus a silk scarf or bonnet—keeps curls fresh.
Read on for quick definitions, prep and products, a step-by-step install for the chin-to-shoulder bob, maintenance musts, and pro tips you can follow at home.
Key Takeaways
- This tutorial focuses on the knotless, feed-in goddess braid bob with curly add-ins.
- X-Pression hair (regular) and human curls help reduce tangles and create a natural finish.
- Expect 4–7 hours for installation; first-timers should set realistic time goals.
- Night routines and lightweight oils extend freshness and protect the scalp.
- The style is versatile and ideal for busy schedules thanks to low maintenance.
What are goddess braids today? Quick definitions, key looks, and why they’re trending

The phrase has evolved: once it meant big, wrapped cornrows; now it often describes knotless box styles with relaxed curly pieces.
Classic meaning vs. modern usage
Classic: Historically, the term described large inverted cornrows that could wrap the head in halo-like patterns. These were bold, protective, and distinct from Ghana braids or goddess locs.
Modern: On social feeds and in salons, it usually means knotless box work with left-out curls for a soft, boho bob or longer finishes. Stylists like Antoinette Ale and Nneka Allison helped push the chin-to-shoulder bob into the mainstream.
Why the look is popular now
The appeal is practical: this style feels lightweight, installs faster than long braids, and works with middle or side parts. Install times reported by creators and stylists range from 4–7 hours, so clients can plan accordingly.
- Shorter lengths cost less and need fewer touch-ups.
- The bob blends blunt shape with airy curls for movement.
- Photo-driven trends favor the wearable, romantic finish of these braided hairstyles.
Goddess braids prep: hair types, tools, and products for a protective style that lasts

Start by choosing extensions and a prep routine that protect your natural hair and scalp. Picking the right base hair and curl add-ins makes install work and wear-time easier.
Choose your hair
X-Pression (regular, not pre-stretched) is a go-to for cutting crisp bobs. It lets stylists trim length without bulky ends. For curls, keep add-ins about 16 inches or shorter for a tidy silhouette.
Human hair tangles less and looks neater over time. Synthetic hair is budget-friendly but may irritate sensitive skin. If you’re new to synthetic hair, do a patch test or rinse bundles in diluted apple cider vinegar and air-dry before use.
Prep natural hair and scalp
Cleanse the scalp thoroughly, then gently stretch or blow out so parts are precise. Start with light moisture—not greasy—so sections stay supple while you feed in extensions.
Aim for low-tension feed-in techniques to protect roots. Protect scalp health by avoiding tight pulls that cause tenderness or breakage.
Toolkit and product lineup
- Rat-tail comb, clips, and an edge brush for neat parts.
- Foaming mousse or setting foam (e.g., ORS Olive Oil Wrap Mousse) to smooth flyaways.
- Light oils or serums for shine and scalp care.
- Silk/satin scarf, bonnet, or pillowcase for nightly protection.
How to install goddess braids (including the trending bob) step by step

Start your install with precise box parts so the finished bob sits balanced and clean.
Sectioning and parting choices
Make even box parts with either a middle or side part depending on your desired look. Choose a stitch detail for texture or a clean part for a seamless finish.
Feed-in, knotless technique
Use a knotless, feed-in method to add extension hair gradually. This keeps the base flat and controls tension so the scalp stays comfortable.
Adding curls for a boho effect
Insert two to three small curly strands per braid as you go. Clip them aside while braiding, then release at the end for a soft halo of curls.
Creating the bob length and finishing
Cut regular X-Pression into shorter pieces to hit chin-to-shoulder length. Leave ends slightly curly for bounce. Finish with mousse to smooth flyaways and trim stray fibers for a polished silhouette.
Salon vs. DIY: timing and tips
- Expect 4–7 hours for a full install; two hairstylists speed the process.
- Manage tension by keeping a firm but gentle grip, especially at the hairline.
- Check symmetry often so the bob reads even across the head.
Maintain goddess braids: nighttime routine, scalp care, washing, and how long styles last

A simple nightly habit goes a long way toward keeping your knotless bob and left-out curls tidy.
Nighttime protection matters most. Put the work into two loose plaits, then wrap with a silk or satin scarf or bonnet. Sleeping on a silk pillowcase reduces friction that frays curls and roughs the ends.
Protect while you sleep
Two plaits prevent tangles and keep the silhouette neat. A scarf or bonnet locks in the shape and protects the head overnight.
Scalp health first
Apply a lightweight moisturizer or hydrating serum two to three times weekly to support scalp comfort. Avoid heavy greases that build up along parts.
If you like oils, use a few drops of argan or olive oil blend. Rub gently into the scalp and smooth any residue down the strands to refresh shine without slickness.
Cleanse without frizz
Wash smart: dilute shampoo and apply it along the scalp between parts. Rinse carefully to lift sweat and product while limiting frizz on the left-out pieces.
How many weeks can they last?
- Large, classic cornrow styles usually look crisp for about one to two weeks with careful wrapping.
- Bob-length knotless sets can stay neater longer, especially when human hair is used for the curls.
- Set your wash cadence to your lifestyle—weekly to every three weeks is common.
Tip: Refresh flyaways with a foaming mousse like ORS Olive Oil Wrap Setting Mousse or got2b Be Twisted Air Dry Curl Foam to redefine curls without stiffness.
Conclusion
Choose your vibe: pick classic large inverted cornrows for bold patterns or the modern knotless bob for a lighter, low-maintenance finish. Each option calls for a different routine and look.
Start strong in prep—clean parts, the right extensions (think X-Pression or human curl add-ins), and gentle tension make the biggest difference on day one.
Try lengths and parting to find personal ways to wear these braided hairstyles, from chin-skimming bobs to long goddess options. Use silk/satin protection nightly and light scalp care to extend wear.
Save reference photos and note what you liked. With the right tools and technique, your braid game will stay polished and comfy—now pick a style and make it yours.
