Imagine a form of body art so enduring it survives millennia. Scientists found proof when they discovered Ötzi the Iceman in 1991—a 5,200-year-old mummy with 61 tattoos. Ancient Egyptians also used permanent markings to showcase status and spiritual beliefs. But how does this ancient practice create lifelong designs on living skin?
Tattoos aren’t just modern fashion statements—they’re ancient symbols with deep roots. From identifying outcasts in Rome to celebrating rites of passage in Polynesia, cultures worldwide have embraced this art. Today’s artist uses advanced tools, but the core process remains a dance between precision and biology.
Your skin becomes a canvas as needles deposit ink into its second layer. This triggers your immune system to trap pigment particles, creating permanent designs. But why do some fade while others stay crisp? The answer lies in technique, aftercare, and even your body’s unique response.
Key Takeaways
- Tattooing dates back over 5,000 years, with Ötzi the Iceman as the oldest known example
- Ink becomes permanent when immune cells encapsulate pigment in the skin’s dermis
- Fading depends on ink quality, sun exposure, and individual healing processes
- Modern artists combine ancient symbolism with cutting-edge equipment
- Proper aftercare significantly impacts a tattoo’s long-term appearance
- Cultural meanings have evolved from status markers to personal storytelling
Introduction to the World of Tattoos

For thousands of years, humans have transformed their skin into living stories. What began as sacred symbols evolved into a global language of self-expression. Let’s uncover how this ancient practice shaped societies and ignited creative revolutions.
Exploring the History and Cultural Significance
Early explorers like Captain Cook returned from Pacific voyages with more than spices—they brought tattooed Polynesian chiefs to Europe. Sailors adopted these markings as badges of adventure, sparking curiosity in Western societies. By 1846, Martin Hildebrandt opened New York’s first tattoo shop, catering to naval crews and soldiers.
Cultural perceptions shifted dramatically through time. In the 1920s, body art became linked to rebels and outcasts. Yet cosmetic tattoos quietly gained traction among women seeking subtle enhancements. Fast-forward to today: 30% of Americans sport at least one tattoo, blending ancient traditions with modern aesthetics.
| Time Period | Region | Cultural Purpose | Tools Used |
|---|---|---|---|
| 2000 BCE | Egypt | Status symbols | Bronze needles |
| 1000 CE | Polynesia | Rites of passage | Shark teeth combs |
| 18th Century | Europe | Military identification | Hand-carved needles |
| 21st Century | Global | Personal storytelling | Electric machines |
This art form bridges generations. From Maori facial designs preserving lineage to today’s watercolor masterpieces, permanent markings continue evolving. Celebrities and everyday people now wear their histories visibly—a far cry from their taboo past.
Understanding How Do Tattoos Work

Your skin becomes a biological vault when receiving permanent designs. The magic happens beneath the surface where specialized cells and tissue interact with pigment.
The Science Behind Skin Layers and Ink Deposition
Your body has two key layers for art preservation. The epidermis acts as a protective shield that renews monthly. Beneath it lies the dermis – a stable network of collagen and elastic fibers.
Needles deliver pigment 1.5-2 millimeters deep into this second layer. Immune cells swarm the area, treating ink as foreign material. These warriors called phagocytes engulf color particles but can’t destroy them.
| Skin Layer | Depth | Function | Ink Interaction |
|---|---|---|---|
| Epidermis | 0.1mm | Protective barrier | Sheds pigment |
| Dermis | 1-4mm | Structural support | Traps ink permanently |
Over weeks, your body forms new tissue around trapped pigment. Fibroblasts in the dermis lock colors in place through collagen production. This natural containment system explains why quality work lasts decades.
Depth matters more than you might think. Shallow placement causes fading as skin regenerates. Excessive depth leads to blurred lines and potential scarring. Artists master this balance through precise needle control.
Tattoo Preparation and Sterilization

Walking into a professional studio feels like entering a medical lab meets art gallery. Your tattoo artist transforms their workspace into a sterile environment before your session begins. Every surface gets wrapped in protective barriers, while tools soak in hospital-grade disinfectants.
Maintaining Sterile Tools and Safe Practices
Watch as your artist cracks open sealed needle packages – a visual guarantee of single-use equipment. Autoclaves sterilize reusable items at temperatures exceeding 270°F, eliminating bacteria and viruses. Disposable ink caps hold fresh pigments, never reused between clients.
Gloves change constantly – after touching phones, adjusting lights, or handling aftercare instructions. Sharps containers swallow used needles immediately, while biohazard bins collect anything contacting bodily fluids. These protocols slash infection risks dramatically.
Design Transfer and Stencil Application
Your chosen design comes alive during this critical phase. Special transfer paper presses the artwork onto your skin, creating a temporary blueprint. This stencil stage lets you approve placement and size before permanent ink hits your body.
Artists often shave the area first for better adhesion. They might adjust lines freehand if your body’s curves distort the image. Once satisfied, you’ll see the final blueprint – your last chance to tweak positioning before the machine starts humming.
The Tattooing Process: Outline, Shading & Color

Your artist transforms blank skin into living art through strategic layering. Like building a house, they start with structural blueprints before adding decorative elements. This phased approach ensures crisp results that withstand time.
Establishing the Outline and Tracing the Design
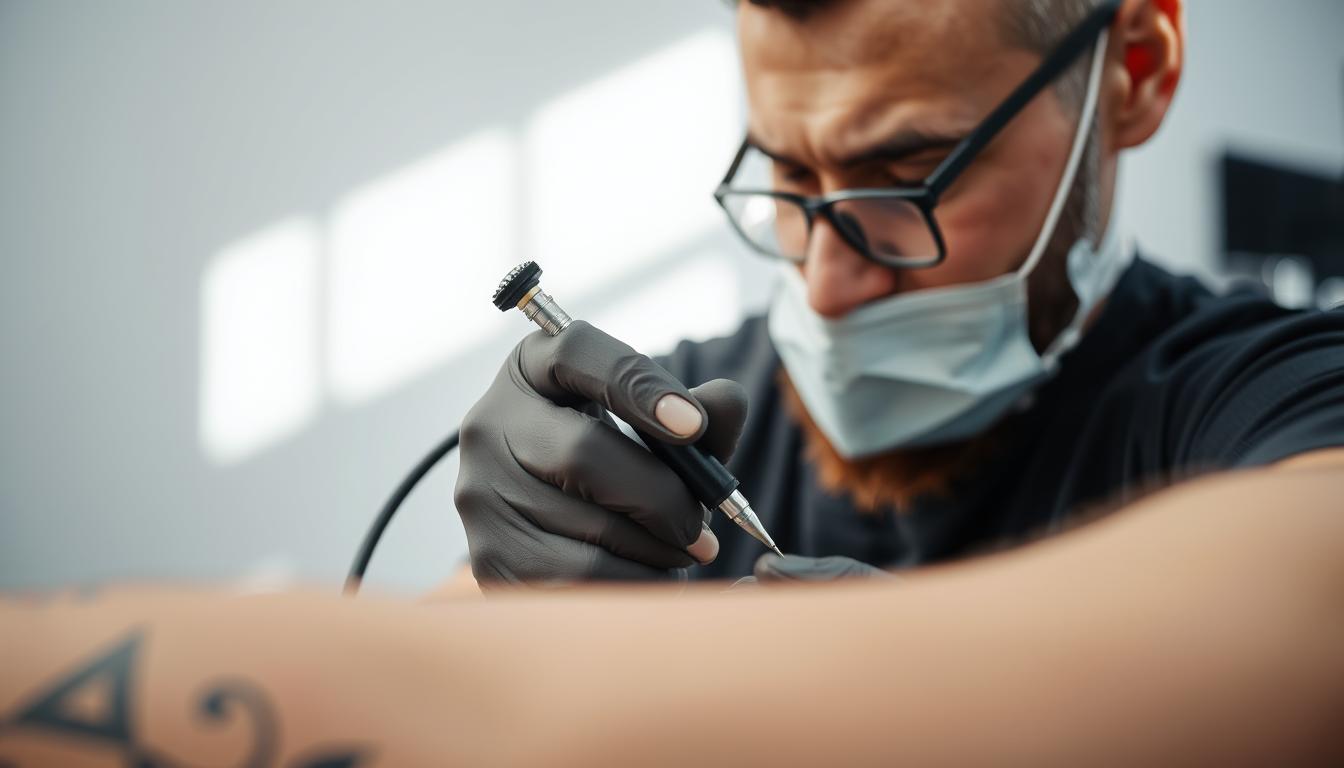
Thin needle clusters become precision pens during this initial stage. You’ll feel rapid vibrations as the machine creates 80-150 punctures per second. Each line serves as an anchor point—crooked strokes here mean crooked art forever.
Artists often switch between single needles and tight groupings. They follow your stencil like a road map, adjusting pressure for consistent depth. This foundation phase demands intense focus, as corrections become challenging later.
Achieving Depth with Shading and Color Techniques
Wider needle configurations take over once the outline sets. Gray washes create shadows through strategic dot patterns. Lighter tones go down first—yellows and peaches before rich blues or blacks.
Watch as colors blend like watercolors. Your artist builds saturation through overlapping passes. Darker pigments get saved for last, allowing easier adjustments. This layered approach prevents muddy tones while boosting vibrancy.
Essential Tattoo Instruments and Machines

Modern body art owes its precision to Samuel O’Reilly’s 1891 invention – the first electric tattoo machine adapted from Thomas Edison’s engraving device. Today’s tools combine historical ingenuity with space-age engineering, allowing artists to create crisp lines and vibrant colors that last decades.
Understanding Tattoo Machines and Needle Configurations
Your artist’s primary tool uses electromagnetic coils to drive needles at 80-150 cycles per minute. This rapid motion allows precise control over ink deposition depth (2-3 millimeters) while minimizing skin trauma. Three key configurations dominate studios:
- Single needles for hair-thin lines
- Magnum clusters for shading gradients
- Round liners for bold outlines
Selecting High-Quality Tattoo Ink
Premium tattoo ink balances safety with vibrancy. Look for brands using organic pigments suspended in medical-grade carriers. “The best inks undergo third-party testing for heavy metals,” notes a Chicago-based studio owner. Avoid cheap alternatives containing questionable dyes that might blur or cause reactions.
Modern formulations include:
- UV-reactive options for hidden designs
- All-natural plant-based pigments
- Fade-resistant color boosters
Managing Risks: Infection, Allergic Reactions, and Aftercare

Your new body art deserves protection from day one. While modern studios prioritize safety, understanding potential risks helps you become an active partner in the healing process. Knowledge transforms aftercare from a chore into a preservation strategy.
Identifying Common Risks and How They Occur
Infection tops the list of concerns, often stemming from contaminated tools or neglected aftercare instructions. Watch for persistent redness, yellow discharge, or fever—these demand immediate medical attention. Artists prevent 90% of issues through sterilization, but your vigilance completes the safety chain.
Allergic reactions might surprise you months later. Redness around specific colors—especially reds and yellows—often signals sensitivity to pigment ingredients. Nickel and mercury in some inks trigger these responses, though most reputable brands now avoid these metals.
Critical Aftercare Instructions to Protect Your Tattoo
Treat fresh ink like a prized painting. Wash gently with fragrance-free soap, then pat dry with paper towels—cloth breeds bacteria. Apply thin layers of ointment for three days, switching to unscented lotion as tattooed skin begins peeling.
Sunlight fades colors faster than time itself. Use SPF 30+ after healing, and avoid pools for three weeks. Picking scabs? That’s like erasing parts of your artwork—let flakes fall naturally.
Tips for First-Timers: Choosing the Right Artist and Shop
Ready to make your body art vision a reality? Your experience hinges on two critical choices: selecting a skilled tattoo artist and a reputable studio. These decisions determine both your safety and the artwork’s longevity.
Evaluating Artist Expertise and Portfolio
Flip through portfolios like you’re curating a gallery. Look for artists whose style matches your vision—whether bold traditional pieces or delicate watercolor blends. Specialists often produce better results than generalists.
Check healed photos in their portfolio. Fresh ink always looks vibrant—healed images reveal true skill. Schedule consultations to discuss placement and design adjustments. A great artist listens while offering professional insights.
Ensuring Shop Cleanliness and Licensing Standards
Walk into studios with the same scrutiny you’d use for a medical office. Licensed tattoo shops display health permits and sterilization certificates openly. Watch for autoclaves—these pressurized sterilizers are non-negotiable.
In states like Oregon, unlicensed facilities face felony charges. Observe glove changes during consultations. Needles should come from sealed packages every time. Your health deserves this level of care when getting tattooed.
Investing in experienced artists and hygienic spaces pays dividends. Your skin deserves masterful craftsmanship paired with uncompromising safety standards. Choose wisely—this art lasts forever.