What if taking off your glamorous artificial nails could protect your natural ones instead of harming them? Many people rush the removal process, only to face brittle, damaged nail beds. But with the right approach, you can maintain healthy nails while switching up your style.
Whether you’re dealing with temporary press-ons or long-lasting acrylic extensions, each type requires specific care. Stick-on designs might seem simple, but even those demand gentle techniques. Full-coverage or sculpted styles often need specialized tools and patience to avoid peeling or splitting your natural nails.
Proper removal isn’t just about aesthetics—it’s a science. Adhesives bond differently depending on the nail type, and forcing them off risks cracks or infections. By understanding these materials, you’ll save time, money, and discomfort.
Key Takeaways
- Different artificial nail types require unique removal methods
- Gentle techniques prevent damage to natural nail beds
- Specialized tools improve safety and efficiency
- Rushing the process often leads to long-term issues
- Professional-quality results are achievable at home
Understanding Fake Nails and Their Challenges

Ever wonder why some artificial styles last weeks while others peel off quickly? The secret lies in their construction. Modern nail enhancements come in various forms, each with unique adhesive properties that demand tailored removal approaches.
Types of Fake Nails
Press-on varieties stick with temporary adhesive, making them ideal for short-term wear. Full-coverage extensions use stronger bonds for extended durability. Acrylic nails combine liquid and powder to create hardened layers, while gel styles cure under UV light for flexible strength.
Sculpted designs often require professional application at a salon. These intricate styles bond tightly to your natural nail surface, demanding extra care during removal. Knowing which type you’re dealing with determines your next steps.
Common Issues with Removal
Rushing the process ranks as the top mistake. Cyanoacrylate-based adhesives – the key ingredient in most nail glues – form molecular bonds stronger than typical household adhesives. Pulling them off dry can strip layers from your natural nail bed.
Using harsh tools like metal files increases fracture risks. Even acetone solutions need proper timing – too little soaking leaves residue, while excessive exposure dries out cuticles. Gel nails pose particular challenges since their flexible structure resists standard removal methods.
By recognizing these nuances, you’ll preserve your nail health while switching styles. Proper technique beats brute force every time.
Preparing Your Workspace and Tools

Your nail care session starts long before you touch those extensions. Proper setup prevents accidents and ensures smooth transitions between styles. Let’s transform your bathroom counter into a salon-worthy station.
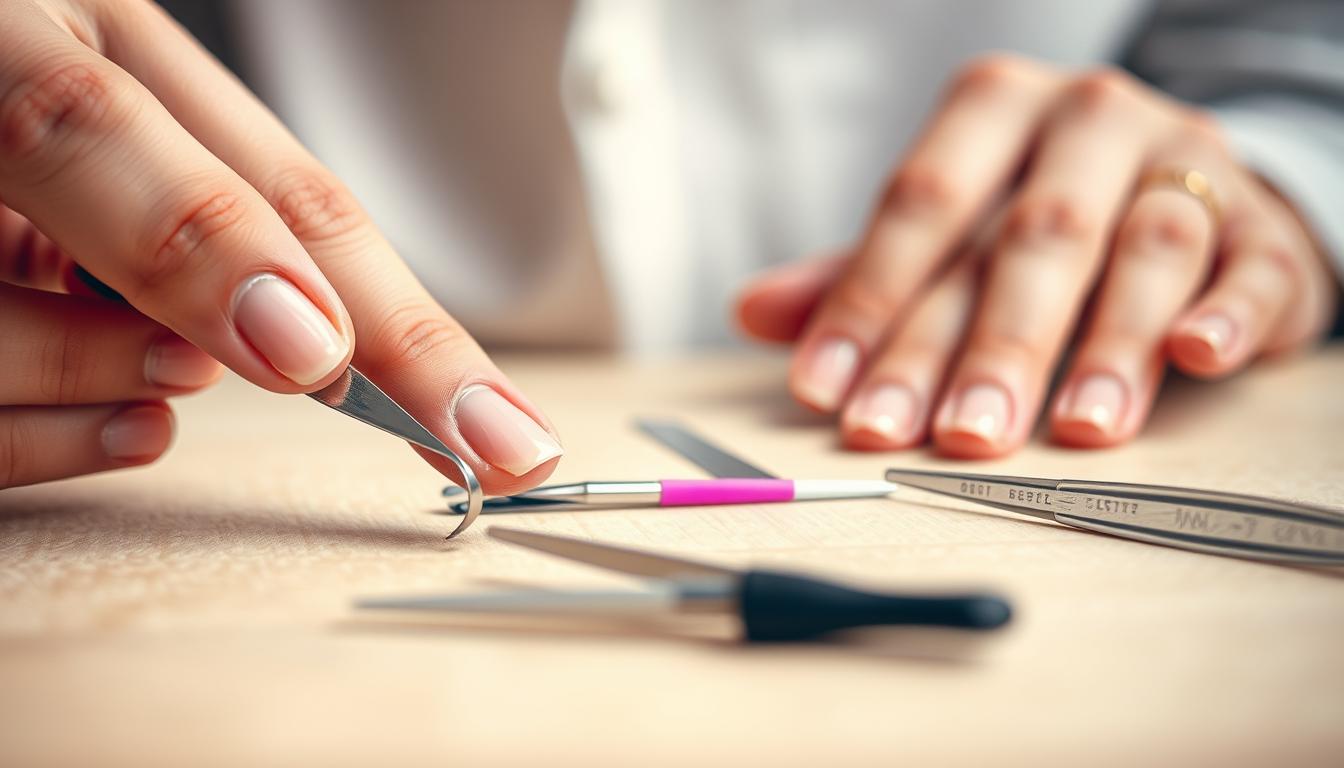
Gathering Essential Removal Tools
Start with 100% acetone – the gold standard for dissolving stubborn adhesives. Pair it with cotton balls or pads for precise application. Aluminum foil squares become your best friend, creating airtight seals that speed up the process.
Keep nail clippers nearby to trim excessive length. A coarse nail file helps buff surfaces without shredding layers. Don’t forget a cuticle pusher – its flat edge lifts softened material gently. Dab petroleum jelly around your skin to block acetone’s drying effects.
Safety and Ventilation Tips
Acetone fumes pack a punch. Open windows or run a fan to keep air moving. Avoid kitchens with gas stoves – this chemical is highly flammable. Set timers to track soaking periods, preventing overexposure.
Protect surfaces with towels. Small bowls hold acetone-soaked cotton within easy reach. Wash hands thoroughly afterward to eliminate residue. With everything organized, you’ll breeze through the next steps confidently.
How to Remove Fake Nails Safely and Effectively

Choosing the right remover makes all the difference between smooth transitions and regrettable damage. While both acetone and gentler alternatives get the job done, their impact on your natural nails varies dramatically. Let’s break down your options.
Using Acetone vs. Non-Acetone Methods
Acetone works like a molecular bulldozer, dissolving glue bonds in 20-30 minutes. Salon pros swear by it because it penetrates acrylic layers faster than acetone-free nail polish remover. Wrap soaked cotton balls in foil to concentrate the effect.
Non-acetone solutions take nearly twice as long but suit sensitive skin. They rely on ethyl acetate or methyl acetate to soften adhesives gradually. Perfect if your cuticles tend to dry out, but patience is non-negotiable. Set a timer for 40 minutes – rushing leads to damage.
Protecting Your Natural Nails
Slather petroleum jelly around your nail bed before starting. This barrier blocks harsh chemicals from dehydrating surrounding skin. Use a wooden cuticle pusher instead of metal tools – gentle pressure lifts extensions without scratching.
If residue remains after soaking, don’t scrape. Reapply polish remover for five more minutes. Healthy nails flex slightly when pressed – if they’re rigid, the adhesive hasn’t fully dissolved. Remember: Your natural nails are layers of keratin, not armor. Treat them like silk, not steel.
Step-by-Step Process for Removing Fake Nails

Mastering the art of artificial nail removal transforms a stressful chore into a satisfying ritual. Follow these carefully sequenced actions to preserve your natural nail strength while bidding farewell to old designs.
Soaking and Softening the Adhesive
Begin by trimming extensions with sharp clippers. Short nails mean less material to dissolve. Buff the glossy top layer gently – this creates tiny pathways for acetone to penetrate.
Soak cotton balls in pure acetone until damp. Place one on each nail, then wrap fingertips tightly with foil squares. Wait 20 minutes – this lets the solution break down stubborn bonds effectively.
| Method | Tools Needed | Time Required |
|---|---|---|
| Acetone Wrap | Cotton, foil, timer | 20-30 minutes |
| Warm Water Soak | Bowl, mild soap | 10 minutes |
Gently Peeling Off the Extensions
After soaking, test one nail first. If resistance occurs, rewrap for five more minutes. Slide a wooden stick under lifted edges, moving parallel to your nail bed. Never pry upward – this prevents layer separation.
Removing Residues with a Cuticle Pusher
Persistent glue remnants? Soak a fresh cotton ball and press it against trouble spots. Use a rubber-tipped pusher in sweeping motions. Buff lightly afterward to restore smoothness.
Finish with a nourishing oil massage. Your natural nails deserve pampering after their transformation!
Special Techniques for Acrylic and Gel Nails
Acrylics and gels demand special attention during removal due to their durable formulas. Unlike temporary adhesives, these materials bond chemically with your natural nails. Let’s explore professional-grade methods that keep your nail beds intact.
Acetone Soak for Acrylic Nails
Start by clipping extensions close to your natural edge. Buff the glossy surface gently – this helps acetone penetrate the hardened layers. Apply petroleum jelly around your cuticles to prevent drying.
Wrap each finger with acetone-soaked cotton and aluminum foil. Wait 20 minutes – this dissolves the acrylic’s chemical bonds. Use a wooden stick to lift softened material sideways. Never peel upward – this protects your nail’s delicate layers.
Method for Removing Gel Nails
File gel surfaces until they lose their shine. Soak cotton pads in pure acetone and secure them with foil wraps. Check progress after 10 minutes – cured gels might need extra time.
Gently push lifted edges with a rubber-tipped tool. If resistance occurs, rewrap for five more minutes. Moisturize immediately after removal to combat acetone’s drying effects.
| Process Step | Key Tools | Time Required |
|---|---|---|
| Acrylic Prep | Clippers, 180-grit file | 5 minutes |
| Gel Removal | 100% acetone, foil squares | 10-15 minutes |
For those loving short pink acrylic nails, proper removal ensures quick style changes without damage. Remember – patience preserves your nail’s natural strength better than haste.
Aftercare: Restoring Your Natural Nails

Your natural nails deserve pampering after extensions come off. Proper care rebuilds strength and prevents brittleness. Let’s explore simple routines that keep your hands looking fresh.
Moisturizing and Cuticle Care
Start by massaging cuticle oil around each nail bed. This hydrates parched skin and prevents peeling. Apply it three times daily – think of it as lip balm for your hands.
Follow with a thick hand cream containing shea butter. Lock in moisture by wearing cotton gloves overnight. Don’t forget sunscreen – UV exposure dries out skin faster than you’d expect.
Using Nail Buffers and Base Coats
A glass nail file smooths edges without shredding layers. Buff gently in one direction to maintain thickness. Avoid metal tools – they create micro-tears.
Apply a strengthening base coat after cleaning surfaces. This shields against stains and adds flexibility. For those loving bold looks, try stiletto styles once your nails regain strength.
Take a 2-week break between manicures. Your natural nails need time to breathe and rebuild their protective layers. Regular oil treatments keep them supple for future designs.
Conclusion
Your nail transformation journey doesn’t end when extensions come off—it evolves. With the right step-by-step process, you can maintain healthy nails while switching styles at home. Those cotton balls and aluminum foil wraps? They’re your secret weapons for salon-quality results without the salon price tag.
Patience pays off. Rushing might tempt you, but waiting those crucial minutes prevents peeling and damage. Your natural nails and surrounding skin will thank you for gentle handling. Regular breaks between applications let your hands recover their natural strength.
Complex cases like thick acrylics might still feel daunting. That’s when professionals shine—don’t hesitate to book a salon visit if needed. Remember: Beautiful nails start with smart removal practices. You’ve got this!