That chip-resistant manicure looked flawless for weeks, but now you’re ready for a fresh look. While salon visits offer convenience, many don’t realize that safe at-home removal is possible with simple tools. The secret lies in understanding how gel formulas bond to your natural nails and which techniques preserve their strength.
Traditional methods involve soaking with acetone, but newer products offer faster alternatives. Both approaches require careful execution to avoid peeling or thinning your nail bed. This guide breaks down the science-backed steps professionals use, adapted for your bathroom counter.
Whether you’re switching up shades or giving your nails a breather, proper care matters. Explore how factors like timing, product quality, and aftercare impact results. For those who love experimenting with styles, check out these pink-and-white nail ideas once you’ve mastered the removal basics.
Key Takeaways
- Two proven removal methods exist: acetone soaking or specialized remover solutions
- Household items like cotton balls and aluminum foil can create salon-quality results
- Rushing the process risks permanent nail plate damage
- Salon removal remains best for complex manicures or weakened nails
- Moisturizing after removal helps restore natural nail health
Getting Ready: Essential Preparations for Gel Nail Removal

After weeks of flawless wear, your fingertips crave transformation. Proper preparation prevents frustration and protects your natural skin and nails during the process. Whether you’re switching styles or maintaining solar nails, these steps ensure smooth transitions between looks.
Toolbox Essentials
Gather these items before starting:
| Tool | Purpose | Pro Tip |
|---|---|---|
| 180-grit file | Break gel seal | Feels like fine sandpaper |
| Pure acetone | Dissolve polish | Avoid diluted versions |
| Cotton pads | Hold solution | Lint-free works best |
| Foil squares | Secure wraps | 3×3 inch size |
Workspace Wisdom
Choose a kitchen table or bathroom counter with open windows. Acetone fumes intensify quickly – proper airflow keeps you comfortable. Cover surfaces with old towels to catch drips.
“Pre-cut 10 foil pieces before soaking. Trying to handle scissors with wet cotton is like wrestling octopuses!”
Work on one hand at a time for better control. Keep cuticle oil nearby – hydration matters after acetone exposure. Position tools within easy reach to avoid drips across your space.
Step-by-Step Guide: How to Remove Gel Nail Polish

Your vibrant manicure has served you well, but it’s time for a change. This professional-grade approach adapts salon techniques for home use, prioritizing both efficiency and nail health.
Buffing, Filing, and Pre-Soak Techniques
Start by breaking the gel’s seal with a 180-grit file. Glide it in one direction from cuticle to tip until the glossy surface becomes matte. This creates tiny channels for acetone to penetrate the hardened layers beneath.
Never file side-to-side – it creates friction heat and weakens the natural plate. The goal is texture, not thinness. You’ll know you’ve done enough when nails feel slightly rough, like fine-grit sandpaper.
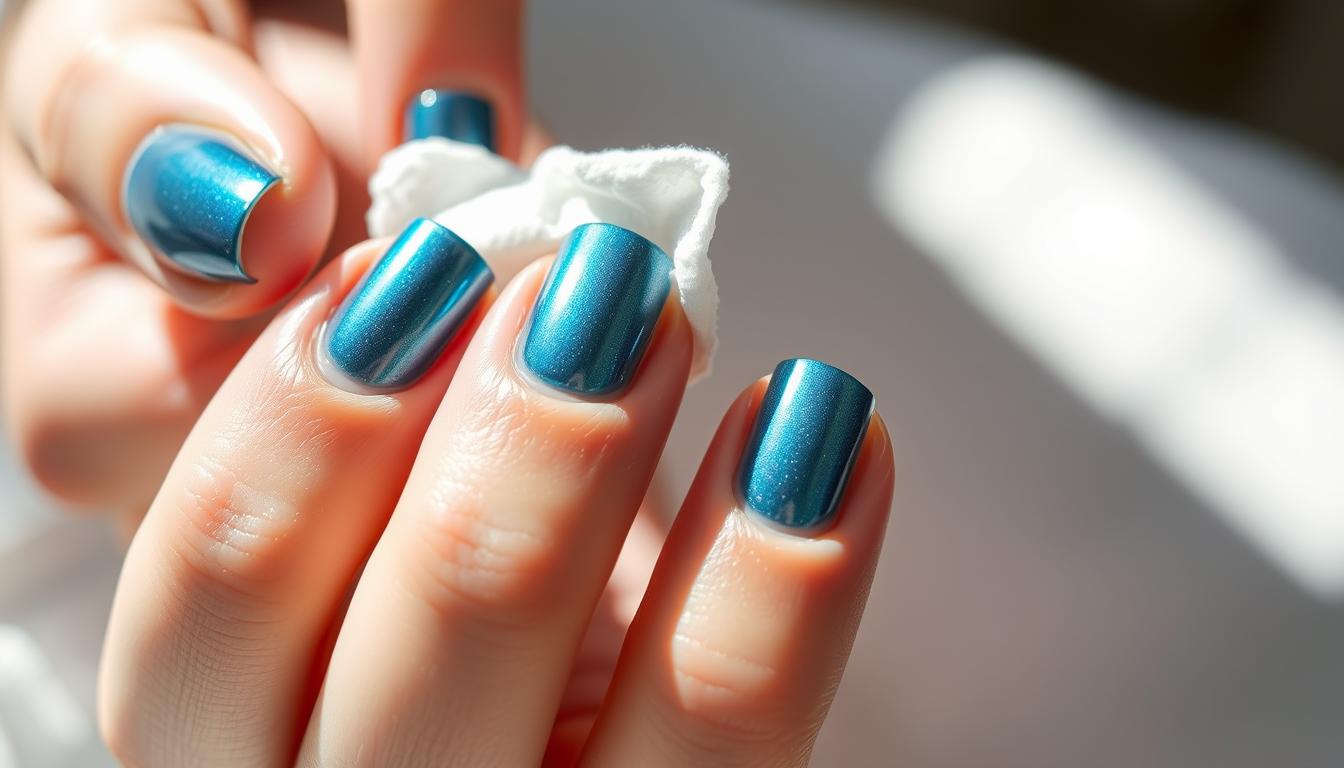
Acetone Application, Cotton Soak, and Foil Wrap Methods
Next, saturate cotton pads with pure acetone – about 5 drops each. Press them firmly onto nails, then wrap each fingertip in 3×3 inch foil squares. This creates a concentrated treatment chamber that accelerates breakdown.
Wait 10 minutes. Peek under one wrap – properly softened gel will show lifted edges or bubbles. Use an orange stick to gently nudge polish from cuticle outward. If resistance occurs, reseal for 5 more minutes.
Finish by buffing residual bits with a soft file. Apply cuticle oil immediately to replenish moisture. Remember: rushing leads to scraping, which causes peeling. Patience preserves your natural base.
Tips and Tricks for a Hassle-Free Gel Removal Process

Your fingertips deserve pampering after their glossy makeover. Smart maintenance keeps them strong for future styles, whether you’re rocking bold designs or classic short pink acrylic nails. Let’s explore recovery strategies and common pitfalls.
Nail Aftercare: Using Cuticle Oil and Buffing for Recovery
Cuticle oil becomes your new best friend post-removal. Apply it three times daily using a massaging motion. Focus on the base of each nail and the surrounding skin to boost circulation and hydration.
Gentle buffing helps smooth ridges caused by acetone exposure. Use a soft foam buffer in one direction only. This maintains thickness while creating a polished surface.
How to Avoid Common Mistakes and Protect Your Natural Nails
Never submerge your entire hand in acetone. This dries out skin and weakens nails over time. Instead, use targeted cotton wraps to limit chemical contact.
- Skip electric drills – they remove natural layers faster than they grow
- Resist peeling stubborn bits (tempting but destructive)
- Wait 48 hours before reapplying color for recovery time
Damaged nails? Visit a salon. Healthy ones can handle home care. Like coloring hair, removal success depends on your base condition. With proper technique, you’ll maintain strength between styles.
Conclusion
Transforming your manicure at home feels empowering with the right approach. You’ve discovered two reliable techniques – acetone wraps and specialized solutions – that keep natural nails intact when executed carefully. Remember, success hinges on patience during those crucial soaking minutes and gentle motions when lifting edges.
Your toolkit now includes smart strategies beyond basic supplies. Pre-cut foil squares and lint-free cotton pads become allies, while post-care rituals like massaging cuticle oil restore suppleness to skin and nails. Temporary dryness? Normal. Flaky bits? Expected. These fade faster than salon appointments.
Armed with these steps, you’re set to refresh styles without compromising nail health. Skip the scraping urges and rushed timelines – your fingertips will thank you. Whether prepping for bold new designs or giving nails breathing room, this knowledge turns messy concerns into controlled transformations.
Next time gel manicures lose their luster, trust your skills. With proper technique and recovery care, you’ll maintain strong bases ready for endless creativity. Happy polishing – or unpainting!