What if the secret to healthy nails isn’t avoiding acrylics, but removing them correctly? Many assume salon visits are the only safe option, but with the right tools and techniques, you can preserve your natural nails while saving time and money.
Licensed nail artists agree: DIY acrylic removal is possible if done carefully. The process demands patience—typically 60 minutes or more—and avoids shortcuts like peeling or forceful scraping. Unlike gel polish, acrylics bond tightly to your natural nails, requiring gentle soaking with acetone-based products.
Rushing this process risks splitting nail beds or causing infections. Yet with proper preparation, you’ll minimize damage and maintain your nail’s strength. This guide combines insights from dermatologists and beauty experts to help you navigate each step confidently.
Key Takeaways
- Safe at-home removal prevents costly salon trips and protects nail health long-term
- Acrylics require more time to remove than gel polish due to their durable adhesive bond
- Allocate at least one hour for the process to avoid rushed, damaging techniques
- Improper methods can thin nails or lead to infections requiring professional treatment
- Mindset matters—approach the task with focus and realistic expectations
Introduction to DIY Acrylic Removal

Why do acrylic nails dominate beauty trends despite newer alternatives? Their secret lies in unmatched durability and creative freedom. Unlike gel or dip powder, acrylics let you flaunt intricate nail art for weeks while resisting chips.
Understanding Acrylic Nails and Their Appeal
Acrylics blend liquid monomer and powder polymer to create a sturdy shell. This bond lasts 2-3 weeks before needing fills—ideal for those who love short pink acrylic nails or bold geometric designs. Maintenance matters: pushing beyond 4 weeks risks lifting and bacteria growth.
| Feature | Acrylic | Gel | Dip Powder |
|---|---|---|---|
| Durability | 3-4 weeks | 2-3 weeks | 2-3 weeks |
| Design Options | Unlimited | Limited by UV curing | Pre-set colors |
| Removal Time | 60+ minutes | 20-30 minutes | 30-40 minutes |
Benefits and Risks of At-Home Removal
DIY removal saves $15-$25 per salon visit and lets you control the pace. But rushing causes splits or infections. Nail technicians use medical-grade acetone—home kits often lack this strength.
Key considerations:
- Salon-grade acetone dissolves layers faster
- Cuticle oil prevents dehydration during soaking
- Metal tools risk gouging natural nails
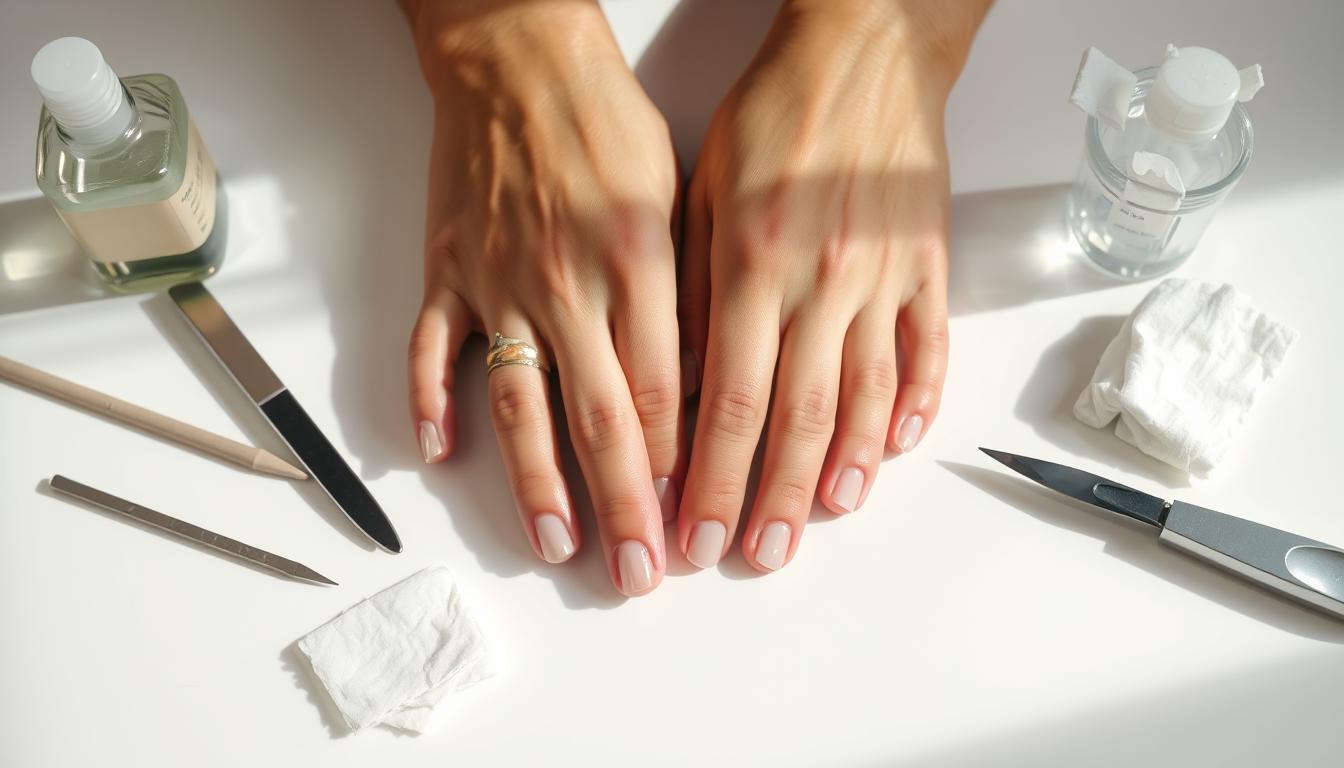
Tool Kit and Workspace Preparation

Ever wonder why some DIY projects fail before they start? Missing the right supplies. For acrylic removal, your toolkit determines success. Let’s build your arsenal.
Essential Tools for Removing Acrylic Nails
Start with 100% pure acetone—not regular polish remover. Nail artist Lila Moreno notes: “Drugstore acetone works, but salon-grade cuts soaking time by 15 minutes.” Pair it with:
- Dual-grit files (100/80 for thickness reduction)
- Non-metal pushers to avoid nail gouging
- Cotton balls over pads—they hold more liquid
| Tool | Purpose | Budget Option |
|---|---|---|
| Acetone | Dissolves acrylic | Sally Beauty Supply ($4) |
| Nail clips | Secures foil wraps | Reusable silicone clips ($7) |
| Cuticle oil | Prevents dryness | DIY coconut oil mix |
Setting Up a Safe, Ventilated Workspace
Acetone fumes demand respect. Open windows or position a fan sideways—direct airflow dries cotton balls too fast. Cover surfaces with:
- Disposable aluminum trays (stops spills)
- Paper towels under each hand
Organize tools clockwise around your bowl. This salon-style setup lets you grab items blindly mid-process. Most supplies cost under $5 at CVS or Walgreens.
Step-by-Step: How to take acrylics off at home

Ready to reclaim your natural nails? Proper preparation makes all the difference. Start by gathering your supplies in a well-lit area—you’ll need precision for this delicate task.
Preparing Your Nails: Clipping and Filing Techniques
Trim extensions using sharp clippers, leaving 2cm above your nail bed. This buffer zone prevents accidental cuts. Switch to a 100-grit file—the coarse texture quickly reduces bulk without scraping your natural surface.
File in one direction only. Back-and-forth motions create heat and weaken nails. Licensed tech Maria Chen advises: “Stop filing when you see a faint outline of your natural nail—that’s your safety net.”
Acetone Soak and Removal Process
Soak cotton balls in pure acetone—70% concentration works best. Press one onto each nail, wrap tightly with foil, and wait 10 minutes. Warmth accelerates the process: place a heating pad under your hands or drape a hot towel over the wraps.
Check progress after 10 minutes. If acrylic feels gummy, gently push residue with a wooden stick. For stubborn spots, reapply acetone for 5 more minutes. Never force lifting—patience protects your nail bed.
| Method | Time Required | Best For |
|---|---|---|
| Foil Wraps | 10-15 minutes | Targeted treatment |
| Bowl Soak | 20-30 minutes | Full-hand removal |
Post-soak, hydrate immediately. Massage cuticle oil into each nail bed to counteract acetone’s drying effects. Buff gently with a soft file to smooth any remaining texture.
Exploring Acetone and Non-Acetone Methods

Have you ever questioned why some nail removal hacks go viral despite expert warnings? Acetone remains the undisputed champion for dissolving acrylics—but let’s separate fact from TikTok fiction.
Using Acetone for Effective Acrylic Removal
Nail chemist Molly Romah clarifies: “Acrylic polymer bonds require acetone’s molecular structure to break down completely.” Unlike regular polish remover, pure acetone penetrates layers within 10-15 minutes. Prep your skin first—apply petroleum jelly around nails to prevent dryness.
Salon-grade acetone works fastest, but drugstore options still succeed with patience. If residue remains after soaking, never scrape aggressively. Re-wrap the nail for 5 extra minutes instead.
Alternatives to Acetone and Their Limitations
While “without acetone” methods trend online, most damage nails. Hot water soaks weaken beds through prolonged exposure. Dental floss techniques often rip natural layers.
Acetone-free polish remover requires 40+ minutes and leaves acrylic fragments. Nail drills demand professional skill—one slip thins your nail permanently. Save these options for emergencies when acetone isn’t available.
| Method | Time | Risks |
|---|---|---|
| Acetone | 15-20 mins | Mild dryness |
| Dish Soak | 60+ mins | Nail warping |
| Nail Drill | 5-10 mins | Over-filing |
Post-Removal Nail Care and Aftercare Tips

Did you know your nails lose 30% moisture during acrylic removal? This dehydration makes recovery care non-negotiable. Proper hydration prevents peeling and accelerates healing—your natural nails deserve this attention after their acrylic adventure.
Hydrating and Repairing Your Nail Beds
Start with lukewarm water and mild soap to cleanse. Pat dry gently—no rubbing. Apply cuticle oil immediately. Nadine Abramcyk warns: “Acrylic removal taxes nail beds, requiring months for full recovery.” Massage oil into each nail fold for 60 seconds to boost absorption.
Look for oils with jojoba or argan bases. These mimic natural skin lipids. For severe dryness, layer oil under cotton gloves overnight. Hydrated nails bend instead of breaking—a key recovery milestone.
Choosing Nail Oils and Strengthening Treatments
Top professionals swear by CND SolarOil for daily use. Its vitamin E-rich formula penetrates fast. Pair it with CND RescueRxx for damaged nails—this treatment fills microscopic cracks like spackle.
- OPI Nail Envy: Strengthens thin nails in 7 days
- Paume Probiotic Hand Balm: Locks in moisture without greasiness
- Dior Crème Abricot: Vintage favorite for intense nourishment
Spot trouble early: ridges mean protein loss. Yellowing suggests fungal risk. If nails feel rubbery, pause polish and focus on solar nails-style breathability. Consistent care brings back that healthy pink shine.
Expert Advice and Common Pitfalls
What separates successful DIY nail care from salon disasters? Professional insights bridge the gap between theory and practice. Top artists reveal their field-tested strategies for balancing efficiency with safety.
Insights from Professional Nail Artists
Kristin Gyimah’s saturation test transforms results: “Dripping acetone cotton dissolves layers faster.” Amy Le’s filing hack cuts process time by 25%—file acrylics to 1mm thickness before soaking. Mytien Le swears by warm acetone baths using a bowl of hot water underneath.
Anna Miles simplifies application with silicone clips. “They create tighter seals than foil,” she notes. All experts agree: peel-resistant nails need recovery breaks. Wait three weeks between acrylic sets to let beds rebuild.
Avoiding DIY Mistakes and Protecting Your Natural Nails
Biting or prying lifts nail layers—like tearing a Band-Aid off skin. Instead, re-soak stubborn spots. Keep nails strong with weekly jojoba oil masks. Yellowing? Apply lemon juice mixed with baking soda gently.
Watch for these red flags:
- White patches signal dehydration—hydrate immediately
- Curved edges mean over-filing—switch to softer buffers
- Persistent stickiness requires acetone wipe-downs
With these pro strategies, you’ll master the removal process while keeping nails healthy. Patience pays off—your natural nails deserve this care.