Discover why knotless braids are the go-to protective style right now. This technique creates a natural look at the roots and blends smoothly with your own hair for a polished finish.
Many wearers say installs feel lighter on the scalp and move freely from day one. You can often pull the style into a bun immediately without the usual tightness or headaches.
Whether you’re booking a pro or following a step-by-step tutorial at home, this guide covers prep, install, and care. Expect tips on sizing, length choices, and how those choices change weight and comfort.
We’ll also touch on how the trend rose in the late 2010s and grew in popularity over recent years, affecting demand and pricing. Read on to learn practical, results-focused advice to keep your scalp healthy and your style lasting longer.
Key Takeaways
- These installs offer a lighter, more natural root look and less tension.
- Comfort from day one lets you style into a bun right away.
- Guide suits both salon clients and DIYers using a clear tutorial.
- Length and size affect weight, styling options, and install time.
- Popularity rose in recent years, leading to wider availability and refined techniques.
Knotless braids: what they are and why they’re trending

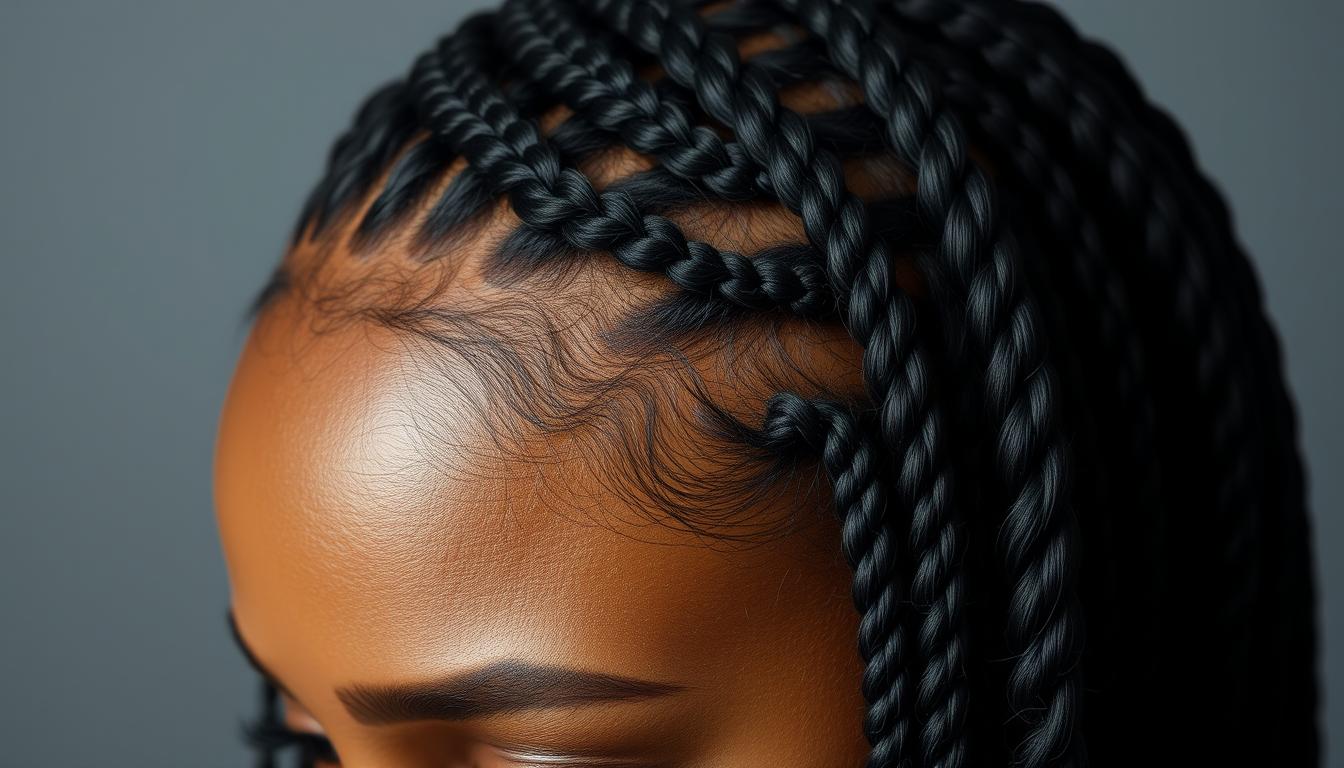
Instead of a visible knot at the root, hair is fed in slowly to create a seamless start that sits flatter at the scalp.
What it is: This method builds each strand by adding small pieces of extension hair as you go. The result is a flatter base and a very natural look at the part.
How this differs from regular box braids
With regular box braids, stylists begin with a knot at the base. That knot can add bulk and extra tension.
The feed-in method spreads weight along the length, which reduces strain and lowers the chance of headaches.
Benefits: lighter feel and a more natural finish
Wearers praise the lighter feel and immediate movement from day one. Styles lay flat under hats and headbands.
Comfort wins: less tightness, easier styling, and a softer overall profile.
Longevity and neatness over a month
Expect neat parts to relax sooner than knotted installs. Roots may puff or frizz within a few weeks.
Many prefer the organic, softened appearance as the style settles over the month. Simple edge care and light mousse keep the look tidy without buildup.
Time and price: now vs years ago
Interest spiked around 2018, and demand in cities like New York and Atlanta pushed prices up. More precise technique means longer install time for medium and small sizes.
Booking earlier and planning for longer sessions helps, especially if you travel to find a trusted stylist.
Step-by-step tutorial: how to do knotless box braids for a flawless finish

This step-by-step tutorial breaks the install into clear stages so you can get a neat, lasting finish.
Prep your hair: cleanse, stretch, and section
Start with a clean scalp and detangled strands. Blow-dry or stretch gently for smooth parting.
Use a rat-tail comb and clips to make even square or brick-layered sections. Clean parts speed the process and improve longevity.
Feed-in technique: building the braid without a knot
Begin with your natural hair and add small, even pieces of extension as you braid down. Keep tension steady for a flat, knotless base.
Align added hair with the braid direction and use a steady palm-roll or finger-over-finger rhythm for consistent diameter.
Securing the ends and finishing touches
- Ends: Hot water sealing works for most synthetic extensions; micro elastics or a tapered finish suit longer length.
- Finish: Smooth flyaways with a light mousse, set under a scarf 10–15 minutes, then add a light oil sheen for luster.
Beginner tips and time planning
Practice the feed-in motion on a back row before tackling visible sections. Medium size is a forgiving starting point.
Block out several hours for a first full head — precision in parting and feeding makes the difference. Check comfort by gathering hair loosely into a bun on day one to confirm the install feels light and moves freely.
Size, length, and appointment planning in the United States

Pick a size and length that match your daily routine and comfort level before you book an appointment.
Choosing size and length: short and chic to waist-length
Size affects density and scalp exposure. Small gives fuller coverage but adds install time. Medium balances fullness and manageable time. Large keeps installs quick and light.
Length shapes weight and styling. Shoulder-length is easy and lightweight. Mid-back is versatile for daily wear. Waist-length looks dramatic but increases weight and chair time.
Booking smart: finding a braider, install time, and maintenance
In cities like New York and Atlanta demand rose fast over recent years, so book early and check portfolios for clean parts and flat roots.
“Confirm install time and a clear quote by size and length before you commit.”
Expect feed-in methods to take longer than knotted options. For medium size, plan a multi-hour session and bring snacks and water.
| Size | Typical Time | Best For |
|---|---|---|
| Small | 6–9 hrs | Long-lasting, fuller look |
| Medium | 4–7 hrs | Balance of fullness and comfort |
| Large | 2–4 hrs | Quick, lightweight styles |
- Budget: prices rose compared with years ago; ask for a size/length quote.
- Maintenance: plan touch-ups or removal at 4–8 weeks based on scalp health.
- Travelers: verify deposit, location, and a follow-up plan if you’ll be away.
Conclusion
Comfort, a flat root, and easy styling are what set this protective style apart for everyday wear. Wearers note immediate movement and a lighter feel, and the evolving braids look often softens into a natural finish over a month.
Pick a size and length that match your routine; mid-back often offers the best balance between manageability and style. Use the step-by-step tutorial earlier in this guide to prep, check technique, or assess a stylist’s feed-in method.
In busy U.S. cities demand rose over recent years, so plan ahead, confirm session time, and prioritize stylists who start with clean, flat roots. If low tension and a natural finish are your thing, this version is a smart alternative to regular box braids and a solid path to long-term scalp comfort.