Want a sharp, modern look that suits many head shapes? This guide breaks down the bald fade so you can ask your barber for exactly what you want. A bald fade, also called a skin fade, blends hair to bare skin for a clean edge that frames the face.
Barbers like Darius Davie and Emmanuel Garcia focus on matching the cut to your features and daily routine. We cover tools, guard sizes, and the pro tips they use to keep the style practical.
This short guide shows an easy way to see how this fade differs from other fades. You’ll learn what to ask for, how to pair the top with different textures, and the maintenance trade-offs.
Key Takeaways
- Understand the basics: the bald fade blends to skin for a defined finish.
- Know the tools and guard sizes your barber will use.
- Match the cut to your head shape and daily life for best results.
- Plan for upkeep so the look stays crisp between visits.
- Bring references and clear notes to get the exact fade haircut you want.
What Is a Bald Fade? The Clean Transition from Hair to Skin
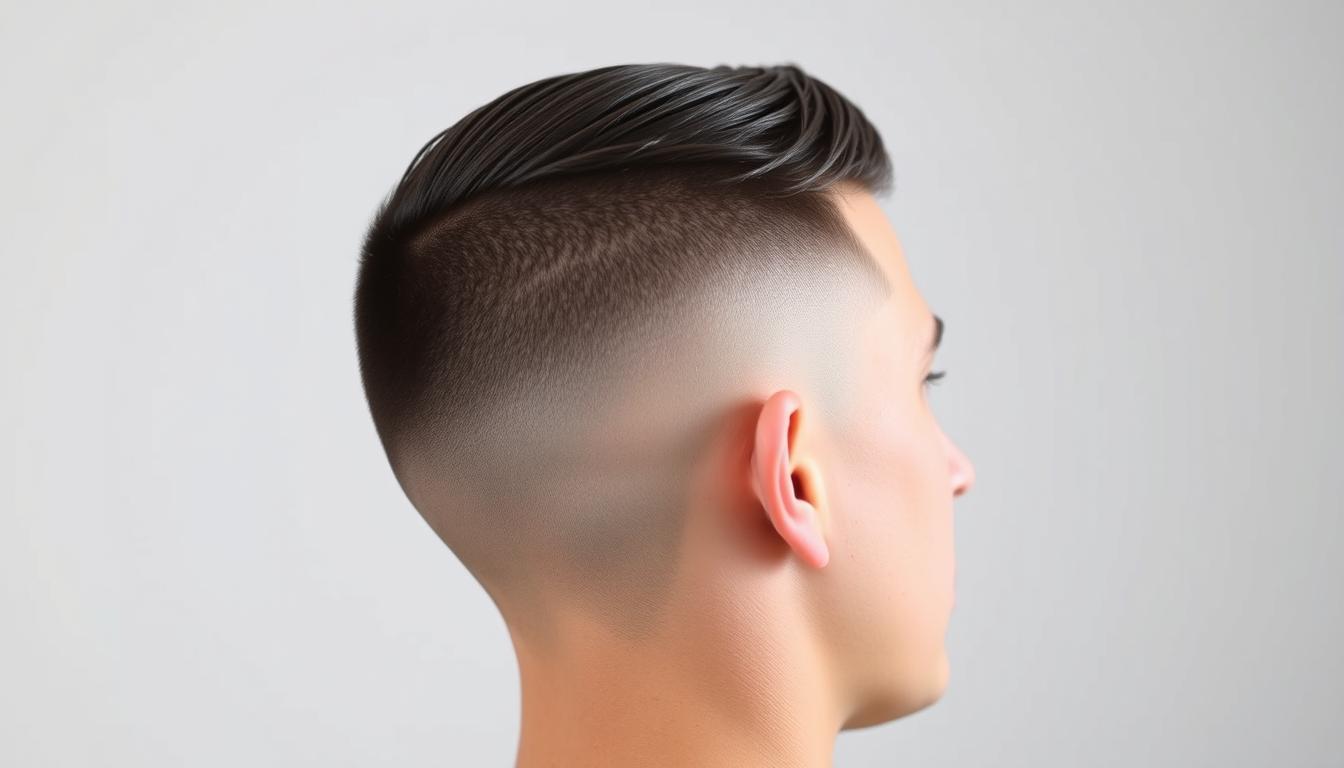
A bald fade creates a smooth gradient from a longer top down to bare skin at the sides and back. It’s a precise cut where the hair disappears into skin, leaving a sharp, modern outline around the head.
The technique highlights head shape and bone structure. High, mid, and low describe where the blend begins on the scalp, and that choice shapes how bold the look feels.
- Maximum contrast: a skin fade gives the top more visual weight by clearing the perimeter.
- Seamless finish: when done well the transition has no harsh lines.
- Versatile: it suits short crops and longer styles because the sides stay neat while the top stays workable.
Ask your barber where to start the fade to match your face and daily routine. A small change in placement makes a big difference in the final look.
The Bald Fade vs. Skin Fade: Same Cut, Different Name

Across shops and regions, the terms vary while the final look stays identical: a clean blend from hair down to bare skin.
The name you hear—skin fade or bald fade—usually points to the same result on your head. What matters is the finished silhouette, not the label.
- Show a photo: visual references remove confusion and set expectations.
- Say what you want: ask for the sides and back faded to skin to be specific.
- Clarify the top: top length and styling are separate from the side blend, so state both.
- Expect a skin-level finish: asking for a bald fade haircut signals the lowest area will be shaved or clipped very close.
Bottom line: the terms aim for the same ultra-clean, modern outline. Use whichever words feel natural, then confirm the look with a photo and a few simple notes.
High, Mid, and Low: Choosing Where Your Fade Starts
Where a cut begins on the scalp changes the whole profile of the hairstyle.
High starts place the shortest area well above the temple. A high bald fade delivers maximum contrast and minimal sides, making the top head feel fuller.
Mid placements sit around the temple line. This mid option gives a balanced transition that flatters most faces and works well for office or active days.
Low starts hug the neckline and ears. A low skin fade keeps the sides longer near the bottom, offering a subtle edge and easier blending with facial hair.
“Ask your barber where the fade starts in relation to your temple and occipital bone to fine-tune the silhouette.”
- Choose based on head shape, hair density, and how much side detail you want.
- A high skin fade can make a long top read fuller by removing side weight.
- Consider future drop or design work when setting the initial start point.
| Placement | Look | Best for |
|---|---|---|
| High | Sharp contrast, minimal sides | Bolder profiles, fuller top |
| Mid | Balanced transition | Most face shapes, workplace-friendly |
| Low | Subtle blend near neck | Conservative styles, longer sides |
Drop Fade and Burst Fade: Dynamic Shapes Around the Ear

Curved blends around the ear add motion and shape to many modern cuts. A drop fade begins above the ear and arcs lower toward the back of the head, creating a smooth curve that follows natural contours.
Drop: a soft arc behind the ear
The drop changes the silhouette by dipping the taper lower at the rear. This arc can accentuate the crown and give the profile a flowing, sculpted look.
Burst: circular taper for edgy tops
A burst variation wraps the taper in a circular pattern around the ear. It complements mohawks, mullets, and any style that keeps more hair on the top.
- Keep more length on top: these shapes frame bold styles while keeping sides neat.
- Bald drop fade: dramatic when paired with a tall top and sharp perimeter.
- Maintenance: the arc or circle needs regular touch-ups so lines stay crisp.
Tip: if you want the fade starts higher in front but lower at the back, ask for a drop to balance height and flow.
Temple Fade: Sharpen the Face, Spotlight the Top
Targeted tapering near the temples subtly lengthens the face and brings the hairstyle forward.
This approach tightens only the temple area, giving a cleaner front edge without changing the full sides of the head. It keeps the top as the main feature of your look.
The temple taper works well for round faces because it adds vertical emphasis. It also pairs nicely with curls, waves, or any structured top that needs a crisp border at the hairline.
“A small change at the temple can make the whole style read sharper while keeping styling options open.”
- Focuses reduction at the temples for a refined outline.
- Offers a middle ground between a complete skin fade and longer side lengths.
- Easy upkeep: quick touch-ups at the temple keep the style fresh.
| Feature | Effect | Best For |
|---|---|---|
| Temple taper only | Sharper front edge, minimal side change | Round or soft faces |
| Partial skin finish | High contrast near hairline | Curly or textured tops |
| Light tapering | Subtle elongation of profile | Anyone wanting low-maintenance refinement |
Talk with your barber about how much taper to apply near the hairline and sideburns. A clear note on your preferred outline makes this clean, focused cut easy to get right.
Taper vs. Fade: Understanding the Terms Before You Cut

Clarifying taper and blend terminology avoids surprises when your barber starts cutting.
Fade refers to a blend that reaches the skin. It creates a strong contrast between sides and top. A true skin fade removes hair down to bare skin for a crisp outline.
A taper shortens hair gradually without exposing skin. It keeps more coverage at the perimeter and gives a classic, conservative look. Taper details near the neckline and sideburns sharpen the silhouette without a skin-level finish.
When to pick which
- Choose a fade for high contrast and an ultra-clean edge.
- Choose a taper for subtle shaping and more coverage.
- Ask for a bald taper fade if you want a skin-tight base with a controlled top silhouette.
Terms vary between shops, so talk through the exact look. Mention how exposed you want the sides, how often you’ll maintain the cut, and any growth quirks like cowlicks.
| Term | Result | Best for |
|---|---|---|
| Fade | Blends to skin | Bold, high-contrast looks |
| Taper | Shortens without bare skin | Conservative, low-maintenance styles |
| Bald taper fade | Skin-level edge with taper control | Clean but covered silhouette |
Tools and Guards You’ll Use for a Skin-Level Result
Good tools and the right guards make a skin-level result repeatable and safe.
Start by using trimmers or edgers to mark a clear line above the ear and shave everything below. This creates a clean base on the sides so blending is predictable.
Clipper guards and lever work
Build the blend in stages with guards 0, 0.5, 1, 1.5, and 2. Use 0, 1, and 2 to create the main “steps” and 0.5 and 1.5 for half-step smoothing. Open or close the lever for micro-length control between guards.
Trimmers, razors, and final skin finish
Trimmers set the initial line; a razor or foil shaver brings hair down to true skin. If you’re unsure about using a razor near the neck, ask your barber to handle that final pass.
- Work in small panels for even removal and a smooth transition.
- Good lighting and mirrors help keep both sides symmetrical around the top head.
- Clean tools reduce irritation and keep the buzz consistent over time.
“Establish the bald line above the ears, clear below, then blend step by step with half guards.”
| Tool | Use | Best moment |
|---|---|---|
| Clippers (0–2 guards) | Build steps and bulk removal | Initial shaping and mid-blend |
| Half-step guards (0.5,1.5) | Soften lines between steps | Refinement and smoothing |
| Trimmers / Edgers | Define bald line and edges | Before final shave |
| Razor / Foil shaver | True skin finish | Final pass for clean sides |
Bald Fade Step-by-Step: From Bald Line to Smooth Blend
Set a clean boundary first — a one-finger-width shaved line above the ear makes the rest predictable. Shave everything below that line to create a true skin base. This clear perimeter helps the rest of the cut fall into place evenly around the head.
Establish the line and build steps
Use a 0 guard to buzz a first band about 0.75–1 inch above the skin line. Work all the way around so the sides back area matches.
Stack a 1 guard above that, then a 2 guard to create visible steps. These bands give you defined lengths to blend into a smooth transition.
Blend with half-step guards
Soften each boundary by switching to 0.5 between 0 and 1, and 1.5 between 1 and 2. Move the clippers gently and keep strokes light to avoid new lines.
Detail work and cleanup
Use the corner of the clipper with careful flicking motions to remove shadows near cowlicks and dense patches. Check symmetry from front and back angles and make micro-adjustments.
“Finish by re-cleaning the skin zone with a foil or razor if needed, then edge the perimeter for a crisp result.”
- Keep strokes light along the sides back to preserve an even read.
- Confirm the top and back blend smoothly with the new perimeter.
- For style variations or to study common patterns, see fade types.
Longer Top, Cleaner Sides: Styling the Top After a Fade
Giving the hair on top more room lets you shape volume while the perimeter stays neat. Coiffed tops pair with the clean contrast of a bald fade to highlight texture and silhouette.
Pompadour and quiff: volume-forward looks
Pompadours and quiffs push height forward. With a longer top, use a blow dryer and a medium-hold product to lift the roots.
The tidy sides keep the profile sharp and let the top read fuller. This works well with fade sides and structured grooming.
French crop and Caesar: sharp fringes over skin
A French crop or Caesar creates a crisp fringe that balances a clean perimeter. For a modern edge, try a textured crop and ask your barber about a cropped fringe.
For more on the cut, see this guide to a French crop.
Comb over and slick back: classic, polished style
Comb overs and slick backs use length to craft a polished office-ready look. Pick products by finish—matte for texture, high shine for formality.
If you have curly hair, leave extra length on top to keep natural movement. Regular trims at the sides back preserve the frame so the top always pops.
“Match product choice to your target finish and keep the crown slightly longer to avoid gaps.”
| Style | Best finish | Why it works |
|---|---|---|
| Pompadour / Quiff | Matte to medium hold | Height contrasts with clean sides for a bold look |
| French crop / Caesar | Textured, low shine | Sharp fringe ties into a skin fade for a modern edge |
| Comb over / Slick back | High shine or natural finish | Polished silhouette for office and events |
| Curly top | Light cream or salt spray | Length preserves texture while sides stay neat |
Curly, Wavy, and Afro Textures: Fades That Work with Your Hair

Keep volume on the crown while slimming the sides to create a clean, modern profile for textured hair.
Curly hair with low or high skin fades
Curly hair often looks best when you preserve length on the top so texture stays visible.
A low or high skin fade changes the perimeter’s boldness; higher placements give stronger contrast and lift the crown.
Afro and high top with line up details
Afro textures pair well with a zero or skin fade and a sharp line up to define the hairline.
Try a high top or textured crop to show off shape while using a neat taper at the neckline to reduce bulk.
Wild waves and textured crops for movement
Wavy styles love a tidy sides line because it keeps motion focused on the top.
For a conservative option that still looks polished, ask about a bald taper fade instead of removing too much coverage.
- Keep hydration and curl-friendly products so the top head area stays defined between cuts.
- Use a subtle taper at the nape to control bulk without losing shape.
- Ask your barber whether a high skin placement will help your specific curl pattern appear taller and cleaner.
“Let the curl pattern guide length on top; use clean sides to frame the texture.”
Hard Parts, Etched Designs, and Colored Tops: Make It Yours
A sharp shaved line or a natural part can change how your whole haircut reads. Pick the approach that fits your daily routine and the style you want to own.
Natural vs. hard part: where the line lives
A natural part follows your hair’s grain and keeps styling easy each morning.
A hard part is a clean, shaved line that instantly sharpens your look. Place it where the hair already wants to separate to avoid extra styling work.
Hair design etching: creativity with regular maintenance
Etched designs run from a single line to elaborate patterns. They turn a cut into a personal statement.
Designs grow out fast, so expect a bit more maintenance to keep lines crisp. If you want subtle effect, pair small elements with a conservative top.
Colored tops: bleached or dyed contrast
Bleaching or dyeing the top boosts contrast against a skin-level perimeter and makes the design pop.
Keep scalp and hair healthy with hydration and gentle shampoos after coloring. Balance is key: choose one hero element — design, color, or height — so the overall look feels intentional.
- Natural part for low-effort mornings and relaxed texture.
- Hard part for a precise, modern edge in your style.
- Etching adds personality but needs shop touch-ups more often.
- Color on the top amplifies contrast; protect hair with good aftercare.
“Place hard parts where your hair naturally separates to avoid daily styling battles.”
For more on shaping the sides, check this side fade guide to see how parts and designs work with different perimeters.
Undercuts and Structured Tops: When the Top Does the Talking

An undercut puts all the visual weight on the top so the rest of the head reads intentionally clean.
Undercuts remove bulk at the sides and back so the hair top becomes the central feature. This creates a dramatic contrast that suits textured crops, pomps, or long quiffs.
Decide if you want a connected undercut that blends slightly into the top, or a disconnected one for a sharper line. Each choice changes the way the silhouette reads from the side.
Undercut with longer top: edgy, high-contrast look
An undercut with length on top makes the top do the talking. It highlights volume and movement while keeping the perimeter ultra-clean.
This method works best for thicker hair because the sides back are minimized and the crown can hold density without competing with side bulk.
Structured tops: flat-tops, pomps, and product-heavy styles
Structured styles need deliberate shaping and a routine. Blow-dry directionally, pick a product that holds the shape, and sculpt the top to maintain lines all day.
“Distribute weight evenly through the top and refine the back so the profile reads smooth.”
- Contrast: The undercut emphasizes a strong silhouette while the top defines the style.
- Maintenance: Regular trims keep edges sharp as the top grows out.
- Styling tip: Use medium to heavy product for pomps and a stiff paste for flat-tops.
- Connection choice: Connected undercuts soften the transition; disconnected ones read bolder.
| Feature | Why it matters | Best for |
|---|---|---|
| Undercut (connected) | Smoother transition between sides and top | Everyday wearers who want contrast without harsh lines |
| Undercut (disconnected) | Visible separation, modern edge | Bold styles and statement tops |
| Structured top | Requires shaping and product to hold form | Pomps, flat-tops, high-volume looks |
| Perimeter control | Keeps the sides back neat so the top remains focal | Thick hair and sculpted silhouettes |
For a variation that keeps top volume but adds a refined fringe, see the French top haircut guide.
Mohawks, Faux Hawks, and Drop Variations: Bold Fade Sides
Center weight and sharp sides create a running ridge that draws the eye up and back. This section covers how a mohawk or faux hawk pairs with drop placements and burst shaping to make a bold outline.
Bald drop fade mohawk: dramatic arc and height
A bald drop fade mohawk carves a dramatic arc that dips toward the nape, making the center strip read taller from the front. Drop placements and burst shapes around the ear accentuate the hawk line while keeping the perimeter clean.
If you choose a high bald fade, the contrast intensifies and the ridge looks sharper from every angle. For curly hair, leave extra length along the strip to add texture and volume without heavy daily styling.
Faux hawk fade: everyday edge
Faux hawks give similar attitude with easier upkeep. They keep sides tidy but allow softer transitions so the look works for day-to-day life.
- Keep edges neat so the fade sides frame the top and the silhouette looks intentional.
- Use firm-hold products to define the ridge, but avoid heavy creams that weigh the strip down.
- Quick line-ups preserve the arc and keep the ear-area shapes crisp between visits.
“A burst around the ear pairs well with mohawks, and a high placement makes the style read bolder.”
For a related, longer variation that keeps length at the back, see this mullet fade.
Beards and Bald Fades: Balancing Facial Hair and Sides Back
A strong beard and a tight perimeter can play off each other to create a balanced, intentional silhouette. Pairing facial hair with neat sides back gives the face structure and keeps the overall look intentional.
Ask your barber to blend the sideburn into the beard with a gradual step so the transition reads seamless from every angle. A light taper into the cheek line softens hard edges while keeping beard density intact.
For the neckline and jaw, a bald taper refines the area around the ears without overexposing skin under a full beard. Clear direction—natural, sharp, or sculpted—helps the cut support your facial hair goals.
- Balance: tight sides back make a full beard look intentional, not messy.
- Keep tools clean and lines precise; sloppy edges ruin a great style.
- Use beard oil or balm to condition and add a subtle sheen that complements the haircut.
- Schedule trims so the beard and haircut age together and the whole look stays balanced.
“Communicate your beard goals so your barber can match the perimeter and taper to the facial hair you want.”
Maintenance and Upkeep: Keeping the Fade Fresh
A little care between shop visits makes the difference between a crisp outline and a soft, grown-in look.
Barbershop cadence: plan to see your barber every 2–3 weeks to restore contrast. That rhythm keeps the skin-level perimeter sharp as new growth appears.
Barbershop cadence: every 2-3 weeks
Regular visits preserve the intent of the cut and prevent uneven stubble from showing through. Tell your barber how tight you want the lower band so they can recommend the best schedule.
Home touch-ups on the sides and back
In between appointments, do a bit of upkeep at home. Edge the neckline and tidy sideburns with a trimmer and a guard to avoid over-cutting the sides back area.
- Use a trimmer with a guard for safe, small adjustments.
- Moisturize the skin after shaving to reduce irritation.
- Keep styling minimal — a light cream or matte paste usually suffices.
- Ask your barber for a simple at-home plan based on how fast your hair grows.
“Consistency matters—regular upkeep keeps bald fades looking intentional rather than accidental.”
How to Ask Your Barber: Get the Bald Fade You Want
Tell your barber the placement and shape you want so the result flatters your head and hair. Start with where the fade starts: high, mid, or low. Say if you want a drop or a burst shape near the ear.
Specify fade height: high, mid, low, or drop/burst
Be explicit. Say “high” for maximum contrast, “mid” for balance, or “low” for a subtler edge.
If you like a curved look, ask for a drop. For a circular wrap around the ear, request a burst.
Explain the top length and style: messy, coiffed, or longer top
Describe how you plan to wear the top—messy, slicked, or long and textured. This guides how the barber connects the sides to the top.
Bring references and discuss head shape and hair type
Show photos and point out exact details you like. Talk about your head shape and hair density so the cut flatters your features.
- Start by naming where the fade starts and whether you want drop or burst shaping.
- Share the top styling—messy, coiffed, or longer top—to set blending needs.
- Bring clear photo references to align expectations on length and overall look.
- Discuss head shape, hair type, sideburns, neckline, and how the cut meets facial hair.
- Say “skin fade” or “bald fade” only if you want skin exposure at the base and confirm how tight.
- Ask about grow-out and maintenance so you know the upkeep between visits.
Summarize the plan together before the first clipper pass. A quick recap avoids surprises and ensures the barber and you share the same vision of the cut.
Conclusion
Finish strong: a clean perimeter and steady upkeep make a bald fade and its smooth transition to skin work every day. This cut gives a modern look that frames your hair and face with clarity.
Choose placement—high, mid, or low—and decide on drop or burst shaping to set your silhouette. Match the top to your routine, plan regular maintenance, and bring photos so your barber knows the exact way you want it to read.
With clear direction and simple care, a bald fade haircut becomes a reliable base for many styles. Treat the cut like a small habit and enjoy a sharp fade haircut that stays intentional between visits.