Are you searching for a nail design that’s both trendy and adaptable? Imagine having a manicure that’s perfect for any occasion, from a casual day out to a formal event.
Ombre nail designs have become increasingly popular, and it’s easy to see why. They offer a unique and creative way to express your personal style. With ombre nail designs, you can choose from a wide range of colors and gradients to create a look that’s all your own.
One of the most appealing ombre nail designs is the combination of soft, feminine hues. This style is perfect for those who want a cute nail design that’s both elegant and understated.
Key Takeaways
- Ombre nail designs offer a unique and creative way to express your personal style.
- A combination of soft hues can create a cute and elegant nail design.
- Oval nail shapes are a popular choice for ombre nail designs.
- Ombre nails are versatile and suitable for any occasion.
- You can choose from a wide range of colors and gradients to create your perfect look.
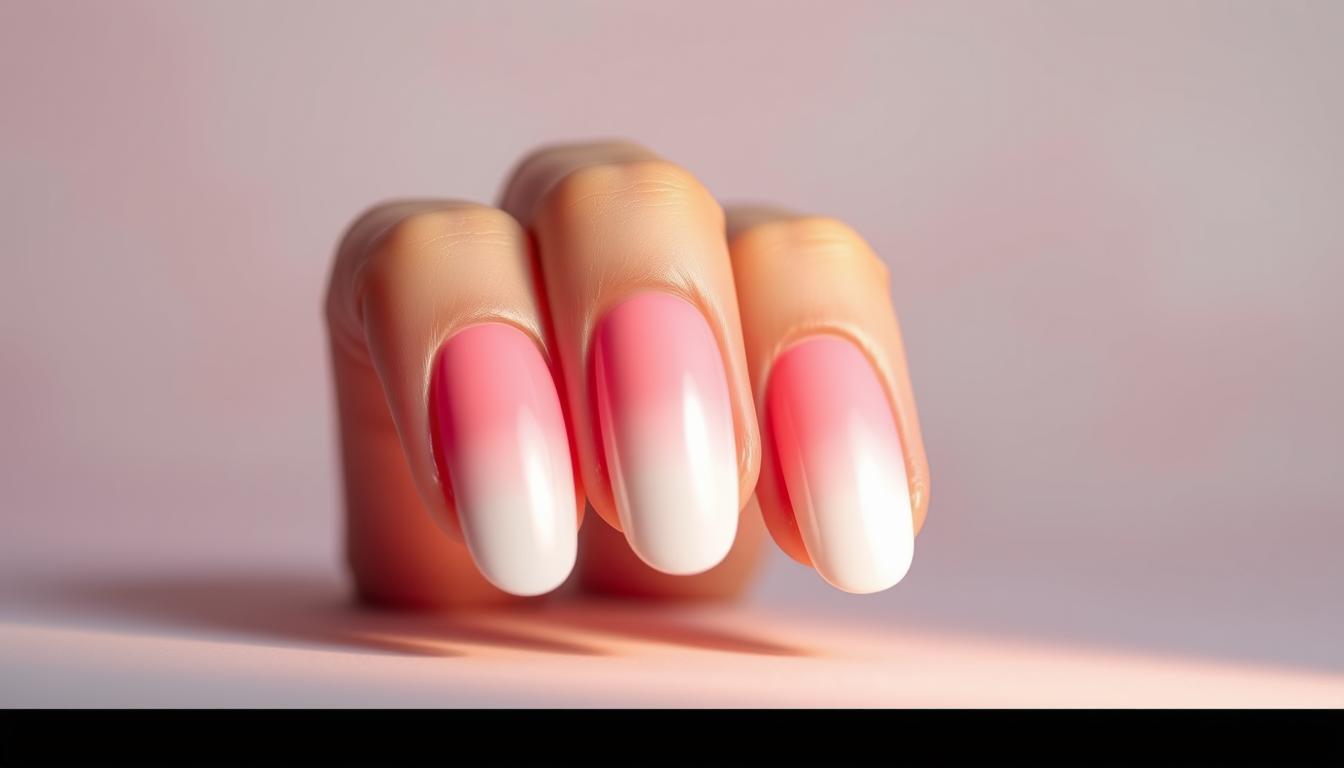
What Are Oval Pink and White Ombre Nails?
Oval pink and white ombre nails are a stylish choice. They mix the elegance of oval nails with the gradient of ombre. This creates a unique and trendy look.
The Definition of Ombre
Ombre comes from the French word for “shadow” or “shade.” In nail art, it means a color gradient. For pink and white nails, it’s blending pink and white for a seamless look. This adds depth to your nails.
Characteristics of Oval Nails
Oval nails are curved and symmetrical, tapering at the tips. They’re versatile and suit most finger types. Oval nails make fingers look longer and slimmer. They’re perfect for showing off ombre colors.
Color Combinations
Pink and white is a classic ombre color combo. Pink is playful and feminine, while white is pure and sophisticated. You can go for soft pastels or bold colors, depending on your style.
Why Choose Oval Pink and White Ombre Nails?
Oval pink and white ombre nails are a stylish choice for anyone wanting to upgrade their nails. They mix the elegance of oval nails with the trendy ombre look. This makes them great for many events.
Aesthetic Appeal
The beauty of oval pink and white ombre nails comes from their soft gradient and classic colors. The ombre effect brings a sophisticated touch. The oval shape also makes fingers look longer, slimming them down. This style looks good on many skin tones and personal styles.
Versatility for Any Occasion
Oval pink and white ombre nails are very versatile. They’re perfect for formal events, casual get-togethers, or everyday style. The soft pink and white colors are not too bold, fitting both conservative and trendy tastes.
Trending Style in Nail Art
Oval pink and white ombre nails are a big hit in nail art. Ombre and gradient styles are all the rage, and paired with oval nails, they’re even more stylish. This trend is popular on social media and among nail artists and influencers.
| Benefits | Description |
|---|---|
| Aesthetic Appeal | Combines elegance with a trendy ombre effect |
| Versatility | Suitable for various occasions, from formal to casual |
| Trending Status | Currently popular in nail art trends |
In conclusion, oval pink and white ombre nails are a fantastic choice for a stylish, versatile, and trendy look. Their beauty and adaptability make them a favorite in nail fashion.
How to Achieve the Perfect Ombre Look
To get a flawless ombre design, you need to know the preparation and application steps. This will help you create a salon-quality look at home.
Preparing Your Nails
Before applying ombre nail polish, prepare your nails first. Start by cleaning your nails to remove oils or lotions. This ensures the polish sticks well.
Use a nail file to shape your nails into an oval. Push back your cuticles gently and trim any excess skin. Proper nail preparation is key for a smooth application and long-lasting manicure.
Choosing the Right Products
Choosing the right products is essential for a great ombre look. You’ll need a base coat, two or more shades of nail polish, and a top coat. Choose polishes with good pigmentation and blending. Brands like Essie, OPI, and Sally Hansen are popular for ombre designs.
| Product | Purpose | Recommended Brands |
|---|---|---|
| Base Coat | Protects nails and promotes polish adhesion | Essie, OPI |
| Ombre Nail Polish | Creates the ombre effect | Sally Hansen, Essie |
| Top Coat | Seals the polish and adds shine | OPI, Seche Vite |
Step-by-Step Application Process
Now, it’s time to apply the ombre design. Start with a base coat to protect your nails. Let it dry completely before moving on.
Apply a light coat of the lightest shade of your ombre polish. Let it dry. Then, use a makeup sponge to dab the polish onto your nails. Start with the lightest shade at the top and build up to the darkest shade at the tip. Blend the colors seamlessly by dabbing gently and using a light touch.
Finish with a top coat to seal in your design and add a glossy finish. With these steps, you can achieve a beautiful DIY nail ombre look that rivals salon-quality designs.
Essential Tools for Ombre Nails
To get salon-quality ombre nails, you need the right tools and products. You’ll need good-quality nail polish, the right tools, and some finishing touches for a flawless ombre design.
Nail Polish Brands to Consider
There are many great nail polish brands out there. Some top picks include:
- Essie: Known for their wide range of colors and long-lasting formula.
- OPI: Offers a vast collection of shades and is popular among nail professionals.
- Sally Hansen: Provides a variety of colors and is known for their Miracle Nail line.
These brands are a good starting point for your ombre design. Choose polishes that are close in color for a smooth transition.
Brushes and Sponges for Blending
The right tools are key for a smooth ombre effect. Two essential tools are:
- Makeup Sponges: Great for a soft, blended look. Just dab the sponge on your nail to spread the polish.
- Nail Brushes: Fine-tip brushes are perfect for nail art or blending colors.
Top Coats for a Finishing Touch
A good top coat is vital for sealing your ombre design and adding shine. Look for top coats that are:
- Quick-Drying: Saves time and prevents smudging.
- Chip-Resistant: Keeps your manicure looking good longer.
Popular top coat options include Sally Hansen and Seche Vite. A top coat will protect your ombre nails and keep them looking fresh.
Tips for Maintaining Your Ombre Nails
To keep your oval pink and white ombre nails looking great, regular care is key. This means taking good care of your nails, using the right products, and knowing when to get a new manicure.
Proper Nail Care Routine
Having a good nail care routine is essential for healthy nails. Keep your nails clean and dry, avoid too much water, and don’t use them as tools. Also, moisturize your cuticles and nail beds to prevent dryness and brittleness.
Key steps in your nail care routine should include:
- Gently washing your hands and nails
- Moisturizing your cuticles and nail beds daily
- Avoiding harsh chemicals or detergents
- Not biting or picking at your nails
Recommended Products for Longevity
Choosing the right products can make your ombre nails last longer. Use a good base coat to prevent stains, a top coat to seal your design, and acetone-free removers to keep your nails moist.
Some recommended products for longevity include:
- Nail strengthening base coats
- Glossy top coats for added shine and protection
- Nourishing cuticle oils
When to Schedule Your Next Manicure
Deciding when to get a new manicure depends on your nail growth and polish condition. Usually, you’ll need a touch-up every two weeks to keep your nails looking good.
Signs that it’s time for a new manicure include:
- Visible nail growth at the cuticle
- Chipping or fading of the nail polish
- Lifting or cracking of the nail polish
Customizing Your Ombre Design

Ombre nails are all about making them your own. You can add nail art, glitter, or different shapes. This way, you can turn a simple design into something truly special that shows off your style.
Adding Nail Art Accents
Nail art trends change all the time. Adding accents to your ombre nails keeps you in style. You can use stickers, stamps, or draw freehand to add cute designs. For example, a small floral pattern or a delicate stripe can make your ombre nails pop.
“Nail art is a way to express yourself, and with ombre, it becomes even more unique,” says a nail art expert. Try using colors that contrast with your ombre to make your nail art really stand out.
Incorporating Glitter or Accessories
Adding glitter or accessories can make your ombre nails sparkle. You can put glitter polish over your ombre or use it for a gradient effect. Also, you can add rhinestones or beads on top for extra shine.
- Apply glitter polish over your ombre base for a cohesive look.
- Use nail accessories like rhinestones or beads to add dimension.
- Experiment with different glitter colors to match your ombre shades.
Experimenting with Different Shapes
While oval nails are common for ombre, you can try other shapes too. Almond, square, or squoval shapes can give your ombre a fresh look. Think about your style and the event when picking a shape.
For instance, almond-shaped nails can make your fingers look longer and more elegant. Square nails, on the other hand, can add a bold, edgy vibe. The important thing is to try different shapes to find the one that fits your ombre design and personal style.
Comparing Ombre Styles
Ombre nail art is a wide world with many styles to choose from. It’s a popular trend, with lots of options for those who want to stay trendy.
Pink and White vs. Other Color Combinations
The pink and white ombre is a classic favorite. It’s elegant and perfect for formal events or daily wear. But, other colors can also make a bold statement.
For example, red and black create a dramatic look. Pastel shades offer a softer, more subtle vibe. Try different colors to find what suits your style best.
| Color Combination | Description | Best For |
|---|---|---|
| Pink and White | Classic, elegant, and sophisticated | Formal events, everyday wear |
| Red and Black | Bold, dramatic | Edgy looks, parties |
| Pastel Shades | Soft, subtle | Spring and summer themes, casual wear |
Matte vs. Glossy Finishes
The finish of your ombre nails can change the look a lot. Matte finishes are understated and elegant. Glossy finishes are shiny and durable.
Matte finishes are great for a subtle, sophisticated look. They work well with earthy tones or muted colors. Glossy finishes make colors pop with their shine.
Seasonal Ombre Variations
Ombre designs can fit any season. In spring and summer, use bright colors to match the lively vibe. Fall and winter are for deeper, richer tones that feel cozy.
- Spring: Pastel shades, floral colors
- Summer: Bright and bold colors, neon shades
- Fall: Warm tones, earthy colors
- Winter: Deep berry shades, icy blues
Think about these factors to pick an ombre style that fits your taste and the season.
Nail Salon vs. DIY Ombre Nails
Choosing between a nail salon and DIY ombre nails is a big decision. Both have their good and bad sides. We’ll look at these to help you decide.
Pros and Cons of Professional Services
Salon ombre nails offer many benefits. Professional technicians can make your nails look amazing and last long. They also give advice based on your nails and what you like.
But, salon services cost more. You also need to book appointments, which might not fit your schedule. Prices differ based on the salon’s fame and where it’s located.
| Aspect | Salon Services | DIY |
|---|---|---|
| Cost | Generally more expensive | Can be cost-effective |
| Expertise | Professional technicians | Dependent on personal skill |
| Time | Requires scheduling an appointment | Can be done at any time |
Benefits of Doing It Yourself
Doing your nails at home lets you try new designs and colors easily. It’s also cheaper because you avoid salon costs.
Doing your nails yourself also lets you learn and control the look. There are many tutorials and trends online to follow.
How to Decide the Best Option for You
Think about your budget, time, and comfort with nail art when choosing. If you want a pro look and don’t mind spending, go to a salon. But, if you’re on a tight budget or enjoy making things, DIY is better.
The key is to choose what makes you feel good and confident. Whether it’s following the latest trends or a classic style, just be happy with your nails.
Common Mistakes to Avoid

Ombre nail designs are very popular, but getting a perfect gradient can be tough. To help you nail your DIY nail ombre, we’ll cover some common errors to steer clear of.
Overlapping Colors
One big mistake in gradient nail colors is overlapping. This can make your nails look muddy or uneven. To prevent this, clean your brush between colors and let each layer dry before adding the next.
Skipping Base and Top Coats
Not using base and top coats can make your ombre nails look dull and not last long. A base coat helps the polish stick, and a top coat seals it in, adding shine. Always include these steps for a polished look.
Inconsistent Techniques
Using the wrong techniques can mess up your ombre nail designs. For a smooth gradient, use a sponge or a special ombre brush. It might take a few tries to get it right, so don’t get discouraged.
By avoiding these mistakes, you can get a stunning, professional DIY nail ombre that boosts your nail game. Remember, patience and practice are essential to mastering ombre nail designs.
Understanding Nail Health
Healthy nails are key for a great manicure, like ombre nails. To keep your nails looking good, knowing about nail health is important.
Nail Strength Importance
Nail strength helps your nails last through daily activities. Weak nails can break or split, ruining your nail art. Use a nail strengthening base coat to make your nails stronger.
Signs of Damaged Nails
Spotting damaged nails early can stop problems from getting worse. Look out for discoloration, brittleness, and ridging. If you see these, it’s time to change your nail care routine for healthier nails.
Tips for Healthy Nail Growth
Healthy nail growth needs good care and the right food. Here are some tips for better nail health:
- Keep your nails moisturized with a nourishing cuticle oil.
- Avoid too much exposure to chemicals, like in nail polish removers.
- Eat a balanced diet full of vitamins and minerals, like biotin, for nail health.
| Nail Care Tip | Benefit |
|---|---|
| Moisturizing | Prevents dryness and brittleness |
| Avoiding harsh chemicals | Reduces risk of nail damage |
| Balanced diet | Supports nail growth and strength |
Understanding and taking care of your nail health leads to stronger, more beautiful nails. This makes your nail designs last longer.
Exploring Ombre Nail Trends
Thanks to social media, ombre nail trends are more varied and easy to find than ever. You can discover many styles and ideas from all over the world, right on your phone.
Celebrity-Inspired Ombre Styles
Celebrities often lead the way in nail trends, and ombre is no different. Stars like Lady Gaga and Rihanna have shown off bold ombre looks on the red carpet. They inspire fans everywhere.
These styles often mix unique colors and creative designs. They go beyond what’s usually seen in nail art.
Social Media Influences
Instagram and TikTok are full of nail art trends. Influencers and nail artists share their latest work. This gives endless ideas for trying out ombre.
Hashtags like #OmbreNails and #NailArt have millions of views. They show the creativity in the nail community.
Seasonal Trends to Watch
Ombre nail trends change with the seasons. In spring and summer, bright and pastel colors are in. Fall and winter bring deeper, richer shades.
Keeping up with these trends can keep your nails looking great all year.
How to Remove Ombre Nails Safely
Ombre nails can add a stunning touch to your look. But, it’s important to remove them safely to keep your natural nails healthy.
Best Practices for Nail Polish Removal
To safely remove ombre nails, use the right methods and products. First, get a nail polish remover that’s acetone-based for the best results.
- Soak a cotton pad with the remover and place it on your nail.
- Wrap the cotton pad with aluminum foil to keep it in place.
- Let it sit for about 10-15 minutes before gently scraping off the polish.
Avoiding Damage During Removal
Be gentle when removing ombre nails to avoid damage. Don’t use harsh chemicals or scrape too hard, as this can harm your nails.
Tips for Safe Removal:
- Choose a nail polish remover made for your nail type.
- Don’t reuse cotton pads soaked in remover.
- Moisturize your nails and cuticles after removal.
Caring for Your Nails Post-Removal
After removing your ombre nails, take care of your natural nails. Apply cuticle oil and hand cream to keep them hydrated.
| Post-Removal Care | Benefits |
|---|---|
| Apply cuticle oil | Hydrates the nail bed and cuticles |
| Use a nail strengthening base coat | Helps to fortify weak nails |
| Moisturize your hands | Keeps your hands and nails healthy |
Seasonal Occasions for Ombre Nails
Ombre nails are great for any season or holiday. You can change your look easily to match the season or celebrate a special day.
Spring and Summer Inspirations
In spring and summer, go for bright and pastel colors. Soft pinks, baby blues, and mint greens are perfect for a fresh look. Add floral patterns or stripes for a seasonal vibe.
Fall and Winter Adaptations
When it gets cooler, try deeper colors for fall and winter. Use deep reds, burgundies, and emerald greens for a cozy look. Metallic accents like gold or silver add luxury. Dark colors paired with lighter shades make for a striking contrast.
Celebrating Holidays with Nail Art
Ombre nails are great for holidays. For Halloween, use orange and black with spider web art. For Christmas, try red and green with snowflakes. nailcutandink.com has lots of ideas for ombre nail designs.
| Season/Holiday | Ombre Nail Design Ideas | Color Combinations |
|---|---|---|
| Spring | Floral patterns, stripes | Pastel pinks, blues, yellows |
| Summer | Neon colors, glitter | Bright corals, turquoises |
| Fall | Leaf patterns, metallic accents | Deep reds, oranges, burgundies |
| Winter | Snowflakes, icy blues | Metallic silvers, golds, dark blues |
Final Thoughts on Oval Pink and White Ombre Nails
You now know a lot about oval pink and white ombre nails. This trendy style is not just pretty but also fits many events. It’s a great choice for anyone looking to update their nails.
Personalizing Your Nail Art
Embracing oval pink and white ombre nails means showing off your unique style. You can add nail art, glitter, or try different shapes. This way, your nails will truly reflect your personality.
Responsible Trend-Following
When following the latest nail trends, remember to keep your nails healthy. This ensures your oval pink and white ombre nails stay beautiful and strong.
By choosing wisely and staying true to yourself, you can confidently sport the oval pink and white ombre nail trend. You’ll also stay ahead in the world of nail art.