
Ready for a clean, modern look that suits work and weekends? This guide breaks down what a fade is, why men choose it, and how barbers create that smooth blend from the sides into the top.
The style has roots in 1940s military grooming and rose to pop culture fame in the 1980s with iconic high‑top looks. Today barbers offer low, mid, high, skin, drop, burst, and temple variations to match face shape and routine.
Expect straightforward advice on picking the right option, sharing photos with your barber, and asking about guard numbers, height, and drop. Regular touch‑ups every 2–3 weeks keep the blend crisp.
Later sections cover differences like taper vs. fade, styling with matte clays or pomades, and a final inspiration board you can screenshot for your next appointment. For a quick reference on types, see this guide on fade types.
Key Takeaways
- The fade creates a smooth blend from shorter sides to a longer top for a modern look.
- It evolved from military roots to 1980s pop culture and many modern variations.
- Bring photos and use guard numbers to get the height and drop you want.
- Plan light touch‑ups every 2–3 weeks to keep proportions sharp.
- Choose products based on finish: matte for texture, pomade for shine.
- This guide helps you match style to face shape, hair type, and lifestyle.
Why the Fade Endures: Sharp, versatile, and timeless
A well-blended side-to-top transition keeps a look fresh, whether you want subtle polish or clear contrast. It reads as both professional and purposeful with only small changes to height or edge.
From clean-cut pro to bold contrast: what a fade says about your style
Low and mid heights read conservative and office-ready. A higher or skin variation signals risk and confidence with a bold contrast.
That flexibility lets you choose how much attention you want from day to day. The same base can support polished comb-overs, textured crops, or coiled tops.
Benefits at a glance: adaptability, easy upkeep, and a polished look
The cut spans decades because its clean transition flatters many face shapes and features. Maintenance is simple: light at-home edging and touch-ups every two to three weeks keep you looking sharp.
| Height | Visual Effect | Best For |
|---|---|---|
| Low | Subtle weight, conservative look | Offices, classic styles |
| Mid | Balanced contrast, versatile | Everyday wear, varied styles |
| High / Skin | High-definition edge, bold contrast | Statement looks, creative wardrobes |
Want a modern twist that pairs well with a mullet? Check this mullet haircut guide for ideas that blend texture and perimeter work.
What is a fade vs. a taper? Getting the terms right
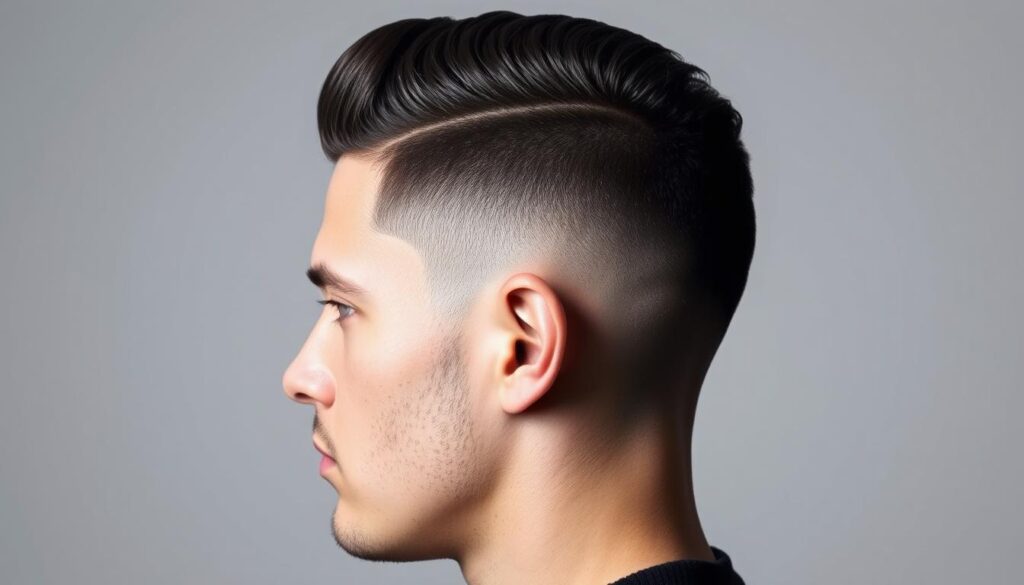
Knowing the difference between a taper and a skin finish helps you get exactly the look you want at the barber.
Fade defined: A fade blends down to skin above the natural hairline. It creates a sharp contrast and leaves visible scalp where the blend reaches skin.
Taper defined: A taper is a gradual reduction in length that preserves the natural hairline. The result is subtler, with the line staying behind the ear and at the nape.
Names that mean the same thing in different places
Temple fade, Brooklyn fade, and blowout are regional tags for a taper fade focused at the temples and nape. These versions usually show skin only around the temples while keeping the hairline behind the ear intact.
- Why it matters: Asking for a taper fade vs. a full skin fade changes how much skin is visible and how sharp the outline reads.
- Describe where the skin should start and how high on the head the blend should climb.
- Bring photos and say whether you want a natural, sharp, or skin finish so your barber can match expectations.
A quick history of the fade: from military precision to cultural icon
What began as a practical military rule became a global marker of personal expression.
In the 1940s, armed forces pushed a higher-and-tighter evolution of the buzz cut. The goal was uniformity: neat, low-maintenance, and easy to groom under strict codes. That precision taught barbers how to blend short sides into longer tops with clean order.
By the 1980s urban barbers and hip-hop artists turned the technique into bold style. The high-top era—think Kid ’n Play—used sharp side blends to frame dramatic silhouettes on top. That period cemented the look as a cultural statement for men across cities.
The 1990s and 2000s spread the approach worldwide. Regional twists and new names appeared as barbers experimented with head contours. Specialty variants like drop, burst, and temple emerged from that creative push.
Through decades, the constant has been precision and blending skill. Today classic barbering meets social media, letting the cut stay timeless while serving as a canvas for reinvention. For modern hybrids that mix texture and perimeter work, check a popular guide on the mullet fade.
Types of fade haircuts: low, mid, high, and beyond
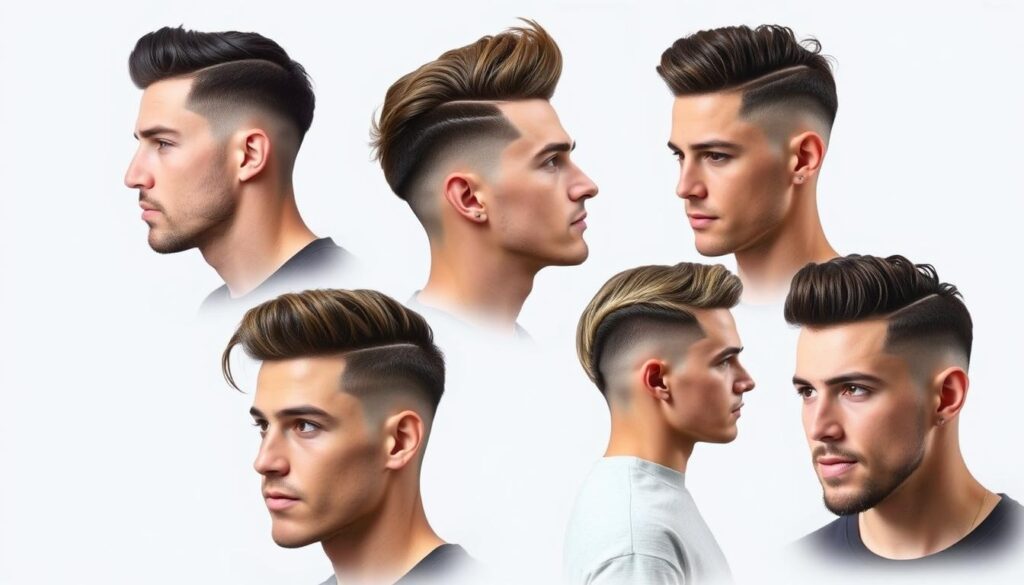
Small shifts in placement change how bold or subtle the overall style reads. Below are quick notes to match a placement to your face, density, and routine.
Low: subtle and work-friendly
Low fades start just above the ears and keep skin exposure minimal. This makes them the most conservative choice for offices and first-timers.
Pairs well with side parts or swept-back tops and hides scalp for thinner areas.
Mid: balanced contrast for broad appeal
Mid fades begin around the middle of the head. They give noticeable definition on the sides while leaving room to style the top in many directions.
Try mid placements with textured crops or comb-overs for a modern look.
High: bold, sharp sides
High fades start above the temples and create a clear, bold contrast that draws attention to angles and facial structure. Expect faster regrowth and more touch-ups.
High cuts work well with cropped or buzzed tops and can lengthen a round face.
Shadow: soft, low‑contrast finish
The shadow fade leaves a faint hint of stubble through the blend for a gentler result. It’s a great middle ground if you want polish without stark lines.
Tip: Start low and move higher in future visits as you grow comfortable with skin exposure. All of these rely on clean clipper work and tight blending along the sides for a crisp professional finish.
Skin fade deep dive: low, mid, high, and drop variations
When the sides are cut down to bare skin, placement defines the whole look.
Define it: A skin fade tapers the sides all the way to bare skin, creating a glass‑clean outline at the base. Precision matters for comfort and a smooth blend.
Low skin
The low skin shows about an inch or less of skin above the natural line. It drops smoothly behind the ear and keeps the sides feeling fuller and conservative.
Mid skin
Mid placements start near brow height, lifting contrast for a modern edge. The line still drops slightly at the back of the head for balanced flow.
High skin
High options clear the sides up toward the crown for maximum contrast. This makes the top appear taller and the profile sharper.
Drop skin
A drop variation dips along the back head to follow skull shape. It creates a contoured silhouette that moves naturally with the neck.
“Discuss where you want skin to start and how much drop you like for a custom contour.”
- Tip: Low pairs with longer tops; mid fits textured crops; high works with ultra-short tops.
- Scalp care: hydrate and use SPF where skin shows.
| Variation | Exposure | Best Pairing |
|---|---|---|
| Low skin | Minimal, even | Longer top / conservative |
| Mid skin | Noticeable, brow level | Textured crop / versatile |
| High skin | High contrast, near crown | Ultra-short top / bold |
| Drop skin | Contoured at back head | Curved nape / skull-aware |
Specialty fades that add character: burst, drop, and temple
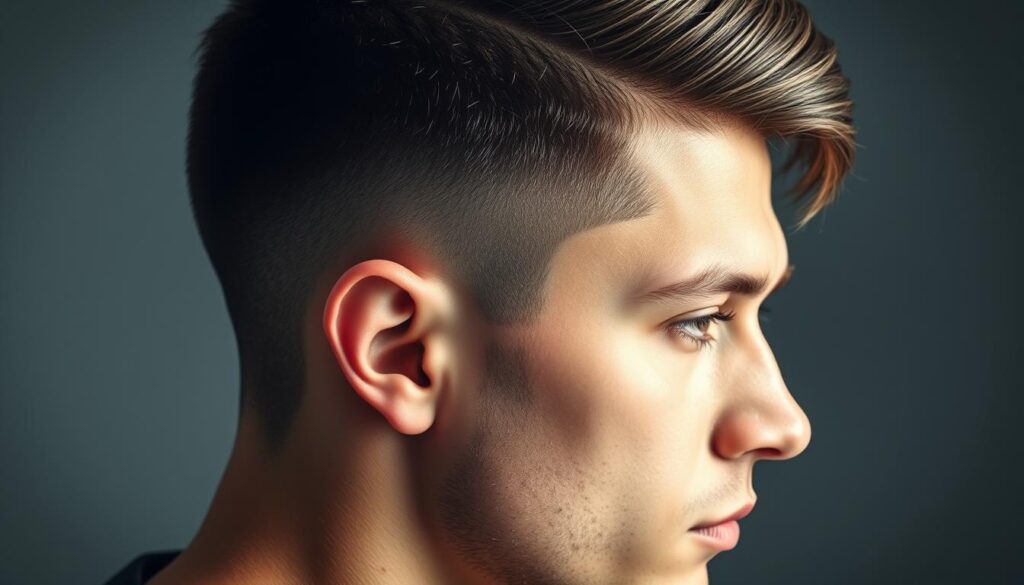
Curved outlines and strategic dips give modern styles extra personality without altering the top. These specialty options change the look by shaping the sides and nape, so a simple top can read sharp or soft depending on placement.
Burst: the semicircle around the ear
The burst creates a semicircle arc that wraps the ear and ends at the side of the neck. It doesn’t continue across the nape, so it pairs especially well with short mullets, faux hawks, and mohawks.
Temple (taper): clean edges at temples and nape
The temple or taper focuses detail at the temples and nape while keeping the natural hairline behind the ear. This gives a crisp perimeter and suits afros or curly tops that need a neat frame.
When to pick a drop over a burst
Drop fades dip along the back of the head to follow skull contour. Choose a drop fade when you want flowing lines that frame curls, coils, or longer tops for smoother movement.
- Maintenance: temple detailing often needs more frequent line-ups.
- Talk to your barber: agree on how tight the arc or dip should sit around the ear and neckline.
- Pairings: burst with a short mullet, temple with textured or curly tops, drop for wavy, flowing looks.
Trending fade styles in the present: what’s hot right now
Current barbershop favorites mix contrast and texture to create fresh, photo‑ready profiles. These looks combine classic shapes with modern edge, so they suit many routines and face types.
Burst taper mullet
Why it works: The burst taper around the ear gives a vintage attitude with modern detail. It frames a longer back while keeping sides neat and graphic.
Mid fade + buzz cut
The mid placement paired with a buzz cut is low-effort and very tidy. It’s easy to wash, quick to style, and ideal for busy routines.
Skin fade + pompadour
High contrast: Razor‑clean sides set off classic volume on top. Use a medium‑shine pomade for hold and definition.
Temple fade + afro
This combo honors natural texture while keeping a crisp perimeter. Light creams help define coils without weighing them down.
“Save a few reference photos from your feed so your barber can match silhouette and finish.”
- Think about lifestyle and workplace before picking a look.
- Small tweaks—raising the height or softening the temple taper—refresh a style without a full change.
- Maintenance varies: skin and tight temple work need quicker touchups than softer blends.
How to choose a fade for your face shape
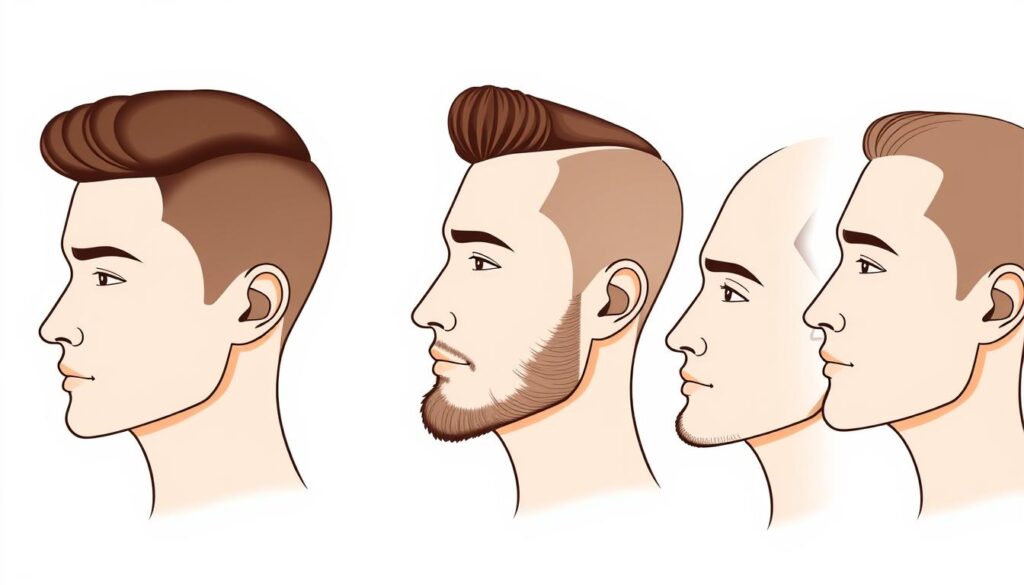
A smart placement choice brings balance by guiding where people look first. Start by identifying your face shape, then pick a side placement and top length that changes perceived proportions.
Round
For round faces, prefer high fades or skin placements to add vertical lines. Raising the sides creates height and reduces the sense of width.
Keep the top slightly longer and textured to lengthen the profile. A short fringe works against the goal; avoid heavy front pieces that flatten height.
Oval
Oval shapes are flexible. You can experiment with low fades, a mid fade, or higher placements without upsetting balance.
Make your choice based on lifestyle and how bold you want the side contrast to be. Try small changes over several visits to find a favorite.
Square
Square jaws benefit from higher side work that accentuates angles. A higher placement highlights cheekbones and frames the jaw.
Pair this with defined length on top to complement the strong bone structure. Beard length can further balance and soften edges.
Long
Long faces need width. Opt for lower side placements and fuller, textured tops to reduce vertical emphasis.
Longer fringe or side-swept pieces break up length and make the overall profile feel more even.
- Quick tips: pick height to control where the eye travels—higher pulls focus up, lower grounds the profile.
- Use photos of people with a similar face shape to set realistic expectations.
- Ultimately, comfort with the final choice and daily confidence should steer your decision.
Hair type and texture: dialing in the best fade for your hair
Different textures demand distinct placements—what works for thick, straight density won’t suit tight coils.
Thick density: For robust, full heads, pick mid or high placements to remove bulk on the sides and spotlight texture on the top. Use matte clays or creams for grip without a crunchy finish. Clippers plus scissor work on top help keep shape while preserving movement.
Fine or thinning
Low placements keep coverage and avoid exposing scalp too high. Lighter guard choices at the sides maintain a natural look while scissors on top preserve perceived density. Be honest about cowlicks and growth patterns so the barber can set realistic upkeep expectations.
Curly, coily, and wavy
Temple, drop, or burst placements frame natural patterns and let curls breathe. Choose light creams or gels to define without stiffness. A touch more length on the top helps shape waves and coils, and diffusing or air‑drying reduces frizz.
“Pick height in harmony with your texture to balance a flattering silhouette and easy daily styling.”
- Seasonal tip: powders add lift in summer; creams steady humidity in winter.
- Clipper note: guard choices and scissor thinning control weight without flattening texture.
Lifestyle fit: professional polish to creative edge

Your daily routine should guide which look you pick — polished for meetings or bold for weekend events.
Office-ready: low and mid placements
Low and mid heights give a conservative silhouette that reads professional. Pair these with neat crops, comb-overs, or short textured tops for a tidy finish.
They are easier to maintain and work well when you want an option that stays subtle through the day.
Standout looks: high and skin placements
High placements, skin options, and burst arcs create a bolder profile. These choices suit creative roles and weekend looks that demand more contrast and personality.
Expect more frequent touch-ups if you want that razor-edge outline kept consistently sharp.
- Choose based on morning routine — less time calls for lower contrast and simple styling.
- Discuss workplace norms with your barber so your choice balances individuality and polish.
- Pack a travel kit: one matte clay and one light cream for weekday to weekend switches.
| Choice | Look | Upkeep |
|---|---|---|
| Low / Mid | Boardroom‑friendly, subtle | Trim every 3–4 weeks, easy maintain |
| High / Skin | Bold, modern | Touch-ups every 2–3 weeks for looking sharp |
| Burst / Specialty | Creative silhouette | Frequent line-ups for a clean arc |
Pick the one you can sustain — confidence and comfort make any choice work.
hair fade haircut maintenance: staying sharp between visits
Keep your look sharp between visits with a simple routine that targets the sides, neckline, and scalp.
Regular small steps prevent the blend from softening and save time at the barber.
Touch-up timing
Book trims every two to three weeks to keep the transition on the sides seamless with the top. A typical blend starts losing crispness after about two weeks, so planning trims every two to three weeks preserves the shape.
At-home edge care
Use a small cordless trimmer for the neckline and around the ears. Trim only the stray growth and avoid chasing symmetry—uneven DIY passes force a full reblend at your next visit.
- Tip: Shower and fully dry before edge-ups to see true growth.
- Ask your barber for a “clean‑up only” option to stretch time between full cuts.
- Sleep on a clean pillowcase and brush off product buildup to keep edges tidy.
Scalp care where skin shows
Where skin is exposed, moisturize gently and apply SPF when you’ll be outdoors. Dry, irritated skin looks worse as the blend grows out, so protect and hydrate consistently.
“A light touch at home and scheduled trims keep the silhouette looking intentional.”
For quick styling between visits, a light hold product or a texturizing powder can refresh volume without adding residue. Track how fast your growth happens so you can time appointments ahead of important events.
Product playbook: finish for every style and hair type
The finish you choose controls shine, hold, and how much texture shows on the top.
Match product weight to density and curl pattern so styles hold without collapse.
Matte clays and creams for natural texture on top
Matte clays add grip and definition to thicker tops without shine. Use creams to keep movement soft and touchable.
Work a small amount in your palms, emulsify, and apply from the back to the front to avoid heavy spots near the hairline.
Pomades and gels for sleek, high-shine control
Pomades suit comb-overs and pompadours that need control with low or medium shine. Gels lock styles for long days and keep every strand in place.
Use gels sparingly on curls. For straight or dense tops, a thin layer gives structure without stiffness.
Sea salt spray and powders for volume and grit
Sea salt adds slight grit and makes building volume easier. Texturizing powders boost lift at the roots for fine top sections and refresh second‑day styling.
- Tip: Start with a dime‑sized amount and add gradually to prevent buildup.
- Care: Use a clarifying shampoo weekly if you cycle heavy products.
- Apply: Lighter products on curls—cream first, then a touch of gel if needed.
| Product | Best for | Finish |
|---|---|---|
| Matte clay | Thick, textured top | Matte, defined |
| Cream | Curls, soft movement | Natural, low‑shine |
| Pomade / Gel | Comb‑overs, glossy styles | Slick, high‑hold |
| Sea salt / Powder | Fine or flat top | Textured, lifted |
“The right product routine makes any cut easier to style and more consistent day to day.”
Talk like a pro at the barbershop: terms, guards, and photo refs
Telling your barber precise details saves time and avoids surprises when the sides and top meet. Use clear terms for height (low, mid, high), say if you want a drop at the back of the head, and state how close to skin you want the base—skin, shadow, or taper.
How to describe height, drop, and finish
State the placement: low for subtle, mid for balance, high for a bold contrast. Say “drop” if you want the back to curve with your skull. Tell the barber the base finish: skin, shadow, or taper.
Why photos help: communicating length on the sides and top
Bring front, side, and back shots. Add a note about guard numbers for the sides (for example, “start with a 0.5 to skin”) and your preferred length on the top. Remember guards read differently on dense versus fine heads.
Common terminology differences across regions
Regional names like Brooklyn or blowout often point to a temple‑focused taper. Visuals remove ambiguity. Mention daily styling habits, confirm natural vs. sharp line‑ups, and ask for a mirror check before the final blow‑down.
“A two‑visit learning curve is normal when dialing in a new fade haircut with a new barber.”
Common mistakes to avoid with fade haircuts
What looks minor when you’re trimming can force a full reset at your next appointment. Small DIY edits often make hard lines or thin patches that a barber must shave back to fix.
Over‑trimming at home and losing the blend
Don’t chase symmetry with a trimmer. Cleaning up too high or too deep removes the blended zone and creates visible steps.
- Only tidy edges; never rework the middle of the blend.
- A bad at‑home pass can force a full re‑cut at your next visit.
Choosing the wrong height for your face shape
Picking a placement that clashes with your face shape can make features look off. Match height to proportions to avoid accentuating roundness or length.
Choice matters: start lower if you’re unsure and raise placement over time.
Skipping maintenance and products for your hair type
Skipping trims lets bulk return unevenly and makes the cut look tired fast.
- Book touch‑ups every 2–3 weeks.
- Use light creams for curls, matte clays for thick straight sections, and powders for fine tops.
- Check cowlicks with your barber so problem spots don’t become gaps.
Patience and small adjustments beat drastic changes — photos of a past successful cut help barbers replicate what worked.
Inspiration board: fade combos for every vibe
An inspiration board helps you mix classic silhouettes with modern detailing for a personal result.
Minimal and tidy: Try a buzz cut paired with short sides for the ultimate no‑nonsense look. A buzz cut is low‑maintenance and easy to refresh with quick trims.
Textured crop and swept-back options
Choose a textured crop with blended sides to add modern edge without fuss. Use matte clay to emphasize grain on the top.
For boardroom versatility, pair a swept‑back top with a low skin fade to keep a sleek silhouette that still moves from meetings to nights out.
Curly top and classic contrast
A curly top with a drop fade sculpts the natural shape and highlights coil definition. Light creams work best to keep texture soft.
Pair a pompadour with a skin base to dial up contrast and give a timeless, sharp profile. Medium‑shine pomade holds the lift without stiffness.
- Save and show a few photos to lock in height, drop, and outline.
- Small tweaks—raise the placement or soften the finish—to make any reference feel personal.
- Adapt each combo to your density and daily routine so the style stays manageable.
| Combo | Best For | Product Match |
|---|---|---|
| Buzz cut + short sides | Minimalists, fast upkeep | Light scalp moisturizer |
| Textured crop + blended sides | Modern, work‑friendly | Matte clay |
| Swept‑back top + low skin fade | Boardroom to evening | Medium‑hold cream |
| Curly top + drop fade | Contour and definition | Light cream |
| Pompadour + skin base | High contrast, classic | Medium‑shine pomade |
Experiment over a few visits to find the combo that feels most “you,” and keep photos handy to guide your barber.
Conclusion
Decide on height, base finish, and silhouette so each visit delivers the result you want. Choose skin, shadow, or taper and pick a drop or specialty arc that fits your face.
Match choices to your face shape and texture so styling feels easy. Use simple product routines that support a textured, natural, or sleek finish and protect exposed scalp.
Bring photos and clear notes for your barber. Say guard numbers and show front, side, and back shots to avoid confusion at the chair.
Book trims every 2–3 weeks to stay crisp. Try small adjustments over time—raise or lower placement until it feels right.
The right look is timeless and adapts to modern trends. Save this guide, pick a style from the inspiration board, and book with a trusted pro. Thanks for reading — you’re one step closer to looking best.
