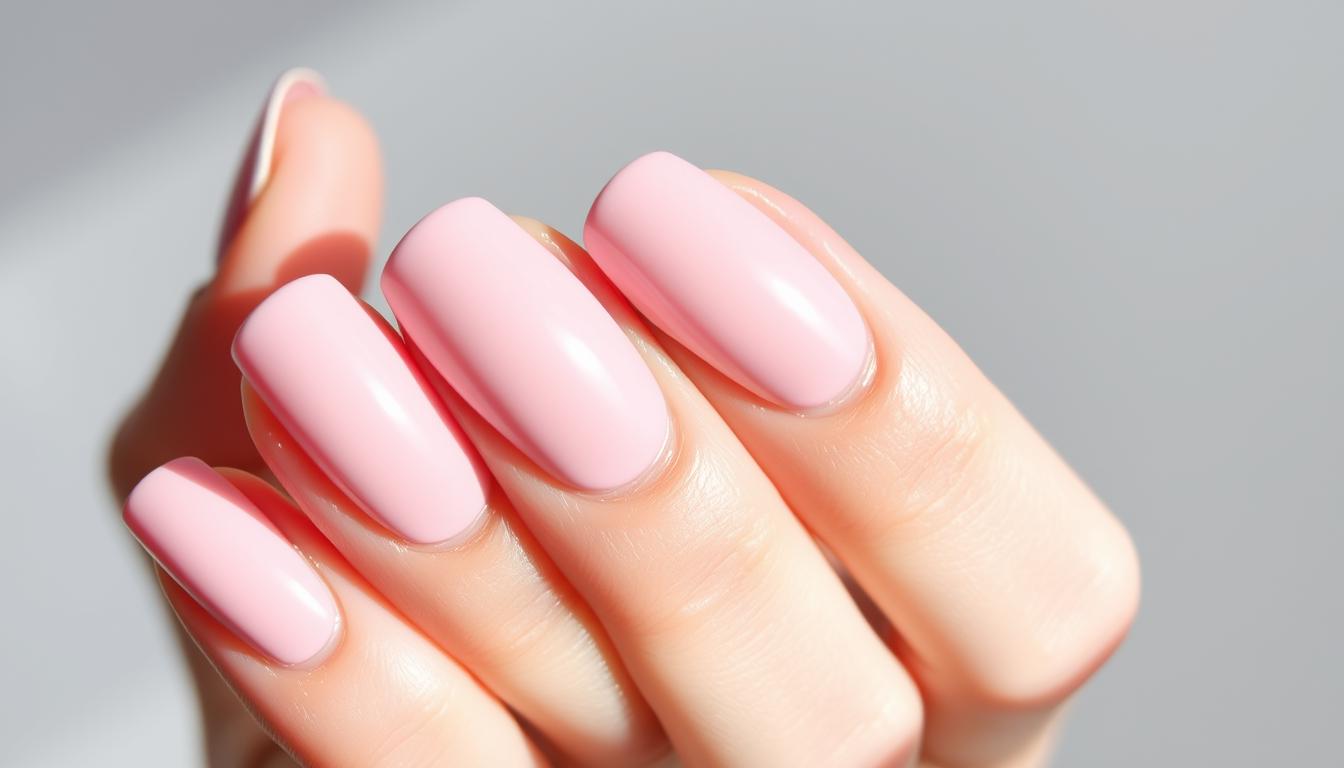
Could your next manicure outlast your phone battery? Imagine a salon-quality finish that stays flawless for weeks without chipping or peeling. This isn’t magic—it’s the power of a modern technique transforming how we think about nail care.
The process involves layering colorful particles over a specially formulated base. Each coat bonds tightly to your natural nails, creating a chip-resistant surface that laughs at dishwashing, typing, or even gardening. Unlike traditional methods, there’s no UV lamp required—just precision and a few simple steps.
Beauty enthusiasts love how this approach combines durability with flexibility. Salons report clients returning less frequently while maintaining showroom-ready nails. The secret lies in the unique blend of ingredients that harden into a protective shield, adapting to your nail’s natural movement.
Key Takeaways
- Lasts up to three weeks without chipping or lifting
- Applied through a layering process with colored particles and sealant
- No UV light required during application
- More flexible and lightweight than acrylics
- Gentler on natural nails compared to some alternatives
Ready to ditch constant touch-ups? This guide breaks down everything from the science behind the technique to pro tips for flawless at-home application. Discover why millions choose this method for long-lasting, vibrant nails that keep up with busy lifestyles.
Introduction to Dip Powder Nails

Nail enthusiasts are trading traditional polishes for a revolutionary technique that lasts weeks. This method merges acrylic’s toughness with gel’s glossy finish—minus the UV lamps or complicated removal processes. Salons call it SNS, but you’ll recognize it by the vibrant colors that stay flawless through daily wear.
Beauty experts praise its user-friendly application. Unlike acrylics that need liquid monomers or gels requiring curing lights, this system uses colored particles bonded with adhesive layers. The result? A flexible shield that bends with your natural nails instead of cracking.
Check out how it stacks up against other options:
| Feature | Traditional Polish | Gel | Dip Powder |
|---|---|---|---|
| Durability | 3-5 days | 2-3 weeks | 3-4 weeks |
| Application Time | 15 mins | 45 mins | 30 mins |
| Removal | Instant | Filing/Soaking | Acetone soak |
| UV Exposure | None | Required | None |
DIY lovers appreciate the minimal tools needed—just base coat, powder, and sealant. Professionals report 40% more clients requesting this service since 2022. It’s not just hype; the numbers prove its staying power in beauty routines.
Best part? You get customizable thickness without bulky extensions. Whether you prefer subtle nudes or bold metallics, the layered approach adapts to your style while protecting nail beds.
Understanding What is Dip Powder Nails

Ever watched a color transform from loose particles to glass-like perfection? The magic happens through a layered bonding process. A sticky base grabs pigmented granules, locking them into place like microscopic puzzle pieces. Each application builds strength while maintaining flexibility.
Professionals use two main methods for application. Some press fingers directly into jars, while others pour pigments over prepared surfaces. Both techniques rely on the chemical reaction between adhesive liquids and acrylic-based powders. This fusion creates a shield that resists chips better than standard polish.
See how application differs across manicure types:
| Method | Adhesion Process | Finish Texture |
|---|---|---|
| Traditional Polish | Air-drying | Thin, prone to dents |
| Gel | UV-cured layers | Hard, glossy surface |
| Dip Technique | Particle bonding | Flexible yet durable |
Salon experts recommend specific particle sizes for different effects. Finer grains create smoother surfaces, while coarser options add subtle texture. The final activator liquid triggers polymerization—turning layered dust into a solid, glossy armor.
Proper preparation makes all the difference. Clean, buffed surfaces allow maximum adhesion. Multiple thin coats prevent lumpiness better than thick applications. With practice, you’ll achieve salon-quality results that stay put through countless hand washes and keyboard sessions.
Benefits of Dip Powder Manicures

What if your manicure survived your toughest tasks? This technique delivers three-week staying power that outlasts standard polish by 200%. Gym sessions, typing marathons, or gardening adventures won’t faze its flexible armor.
| Feature | Traditional Polish | Gel | Dip Powder |
|---|---|---|---|
| Average Wear | 5 days | 14 days | 21 days |
| Drying Time | 15+ mins | UV light required | Instant set |
| Nail Protection | Minimal | Moderate | Reinforced layer |
| Cost Per Month | $40+ | $60+ | $30 |
Active lifestyles demand resilience. Unlike brittle gels that crack under pressure, the bonded layers flex with your movements. Nurses, artists, and parents rave about surviving daily chaos with flawless tips.
Skip the UV lamps and smudge anxiety. Colors cure instantly through chemical activation—no waiting between coats. Salons offer 500+ shades, while DIY kits let you mix custom hues. For creative flair, explore stunning stiletto nail designs that showcase metallic pigments and ombre effects.
Your natural tips thrive underneath. The fortified surface prevents splits and breaks, letting lengths grow without fear. Over time, many users report stronger beds thanks to reduced filing and acetone exposure during fills.
Budget-conscious? One $40 kit creates 8+ applications—that’s $5 per salon-quality finish. Compare that to weekly polish changes or bi-monthly gel appointments. Durability meets affordability in every vibrant layer.
Detailed Application Process of Dip Powder Nails

Ready to transform your manicure routine? Mastering the technique requires precision and timing. Let’s break down each phase to help you avoid common pitfalls and achieve flawless results.
Nail Preparation and Base Coat Application
Start with clean, dry fingertips. Use a 180-grit buffer to gently remove shine from natural surfaces. Push back cuticles carefully—any leftover skin can cause lifting later. Sanitize with alcohol wipes to eliminate oils.
Apply Bond product in thin strokes, avoiding skin contact. This creates a tacky surface for better adhesion. Wait 15 seconds before brushing on the first layer of Base. Work one finger at a time to prevent premature drying.
Layering the Powder and Sealant
Angle your finger at 45 degrees when dipping into pigmented particles. Hold for two seconds, then lift straight up. Tap the side of your hand to dislodge loose grains. Use a soft brush to sweep away leftovers after 30 seconds.
Repeat the Base-and-dip sequence 2-3 times for full coverage. Finish with Activator liquid to harden layers, then buff gently for smoothness. Seal with Top Coat using three swift strokes.
| Step | Time Required | Tool Needed | Pro Tip |
|---|---|---|---|
| Prep | 5 mins | Buffer | File in one direction |
| Base Coat | 30 secs/nail | Bond product | Keep away from skin |
| Dipping | 10 secs/nail | Powder jar | Rotate container |
| Sealing | 2 mins | Activator | Double-layer Top Coat |
Struggling with uneven texture? Apply thinner coats and maintain consistent dipping angles. For stubborn bubbles, lightly file between layers. Remember—patience beats rushing when building durable color armor.
At-Home vs Salon Dip Powder Nails

Choosing between DIY kits and professional services shapes your nail care experience. Let’s break down costs, convenience, and results to help you decide.
DIY: Freedom With Practice
Home kits offer creative control at $20-$60 upfront. While budget-friendly, they demand patience—expect 2 hours for your first attempt. Proper prep work and layering techniques make or break durability.
Salon Perfection on Demand
Professionals deliver flawless results in 90 minutes for $30-$60. Trained nail technicians use medical-grade sanitation and premium products. Many salons now offer solar nail enhancements alongside traditional services.
| Factor | At-Home | Salon |
|---|---|---|
| Cost Per Session | $2.50-$5 | $30-$60 |
| Time Investment | 2+ hours | 90 minutes |
| Error Correction | Self-managed | Expert fixes |
First-timers often prefer salons for guaranteed outcomes. Seasoned enthusiasts enjoy home customization once they master the powder-to-sealant ratio. Your lifestyle and schedule ultimately determine the smarter choice.
Essential Tools and Products for Dip Powder Nails
Your toolkit determines whether your manicure lasts three days or three weeks. Professional-grade supplies create salon-worthy results that withstand daily wear. Let’s explore the key players in achieving that flawless finish.
Must-Have Essentials for Lasting Color
Every successful application starts with bond liquid to prep surfaces. This sticky primer ensures pigments adhere properly. Next, a base coat grabs colored particles during dipping—opt for quick-drying formulas to prevent clumping.
Quality matters most with the star ingredient: vibrant powders. Brands like iGel Beauty infuse theirs with calcium and vitamins to strengthen beds while adding color. Their vegan-friendly options avoid harsh chemicals found in budget kits.
Seal your work with activator liquid and a glossy top layer. These harden layers into flexible armor. Don’t skip the finishing touches—nourishing oils hydrate cuticles, while brush savers keep tools lint-free.
| Essential | Purpose | Pro Tip |
|---|---|---|
| E-File | Shape & smooth | Use low speed |
| Dust Brush | Remove excess | Tap gently |
| Buffer | Prep surfaces | 180-grit ideal |
Starter kits ($25-$50) work for beginners, but pros invest in salon-grade systems. Premium products apply smoother and last longer—worth the upgrade once you master techniques. Remember: every component works together like gears in a clock. Skip one, and the whole system falters.
Health and Safety Considerations
Ever wonder why some salon visits end with more than pretty nails? Protecting your health matters as much as achieving chip-free color. Reputable studios follow strict protocols, but smart clients know what to watch for.
Sanitation and Contamination Prevention
Your technician should never dip fingers into shared jars. Proper application uses brushes or disposable dispensers to sprinkle pigments. Multi-use containers risk transferring bacteria between clients through skin contact or airborne particles.
Ask these questions before booking:
- Do you use single-use powder applicators?
- How often do you sterilize metal tools?
- What’s your process between clients?
Red flags include reused buffers or cloudy liquid solutions. Observant clients notice fresh liners in powder containers and sealed tool packages. Your hands deserve medical-grade cleanliness standards.
Safe Removal Techniques
Ripping off layers damages natural surfaces. Instead, soak cotton pads in pure acetone and wrap each fingertip for 12-15 minutes. Gently push softened product away with an orange stick—never force it.
| Mistake | Consequence | Solution |
|---|---|---|
| Peeling | Nail thinning | Patience during soaking |
| Over-filing | Weak edges | 400-grit buffer only |
| Rushing | Skin irritation | 20-minute minimum soak |
Moisturize immediately after removal. Cuticle oils restore flexibility, while keratin treatments strengthen stressed tips. Remember: healthy beds ensure better adhesion for your next vibrant set.
Comparing Dip Powder, Gel, and Acrylic Nails
Need a manicure that matches your active schedule? Let’s break down how three popular options stack up for real-world wear. Each technique brings unique strengths to the table—your ideal choice depends on lifestyle priorities and nail health goals.
Durability and Longevity
Gel manicures shine with their glossy finish but require UV curing between coats. While they typically last two weeks, frequent handwashing can cause premature lifting. Acrylics offer extreme durability but feel heavier and may weaken natural surfaces over time.
The layered approach of dip systems creates flexible armor that withstands three weeks of typing, workouts, and chores. Unlike gel nails that risk cracking, bonded particles adapt to nail movement. Acrylic alternatives often demand monthly fills—dip grows out more gracefully between touch-ups.
Comfort matters too. Dip powder weighs 30% less than traditional acrylic nails, reducing strain on delicate beds. Maintenance costs add up differently: gel requires regular salon visits, while dip kits offer multiple at-home applications per purchase.
Your final decision? Prioritize flexibility and endurance with dip, instant gloss with gel, or dramatic length with acrylics. All three deliver stunning results—it’s about what works best for your daily rhythm.