What if your next hairstyle could channel 70s rockstar energy while staying runway-ready? The answer lies in a bold hybrid that’s rewriting style rules. This choppy, textured look merges retro shag vibes with contemporary flair, creating movement that dances between carefree and intentional.
Celebrities like Billie Eilish and Miley Cyrus have embraced this low-maintenance yet head-turning style, proving its power across hair types. Whether you’ve got pin-straight strands or beachy waves, the magic happens through strategic layering. Thicker sections frame the face while tapered ends add that signature “lived-in” charm.
Our guide breaks down every step – from consulting with stylists to DIY maintenance hacks. You’ll learn how to enhance natural texture, master tousled finishes, and keep those layers looking freshly snipped. We’ve even included pro tips for using everyday products to amplify volume without sticky residues.
Key Takeaways
- Blends 1970s shag aesthetics with modern mullet-inspired shape
- Works for straight, wavy, curly, and thick hair textures
- Requires minimal styling effort for maximum impact
- Face-framing layers create dimension and movement
- Adaptable to both dramatic and subtle interpretations
Introduction to the Wolf Cut
Ever wondered how to achieve that perfect balance between messy and chic? Meet the hairstyle stealing the spotlight from conventional looks. This edgy design combines retro inspiration with modern adaptability, offering a fresh take on effortless styling.

What Defines This Look?
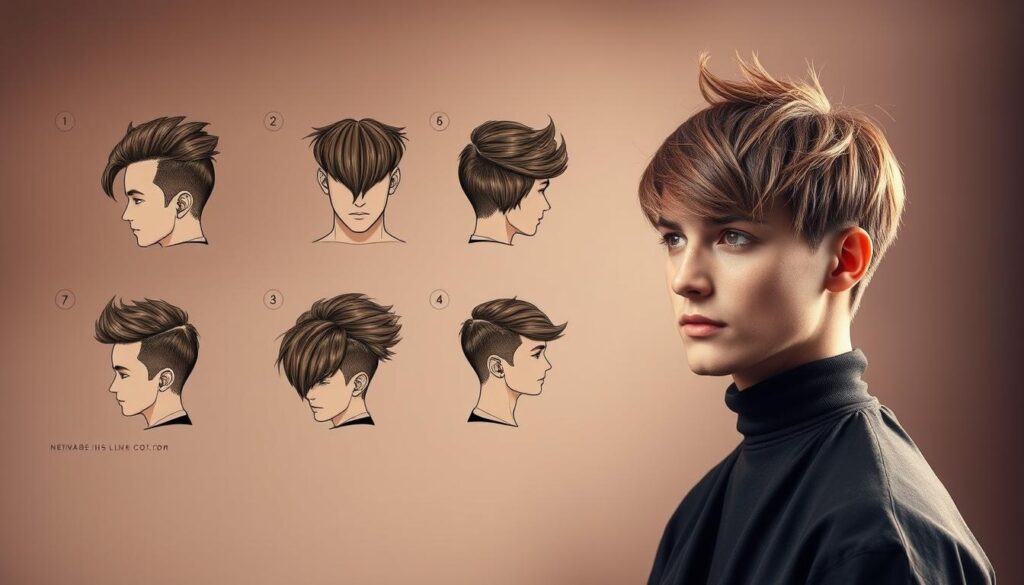
The signature style blends shaggy movement with a subtle modern mullet-inspired shape. Choppy layers create depth at the crown while tapered ends add lightness. Unlike traditional styles, it maintains intentional unevenness that enhances natural waves or curls.
| Feature | Wolf Cut | Classic Shag | Modern Mullet |
|---|---|---|---|
| Layer Structure | Uneven, face-framing | Uniform lengths | Sharp contrast |
| Texture | Lived-in finish | Defined waves | Sleek transitions |
| Maintenance | Air-dry friendly | Regular styling | Frequent trims |
From Past to Present
Originally inspired by 80s rock aesthetics, today’s version softens extreme angles. Stylists now use feathering techniques to blend layers seamlessly. The update works for office professionals and festival-goers alike, requiring just texturizing spray for day-to-day wear.
Curly-haired individuals particularly benefit from the shape’s ability to enhance bounce. Straight strands gain dimension through strategic slicing. Best part? It grows out gracefully, maintaining its shape between salon visits.
Key Elements of the Iconic Wolf Cut
The secret to nailing that effortlessly cool style lies in its architecture. This hairstyle thrives on contrast – bold volume up top melting into softer ends, with strategic chaos that looks intentional. It’s like building a skyscraper with a wild garden on its roof.

Choppy Layers and Textured Volume
Stylists craft this look using staggered slicing techniques. Thicker sections near the crown create lift, while feathered ends prevent bulkiness. “The magic happens when layers collaborate instead of competing,” explains a New York salon owner. Face-framing pieces angle toward the jawline, enhancing bone structure.
Heavy bangs anchor the style, balancing the shorter front layers that nod to retro mullets. These pieces add edge without overwhelming delicate features. Texturizing sprays work wonders here – a quick scrunch amps up the lived-in vibe.
The real genius? How the fuller upper section transitions seamlessly. It maintains shape between trims, growing out gracefully. Thick hair gets liberation from weight, while fine strands gain body. Blow-dry upside down for instant lift, or let waves air-dry for beachy movement.
Pro tip: Ask your stylist for “broken” ends rather than blunt cuts. This preserves the signature undone texture. For curly types, layers should follow natural coil patterns to boost bounce without frizz.
wolf cut tutorial: Essential Steps for a Flawless Look
Transform your locks with precision by mastering the foundation of this iconic style. Proper preparation separates salon-worthy results from uneven layers. Let’s break down the techniques professionals use to create that coveted balance between structure and rebellion.

Starting with Damp Hair Techniques
Wash and towel-dry strands until they’re 80% dry – think damp sponge texture. This moisture level helps scissors glide smoothly while preventing shrinkage surprises. Pro tip: Apply a lightweight leave-in conditioner to avoid flyaways during trimming.
Step-by-Step Cutting and Styling Process
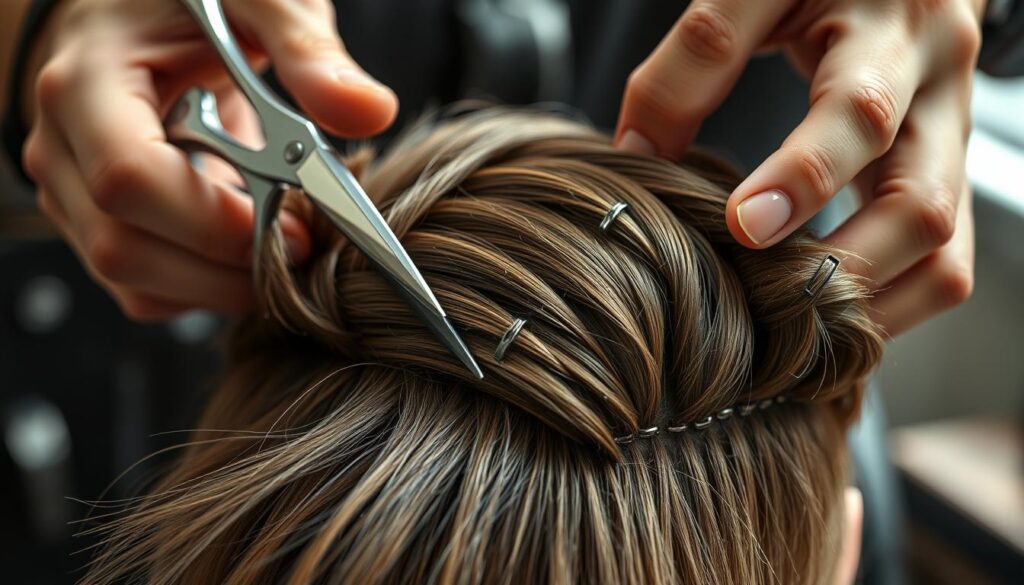
Divide hair into three horizontal bands using clips. Start at the nape, cutting the bottom section 1-2 inches shorter than desired length. Work upward, leaving each layer slightly longer than the one below. “Angle your shears vertically for softer edges,” suggests Los Angeles stylist Mara Chen.
Face-framing pieces require extra attention. Hold sections at 45-degree angles near the cheeks, trimming conservatively. Remember: You can always take more off later. Finish with texturizing shears on ends to enhance that lived-in feel.
Blow-dry with a round brush to test the shape. Spot any uneven areas? Tweak them with point-cutting motions. For wavy types, scrunch in mousse before air-drying. Straight textures benefit from light sea salt spray to amplify movement.
Tools, Products, and Techniques
Sharp tools transform good styles into iconic looks. Achieving that perfectly imperfect texture requires specific equipment and products. Let’s explore the essentials that help craft and maintain this dynamic hairstyle.
Must-Have Tools for a Sharp Cut
Quality scissors make all the difference. Professional-grade options like HH14T Shimatta Blending Shears create feathery ends that mimic natural wear. For precision, HH6 Kime Shears slice through thick sections without tugging.
| Tool | Best For | Key Benefit |
|---|---|---|
| Blending Shears | Texturing ends | Reduces bulk smoothly |
| Sectioning Clips | Organizing layers | Prevents uneven cutting |
| Rat-Tail Comb | Parting precision | Creates clean lines |
| HHV Mamba Shears | Jagged layers | Adds rockstar edge |
Sectioning tools keep hair organized during trimming. Wide-tooth combs detangle without breakage, while butterfly clips secure layers. Always work with damp strands – they’re easier to control and cut evenly.
Styling products enhance the look’s natural movement. Lightweight mousse adds volume to fine textures, while sea salt spray boosts wave definition. For heat styling, always use thermal protectant sprays to prevent damage.
Maintain your tools by wiping blades after each use and oiling joints monthly. “Dull scissors crush hair shafts instead of cutting them,” warns stylist Lena Torres. Store equipment in dry cases to prevent rust and ensure lasting sharpness.
Sectioning and Cutting Methods
Precision starts with smart organization. Dividing hair into strategic zones ensures each layer gets proper attention while preserving the style’s rebellious spirit. This approach lets you maintain control without sacrificing that coveted undone texture.

Effective Sectioning for Perfect Layers
Begin by creating three horizontal bands. Clip the top section above your ears using butterfly clips – this area builds crown volume. The middle zone handles face-framing pieces, while the bottom section near the neck establishes the base length.
| Section | Tools Used | Cutting Angle | Purpose |
|---|---|---|---|
| Top | Butterfly clips | 45° upward | Volume foundation |
| Middle | Fine-tooth comb | Vertical slices | Movement creation |
| Bottom | Blending shears | Horizontal trim | Shape definition |
| Bangs | Point-cutting shears | 90° downward | Soft framing |
For bangs, comb forward a triangular section starting at the crown. Hold strands vertically between fingers and snip with downward motions. “This technique prevents harsh lines,” notes stylist Jenna Wu. “Leave them ½ inch longer than desired – you can always refine later.”
Maintain section integrity by working through zones methodically. Those with thicker hair might add two-block haircut techniques to reduce bulk at the sides. Curly types should cut layers dry to account for shrinkage.
Remember: The goal is structured chaos. Alternate between sharp scissors and texturizing tools to balance precision with organic movement. Clip completed sections away immediately to avoid accidental trimming.
Achieving Volume and Dynamic Texture
Unlock your style’s full potential by mastering airflow and strategic product application. The right techniques transform flat strands into dimensional masterpieces that look expensive yet undone. Let’s explore how to elevate your look through heat styling and artful detailing.
Blow-Drying with a Diffuser
Attach your diffuser and tilt your head sideways – this positioning lifts roots while preserving natural bends. Keep the dryer nozzle below your strands, letting ends nestle into the bowl. Gentle heat circulation prevents frizz while amplifying body.
Move the diffuser in upward scooping motions. Focus on the crown area for that coveted lift. “Think of it as pushing volume into the hair rather than flattening it,” suggests stylist Marco Reyes. For wavy textures, scrunch sections lightly as they dry to enhance definition.
Enhancing Bangs and Side Details
Run fingers through fringe while drying to create soft separation. Twist random sections near the temples for that lived-in edge. Choppy pieces should frame the face without looking overly precise.
Use a curling iron on cool settings to bend stubborn side layers outward. This adds movement that complements the style’s wild essence. Finish with a light mist of texturizing spray – focus on mid-lengths to avoid weighing down roots.
Maintaining and Caring for Your Wolf Cut
Keep your statement style looking sharp with smart upkeep strategies. Proper maintenance preserves the dynamic layers while letting your natural texture shine through. Follow these guidelines to extend your style’s lifespan between salon visits.
Timing Is Everything
Mark your calendar for trims every 6-8 weeks. This schedule keeps layers from blending together and maintains the shape’s edge. Thicker textures might stretch to 10 weeks, while fine hair often needs more frequent touch-ups.
| Hair Type | Trim Frequency | Key Focus |
|---|---|---|
| Straight | 7 weeks | Preventing blunt ends |
| Wavy | 6 weeks | Enhancing movement |
| Curly | 8 weeks | Defining coil patterns |
| Thick | 9 weeks | Reducing bulk |
Swap regular towels for microfiber alternatives when drying. Gentle squeezing prevents frizz better than rough rubbing. For heat styling, always apply thermal protection spray first – it shields strands while locking in moisture.
Weekly deep conditioning treatments work wonders. Try these products for best results:
- Hydrating masks with shea butter
- Leave-in conditioners for detangling
- Lightweight oils for shine without weight
Notice layers losing definition? Book a trim before the style becomes unmanageable. Share photos with your stylist to maintain the original shape’s integrity.
Expert Advice and Insider Styling Tips
Elevate your style game with wisdom from industry icons. Master stylists Nick Arrojo and Steven Waldman reveal their top strategies for making this trend work across all hair types. Their insights bridge the gap between salon perfection and real-life wearability.
Pro Secrets for Maximum Impact
Fine hair thrives with body-building mousse applied to damp roots before blow-drying. For stubborn flyaways, Waldman recommends serums with argan oil: “A pea-sized amount tames frizz while enhancing shine.”
Straight textures benefit from texturizing sprays scrunched into mid-lengths. Arrojo suggests applying product in sections: “Twist small strands while misting to create natural-looking separation.”
Curly types should layer products strategically. Start with leave-in conditioner, then add lightweight gel for definition. Diffuse with your head tilted sideways to maintain volume at the crown.
Remember: Less is more. “Over-styling kills the effortless vibe,” both experts agree. A quick spritz of sea salt spray revives second-day looks without weighing strands down.
